


Welcome to the final blog on building a Bottle Cap Inspection System using Machine Vision. In this project, we plan to create an automated visual inspection system that can detect defects in bottle caps, such as cracks, deformation, and missing parts. By using the power of the Ultra96-V2 FPGA from Xilinx, along with an HD camera and an actuator, we'll achieve accurate and efficient bottle cap inspection.
Hardware Overview:
The Ultra96-V2 is a development board based on the Xilinx Zynq UltraScale+ MPSoC architecture. It combines the programmable logic capabilities of an FPGA with the processing power of an Arm Cortex-A53 processor. With its rich set of peripherals and high-performance computing capabilities, the Ultra96-V2 is an excellent choice for our machine vision application.

We'll be using a compact camera module as our image source for capturing bottle cap images. The camera offers high-resolution imaging capabilities, along with features like auto-focus, low-light performance, and video recording.
Getting started
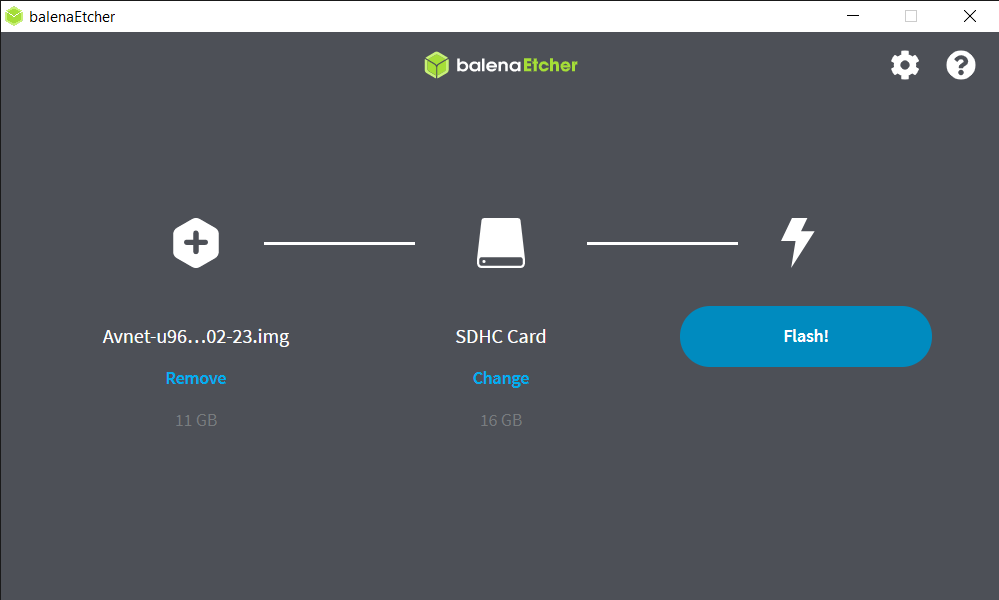
We will be implementing the project concepts from the training module into practice, following a step-by-step approach. Download the uz96v2_sbc_base from http://avnet.me/avnet-u96v2_sbc_base-vitis-ai-1.3-image. After downloading the image file, program the image file to a 16GB micro SD card using Balena etcher.
| {gallery}Flashing the SD card |
|---|
|
|
|
|
|
|


The image file contains the hardware design (BOOT.BIN, dpu.xclbin), as well as the petalinux images (boot.scr, image.ub, rootfs.tar.gz).
PMIC Version Checking
Change directories to the location of the PMIC programmer and list the config files.
# cd ~/pmic-prog
# ls -l pmic-configs

You can see which revision you have by reading these two registers. 0x2A has the day and 0x2B has the month of release.
# ./pmic_prog read 6 0x13 0x002A
# ./pmic_prog read 6 0x13 0x002B
# ./pmic_prog read 6 0x14 0x002A
# ./pmic_prog read 6 0x14 0x002B

PMIC Reprogramming
To reprogram the 0x13 & 0x14 devices, enter the following command, making sure that the two highlighted numbers match!
# ./pmic_prog program 6 0x13 -i ./pmic-configs/U96V2_5401_0x13_191030.txt
# ./pmic_prog program 6 0x14 -i ./pmic-configs/U96V2_5401_0x14_191030.txt

Launch the dpu_sw_optimize.sh script
$ cd ~/dpu_sw_optimize/zynqmp
$ source ./zynqmp_dpu_optimize.sh

To find the version of the Linux, run lsb_release -a command

Define the DISPLAY environment variable
$ export DISPLAY=:0.0
Change the resolution of the DP monitor to a lower resolution, such as 640x480
$ xrandr --output DP-1 --mode 640x480
Launch the segmentation application
$ cd ~/Vitis-AI/demo/VART/segmentation
$ ./segmentation ./video/traffic.mp4 /usr/share/vitis_ai_library/models/fpn/fpn.xmodel
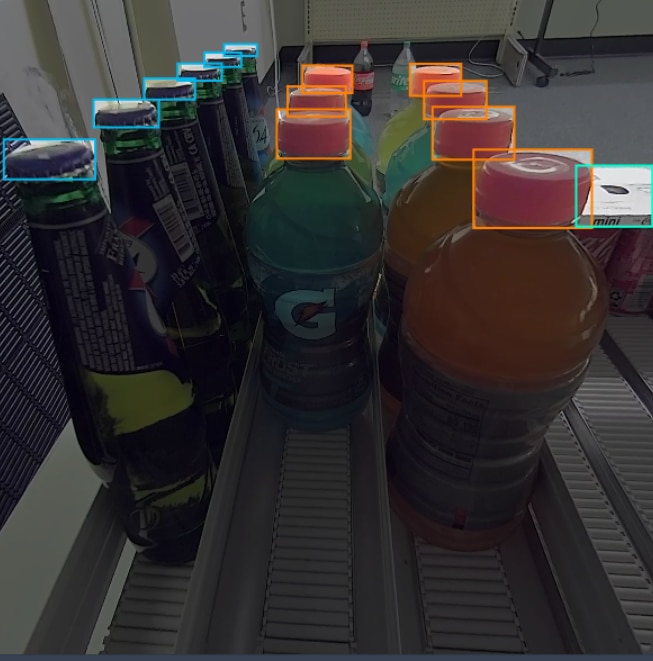
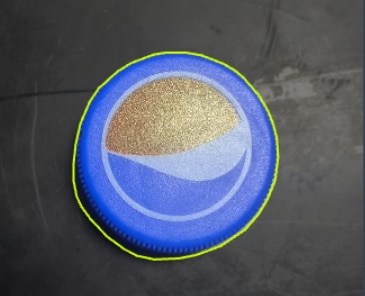
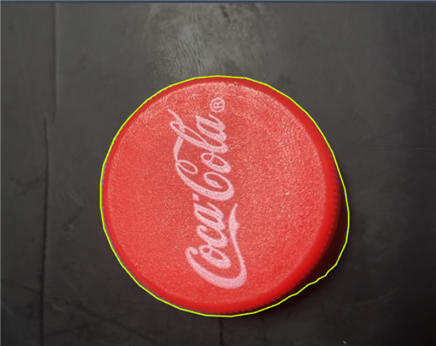
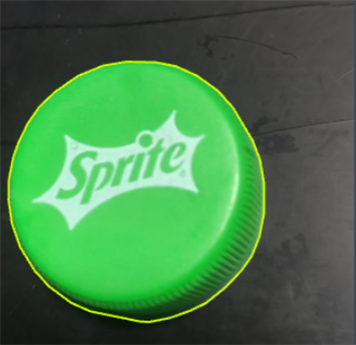
The Camera captures images of bottle caps as they pass by. Image preprocessing techniques such as resizing, noise reduction, and contrast adjustment may be applied to improve the quality of the images. The algorithm identifies key features of the bottle cap, such as its shape, colour, and any distinguishing marks or patterns. Using machine learning or computer vision techniques, the system detects defects like cracks, deformities, or missing parts by comparing the features of each bottle cap with a reference. Based on the analysis, the system decides whether the cap is defective or not. If a defect is detected, the actuator is triggered to remove the faulty cap from the production line.
Simple Image processing using OpenCV
import cv2
import numpy as np

# Load the image from the Camera or any image source
image = cv2.imread('bottle_cap.jpg')

# Convert the image to grayscale
gray = cv2.cvtColor(image, cv2.COLOR_BGR2GRAY)

# Apply Gaussian blur to reduce noise
blurred = cv2.GaussianBlur(gray, (5, 5), 0)

# Use edge detection (Canny) to identify edges
edges = cv2.Canny(blurred, 50, 150)

# Find contours in the edge image
contours, _ = cv2.findContours(edges.copy(), cv2.RETR_EXTERNAL, cv2.CHAIN_APPROX_SIMPLE)

# Initialize a list to store detected defects
defects = []

# Loop over the detected contours
for contour in contours:
    # Calculate the area of the contour
    area = cv2.contourArea(contour)

    # If the area is below a certain threshold, consider it a defect
    if area < 500:  # You may need to adjust this threshold based on your specific case
        defects.append(contour)

# Draw the detected defects on the original image
cv2.drawContours(image, defects, -1, (0, 0, 255), 2)

# Display the original image with defects highlighted
cv2.imshow('Defect Detection', image)

# Wait for a key press and then close the window
cv2.waitKey(0)
cv2.destroyAllWindows()
Training and testing the model with the collected dataset.
Demonstration and Outcome
The Setup 
Detection and segmentation using a custom model
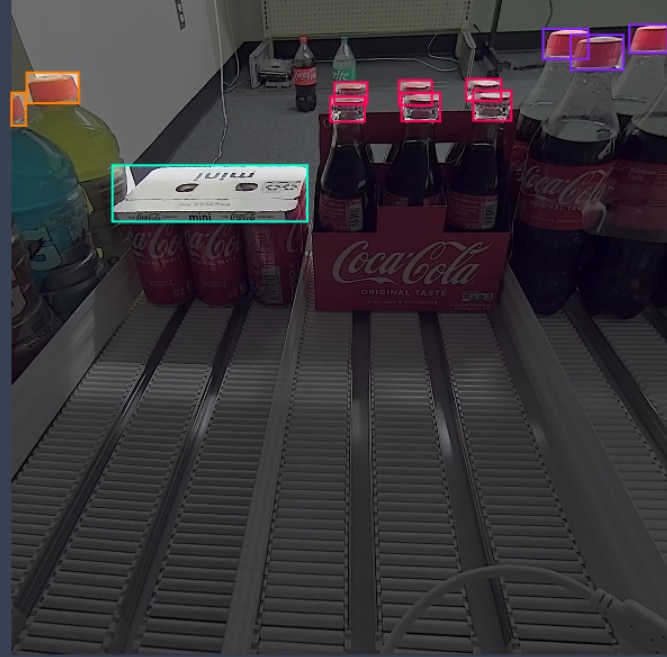
Challenges in detection
-
Variability: Bottle caps can vary in colour, size, and markings, making it challenging to create a one-size-fits-all detection algorithm.
-
Real-time Processing: Ensuring that the system processes images in real time, especially in high-speed production environments, can be demanding.
-
Training Data: Training the system's machine learning models requires a substantial dataset of both defective and non-defective caps.
-
Environmental Factors: Changes in lighting, dust, or camera angles can affect the accuracy of detection.
-
Integration: Integrating the system into an existing production line without disrupting operations can be complex.
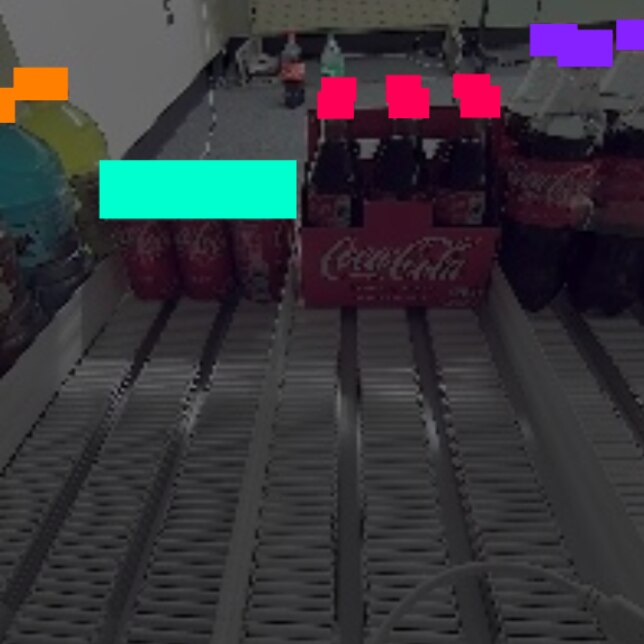
Special-case conditions
- Overlapping caps
- Light conditions
- Partial visibility
- Other corner cases
Future work update on this project: Now that the detection phase is complete, my next task is to classify the items as either 'good cap,' 'loose cap,' or 'no cap.' This classification is used for the upcoming phase, which involves integrating these items into a simple conveyor system.


Compatibility Note – e-Con USB3 Camera on Ultra96-V2 Some USB3 cameras, like the e-con Systems See3CAM_CU30_CHL_TC, may encounter compatibility issues on the Ultra96-V2 board. To resolve this, switch to USB2 mode by connecting these cameras through a USB2 hub or extender.
Summary
Our Bottle Cap Inspection System is a testament to the power of image processing and FPGA technology. It promises enhanced quality control, reduced waste, and increased efficiency in manufacturing processes, while also presenting various challenges that must be overcome for successful implementation.
Just clearing the draft! Thanks,rscasny for understanding my situation and constantly encouraging me.
Here are the links to my previous blogs
Blog-1 Taking the first steps - Xilinx Ultra96-V2 (PP3)
Blog 2 - UART Test - Serial Message on Ultra96-V2
Blog 4 - Interfacing LMS6DSL Click Mezzanine with Ultra96-V2 Using Vitis
Blog 5 - LCD click interface on Ultra96-V2
I hope that you find this interesting. Extending my sincere gratitude to Element14 and Avnet for hosting this incredible contest. It's been a fantastic journey of learning on Xilinx MPSoCs. Thanks for reading!
