element14 Community
element14 Community
    Register Log In
  • Site
  • Search
  • Log In Register
  • About Us
  • Community Hub
    Community Hub
    • What's New on element14
    • Feedback and Support
    • Benefits of Membership
    • Personal Blogs
    • Members Area
    • Achievement Levels
  • Learn
    Learn
    • Ask an Expert
    • eBooks
    • element14 presents
    • Learning Center
    • Tech Spotlight
    • STEM Academy
    • Webinars, Training and Events
    • Learning Groups
  • Technologies
    Technologies
    • 3D Printing
    • FPGA
    • Industrial Automation
    • Internet of Things
    • Power & Energy
    • Sensors
    • Technology Groups
  • Challenges & Projects
    Challenges & Projects
    • Design Challenges
    • element14 presents Projects
    • Project14
    • Arduino Projects
    • Raspberry Pi Projects
    • Project Groups
  • Products
    Products
    • Arduino
    • Avnet Boards Community
    • Dev Tools
    • Manufacturers
    • Multicomp Pro
    • Product Groups
    • Raspberry Pi
    • RoadTests & Reviews
  • Store
    Store
    • Visit Your Store
    • Choose another store...
      • Europe
      •  Austria (German)
      •  Belgium (Dutch, French)
      •  Bulgaria (Bulgarian)
      •  Czech Republic (Czech)
      •  Denmark (Danish)
      •  Estonia (Estonian)
      •  Finland (Finnish)
      •  France (French)
      •  Germany (German)
      •  Hungary (Hungarian)
      •  Ireland
      •  Israel
      •  Italy (Italian)
      •  Latvia (Latvian)
      •  
      •  Lithuania (Lithuanian)
      •  Netherlands (Dutch)
      •  Norway (Norwegian)
      •  Poland (Polish)
      •  Portugal (Portuguese)
      •  Romania (Romanian)
      •  Russia (Russian)
      •  Slovakia (Slovak)
      •  Slovenia (Slovenian)
      •  Spain (Spanish)
      •  Sweden (Swedish)
      •  Switzerland(German, French)
      •  Turkey (Turkish)
      •  United Kingdom
      • Asia Pacific
      •  Australia
      •  China
      •  Hong Kong
      •  India
      •  Korea (Korean)
      •  Malaysia
      •  New Zealand
      •  Philippines
      •  Singapore
      •  Taiwan
      •  Thailand (Thai)
      • Americas
      •  Brazil (Portuguese)
      •  Canada
      •  Mexico (Spanish)
      •  United States
      Can't find the country/region you're looking for? Visit our export site or find a local distributor.
  • Translate
  • Profile
  • Settings
Pi Chef Design Challenge
  • Challenges & Projects
  • Design Challenges
  • Pi Chef Design Challenge
  • More
  • Cancel
Pi Chef Design Challenge
Blog KCON - Pi Chef AIY API & Certs
  • Blog
  • Forum
  • Documents
  • Polls
  • Files
  • Events
  • Mentions
  • Sub-Groups
  • Tags
  • More
  • Cancel
  • New
  • Share
  • More
  • Cancel
Group Actions
  • Group RSS
  • More
  • Cancel
Engagement
  • Author Author: jkutzsch
  • Date Created: 1 Apr 2018 5:21 AM Date Created
  • Views 840 views
  • Likes 5 likes
  • Comments 1 comment
  • pi chef design challenge
  • kitchen
Related
Recommended

KCON - Pi Chef AIY API & Certs

jkutzsch
jkutzsch
1 Apr 2018
  1. Intro Blog
  2. Unboxing
  3. Setup
  4. Gourmet Install
  5. Load up some Recipes!
  6. Enclosure Planning.
  7. 7inch Touchscreen Time
  8. AIY Build / Google Voice
  9. AIY API & Certs   <<<---
  10. Succes with Google AIY!


Welcome back to where we work with our KCON and getting the AIY established.


So previously we were able to get our KCON up and running with our 7" touchscreen and the Recipe Manager.  All key parts of setting up a Kitchen CONsole for aspiring Chefs.


But one more part is of interest, and that is trying to get our Google AIY Voice kit integrated.  In our last blog I was having power issues and since I have been able to successfully get the KCON running with the AIY Hat installed.


image


Here we have a clean boot with the AIY Hat installed.  Previously I was running all power through the RPI3 then going through the GPIO for the LCD and the AIY Hat.


imageimage


So this is what I am using for my primary power it all looks good until I add the Google AIY Hat on.  Looking at other projects I can see where others powered the LCD screen separately so that is what I did next and was able to get it all working together!


imageimage


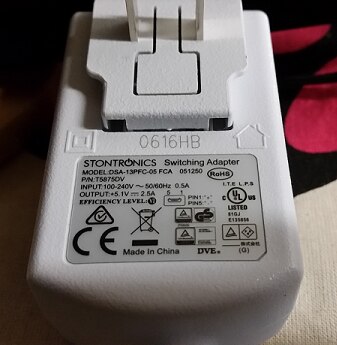
So this is what I am now using to power my Screen separate from the RPI and AIY Hat.


Now dougw has been able to get all 3 working with just one Power adapter so I am intrigued and will continue to pursue using just one later as I get to the cleanup and tweak phase.


For now we are working by using 2 adapters.  Not sure if the 2.5a is not big enough by itself and I don't have anything bigger to test with...


image


So Salmon Faris posted an interesting article on Hackster.io


GooglePi - Google Assistant on Raspberry Pi

What I liked about his article is the fact it works from the basis you already have your OS running and you want to add the Google AIY to it.  Where as the majority of the others go with a clean AIY download with OS all bundled.


Following along his path of Setting up the Google Assistant gave me the basis to get my KCON set for api and Certs.  I am guessing changes in Google Cloud Platform has caused some changes in his steps where you kind of have to guess what is now the new choice.


https://console.cloud.google.com/cloud-resource-manager


Is the starting point.


image


Before you can Select a project it wants you to login.  Makes sense.


image


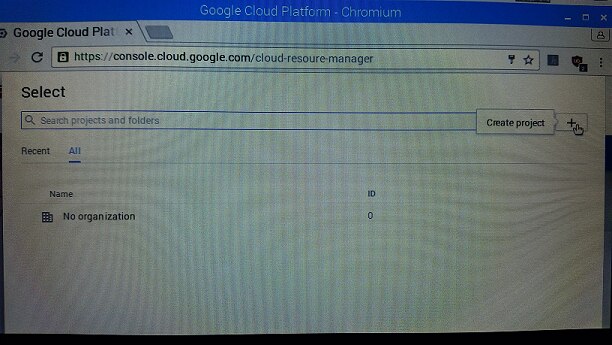
Okay, all logged in and now Projects to choose from.  Which also makes sense since I have not created any.  So let's choose Create project.


image


I of course name my Project:  KCON and hit create.


image


Now here is where things get a bit different from the linked instructions.


In fact it looks a LOT different.  From what the examples the provided.


image


What you want to do is scroll down the screen a bit and watch the left hand side until you see the Getting Started area.  Here you can enable APIs and get credentials!


So click on that option.


image


Now you will see the Enable APIS and Services.  Click on that.


image


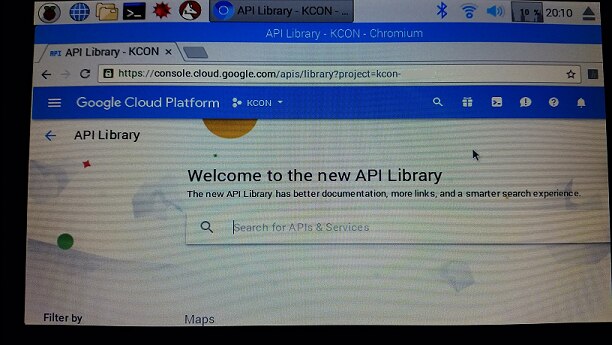
Now we have an option to search.


image


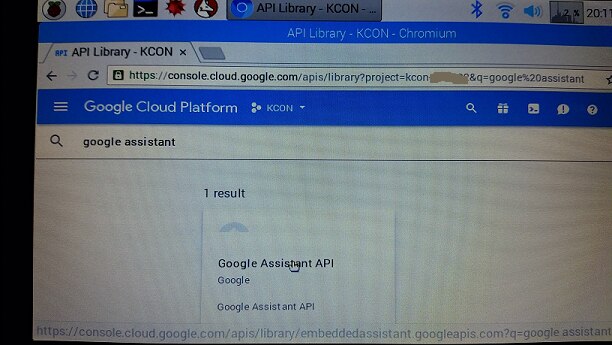
As soon as we start typing in Google Assistant the screen changes to the above and shows you the Google Assistant API 1 result.


Go ahead and click on that option.


image


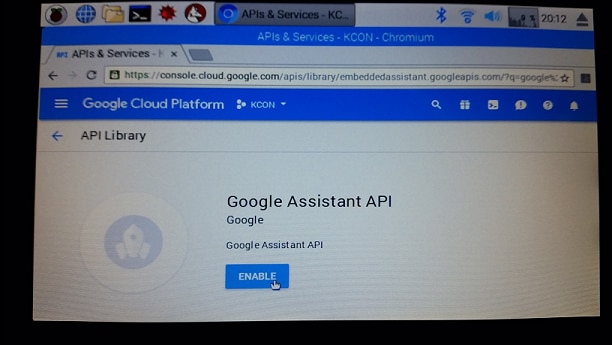
What would you like to do today?  Enable?  Enable?  Or Enable?


Okay let's click on Enable.


image


Alright, we are moving forward.  But before they give us the API they want us to Create Credentials.


So let's click on that option and move forward.


image


We want to create the Google Assistant API credentials.


image


KCON for our Client ID.  Click on the Create button.


image


Setup the Email address for your Google ID and KCON for our Product name.


My wife used to bake specialty Cakes and as such her Google ID was the perfect one for her KCON!


image


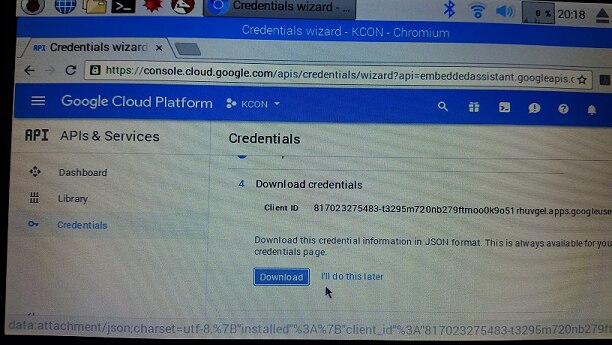
Here is a Client ID.  Click on Download!


image


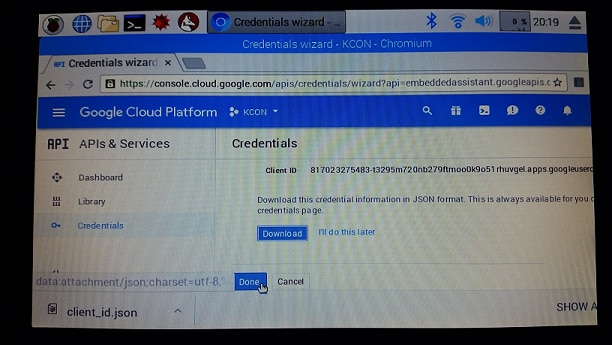
Success!  We now have the required file on our KCON!

  • Sign in to reply

Top Comments

  • genebren
    genebren over 7 years ago +1
    Nice update on your project. Gene
Parents
  • genebren
    genebren over 7 years ago

    Nice update on your project.

    Gene

    • Cancel
    • Vote Up +1 Vote Down
    • Sign in to reply
    • More
    • Cancel
Comment
  • genebren
    genebren over 7 years ago

    Nice update on your project.

    Gene

    • Cancel
    • Vote Up +1 Vote Down
    • Sign in to reply
    • More
    • Cancel
Children
No Data
element14 Community

element14 is the first online community specifically for engineers. Connect with your peers and get expert answers to your questions.

  • Members
  • Learn
  • Technologies
  • Challenges & Projects
  • Products
  • Store
  • About Us
  • Feedback & Support
  • FAQs
  • Terms of Use
  • Privacy Policy
  • Legal and Copyright Notices
  • Sitemap
  • Cookies

An Avnet Company © 2025 Premier Farnell Limited. All Rights Reserved.

Premier Farnell Ltd, registered in England and Wales (no 00876412), registered office: Farnell House, Forge Lane, Leeds LS12 2NE.

ICP 备案号 10220084.

Follow element14

  • X
  • Facebook
  • linkedin
  • YouTube