


Table of Contents
- Project Introduction
- Getting Started
- Calibrating the MPX2050DP Pressure Sensor
- Calculations and Noise Reduction
- Using Vivado and Testing the System
- Project Report Updated
**********************************************************************************************************************
Calibrating the MPX2050DP Pressure Sensor
There are different differential pressure sensors on the microcontroller market known as MPX type pressure sensors. Depending on our application, we must select the appropriate sensor, remembering that many of these sensors will need to be coupled to voltage amplifier circuits in order to be read by a microcontroller. In my case, I use the MPX2050DP which delivers up to 40mV which will require an op amp to handle its signal.

The MPX5010 series piezo-resistive transducer is a state-of-the-art monolithic silicon pressure sensor designed for a wide range of applications, but particularly those employing a microcontroller or microprocessor with ADC inputs. This patented single element transducer combines advanced micromachining techniques, thin film metallization, and bipolar processing to provide a high-level, accurate analog output signal that is proportional to applied pressure. MPX2050 can measure a pressure of 50 kPa (375 mmHg). It gives linear output over the range as shown in the figure extracted from the datasheet.

Of course, the applications of this sensor are not limited only to level measurement, which is the objective of this post. As we see in the previous graph, the equation to obtain the sensor pressure is given by:
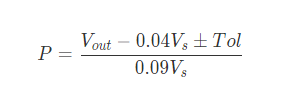
Vs is the supply voltage (Vs = 3.3v) and V {out} is the voltage delivered by the sensor (that is, the one we read on the microcontroller board in bytes and transform it to voltage) and Tol is the tolerance, an adjustment that we must make to the sensor to calibrate the measurement.
Cmod S7-25 XADC Demo
In my case, I used this project with the Cmod S7-25's Spartan 7 FPGA's analog-to-digital core with a Microblaze processor, and the link is: https://github.com/Digilent/Cmod-S7-25-XADC
In summary, I emphasize the steps shown below:
I opened the project in read-only mode.

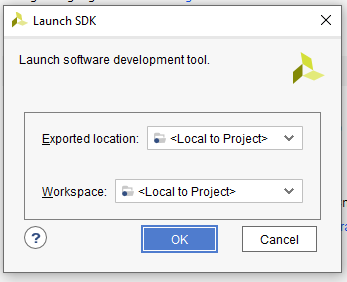
I have selected File -> Launch SDK.
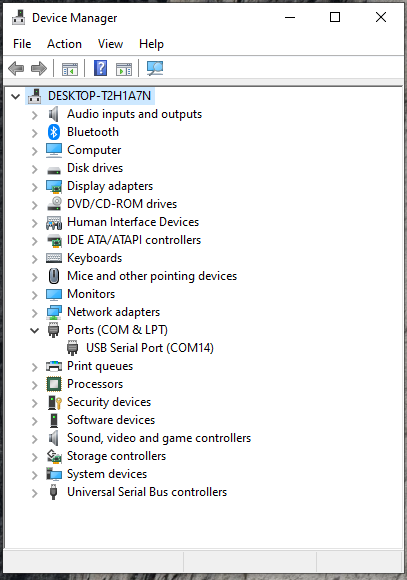
I have verified the serial port of my board.
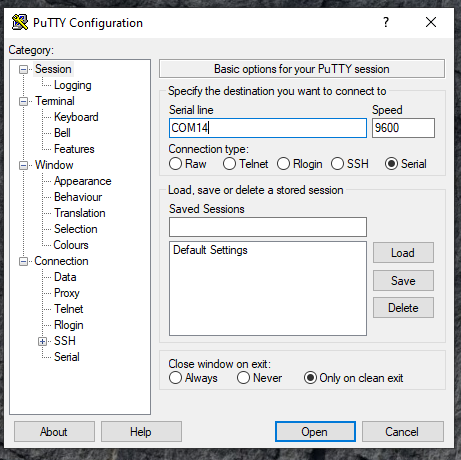
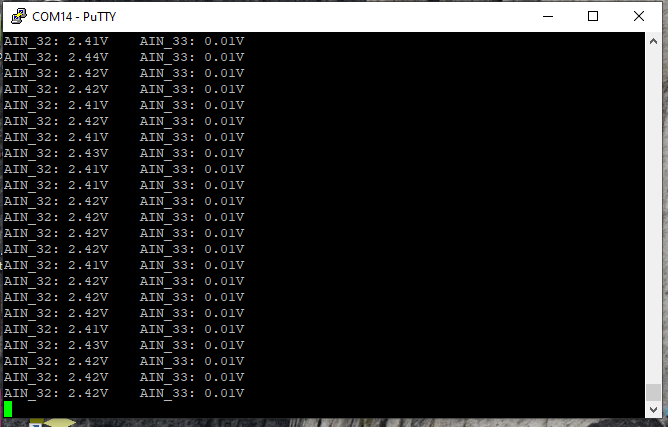
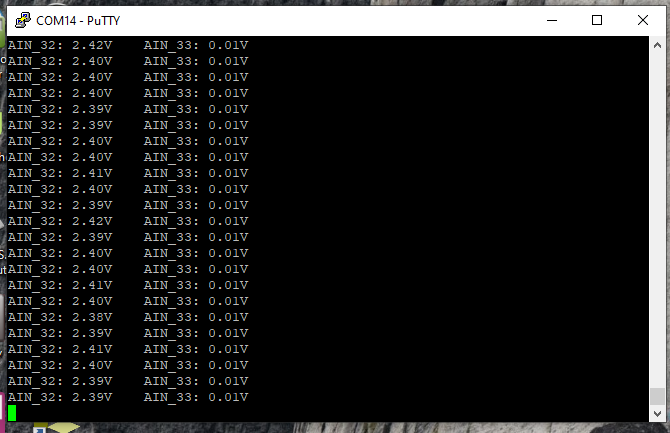
Next I have configured pUTTY as shown below.
Select Xilinx -> Program FPGA
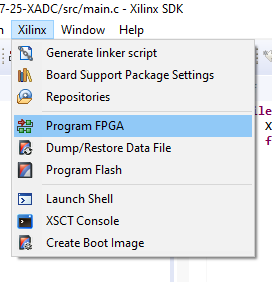
Leave all fields as their defaults and click "Program".

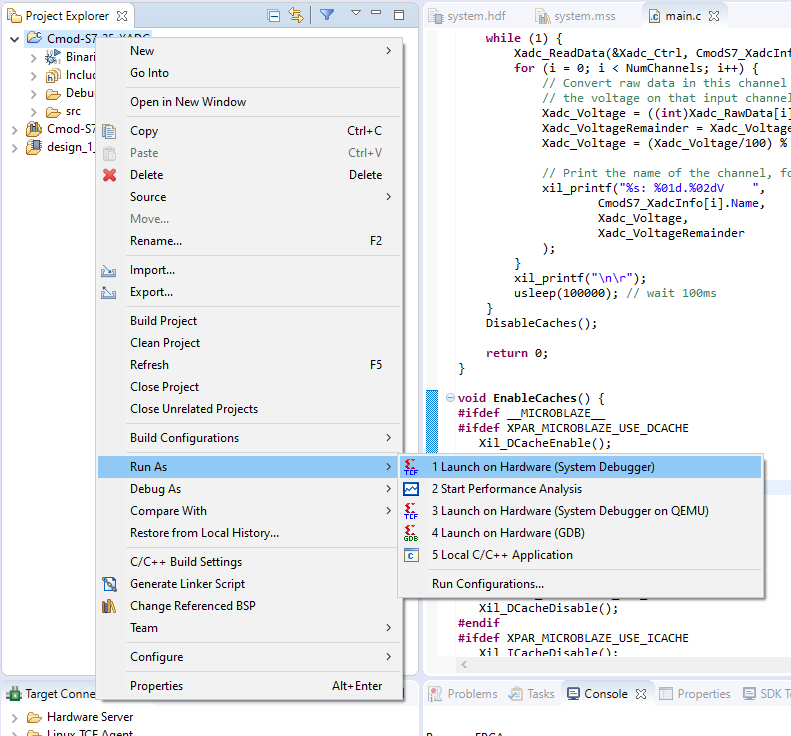
In the Project Explorer pane, right click on the "Cmod-S7-25-XADC" application project and select "Run As -> Launch on Hardware (System Debugger)"
The schematic diagram used is shown below:

How does it work?
- The MPX2050DP pressure sensor is powered with 10 volts and at the output it gives very small voltage values (0-40 mV), so an operational amplifier is necessary;
I have used the LM386N-1 op amp as an amp with gain of 20; - I obtained at the output of the LM386N-1 voltages over 3.3 volts, so I used a voting divider to lower the signal a few tenths of voltage;
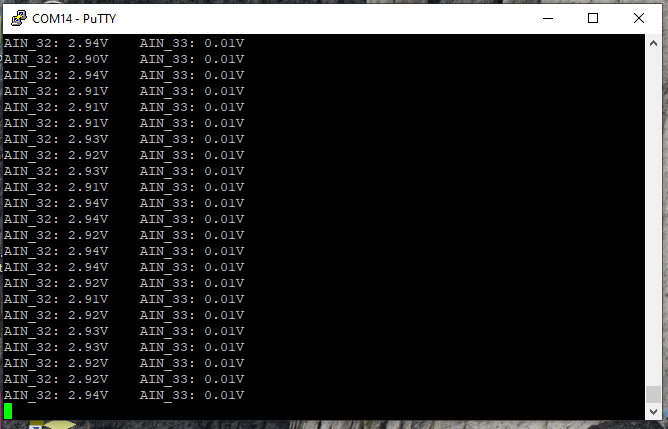
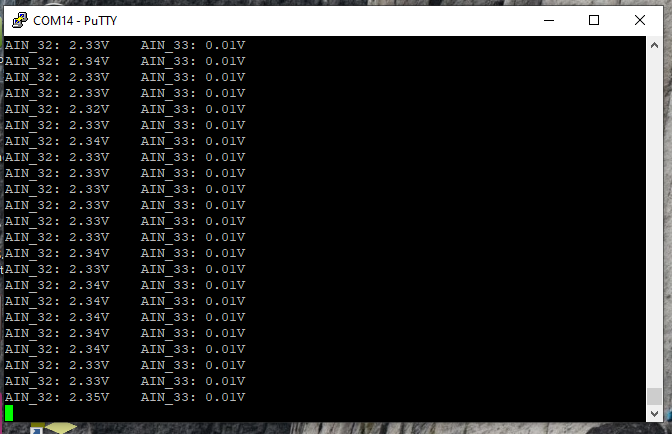
- This voltage is connected to the analog port AIN_32 of the Cmod S7-25 board;
- At the output of the serial port we have the readings of the MPX2050DP sensor in volts;
- For the calibration of the pressure sensor MPX2050DP I have used a pressure gauge;
- I have also used a manual air pump to input the air pressure onto the MPX2050DP pressure sensor. I also release the air leak with a knob valve;
- Finally I have compared the voltage readings with the pressure in mmHg.
The video with the tests is shown below:
The calibration obtained is shown in the images below:
300 mmHg -> 2.45V
240 mmHg -> 2.41V
180 mmHg -> 2.38V
120 mmHg -> 2.37V
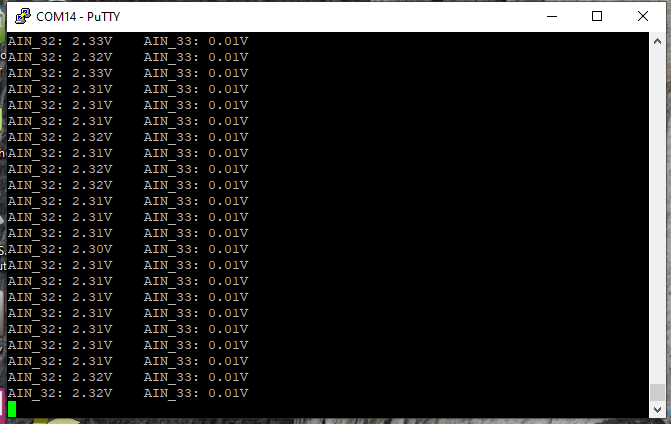
60 mmHg -> 2.33V
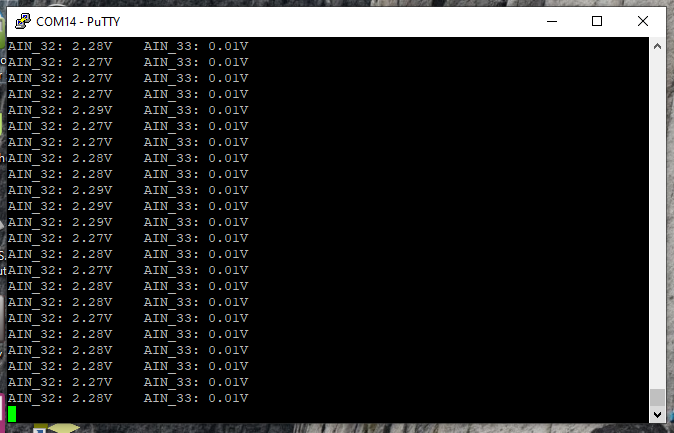
0 mmHg -> 2.30V