Table of Contents
- Project Introduction
- Getting Started
- Calibrating the MPX2050DP Pressure Sensor
- Calculations and Noise Reduction
- Using Vivado and Testing the System
- Project Report Updated
**********************************************************************************************************************
Below, I show you the project wrap-up and lessons learned:
Project Introduction
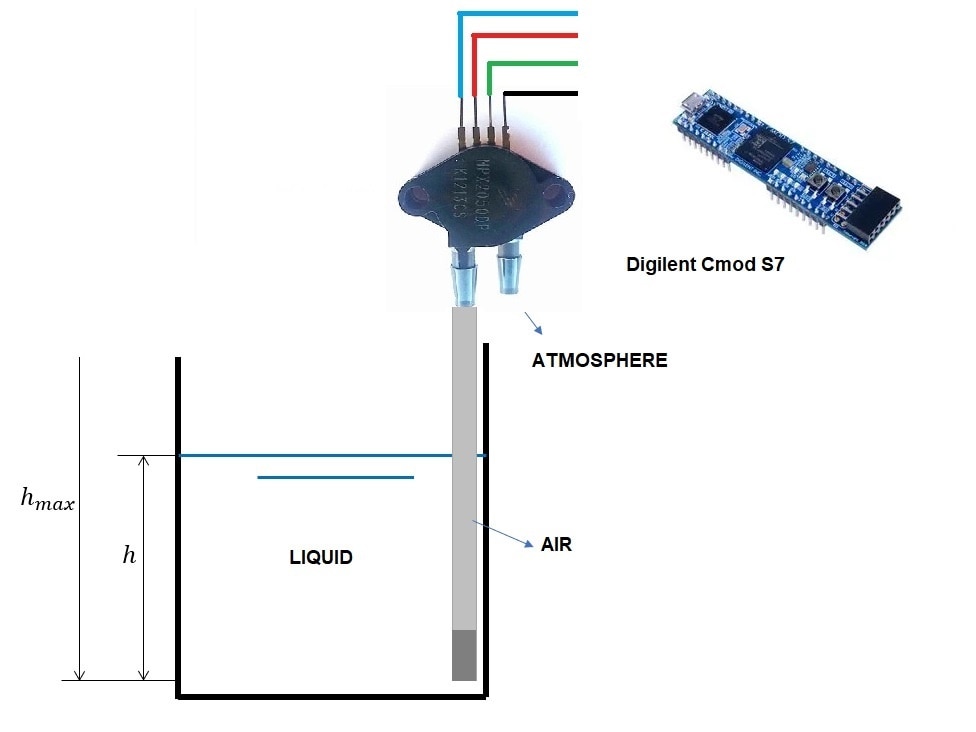
Here I present an alternative solution to measure the water level of a container. This is an economical and accurate way. For this we use the Digilent Cmod S7 board.

Getting Started
In this section I show you the steps to follow for the installation of Vivado Software, Xilinx SDK, and Digilent boards.
For those of us who are starting to use this Digilent board, additionally, its necessary to do a basic test to know how the software is used and to prove that the board is in good condition. in this case I tried the blink a LED demo example.

Calibrating the MPX2050DP Pressure Sensor
This chapter shows us the steps to calibrate the MPX2050DP pressure sensor. For example, according to the datasheet, the pressure range that can be measured is from 0 to 40 kPa, but the voltage range is from 0 to 40 mV. So I use the LM386N-1 op amp and manage to increase this range by about 200 mV.
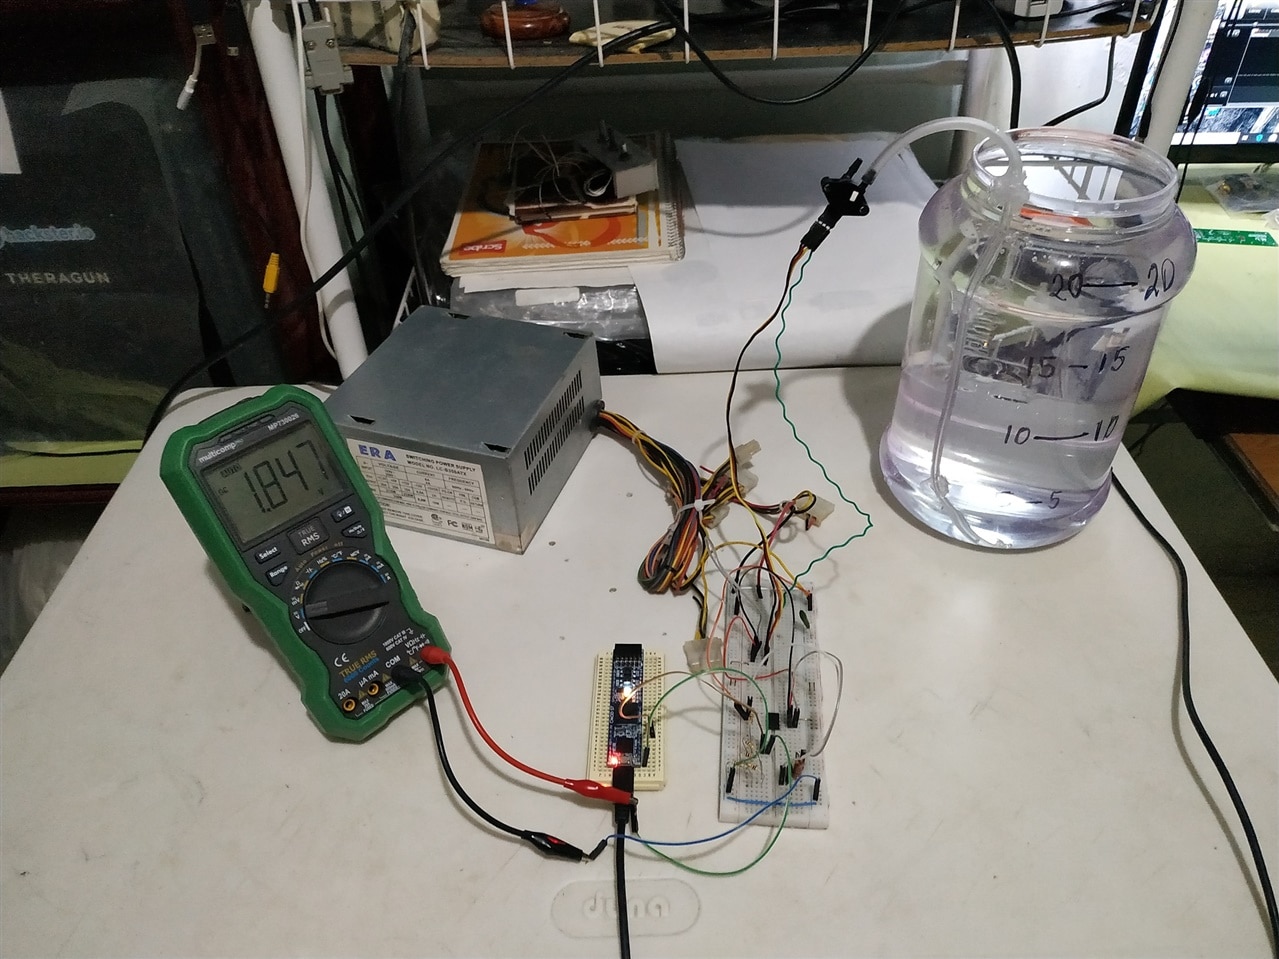
Finally we have to use an analog manometer to calibrate the pressure range and compare it with the millivolts measured with the programming board.

Calculations and Noise Reduction
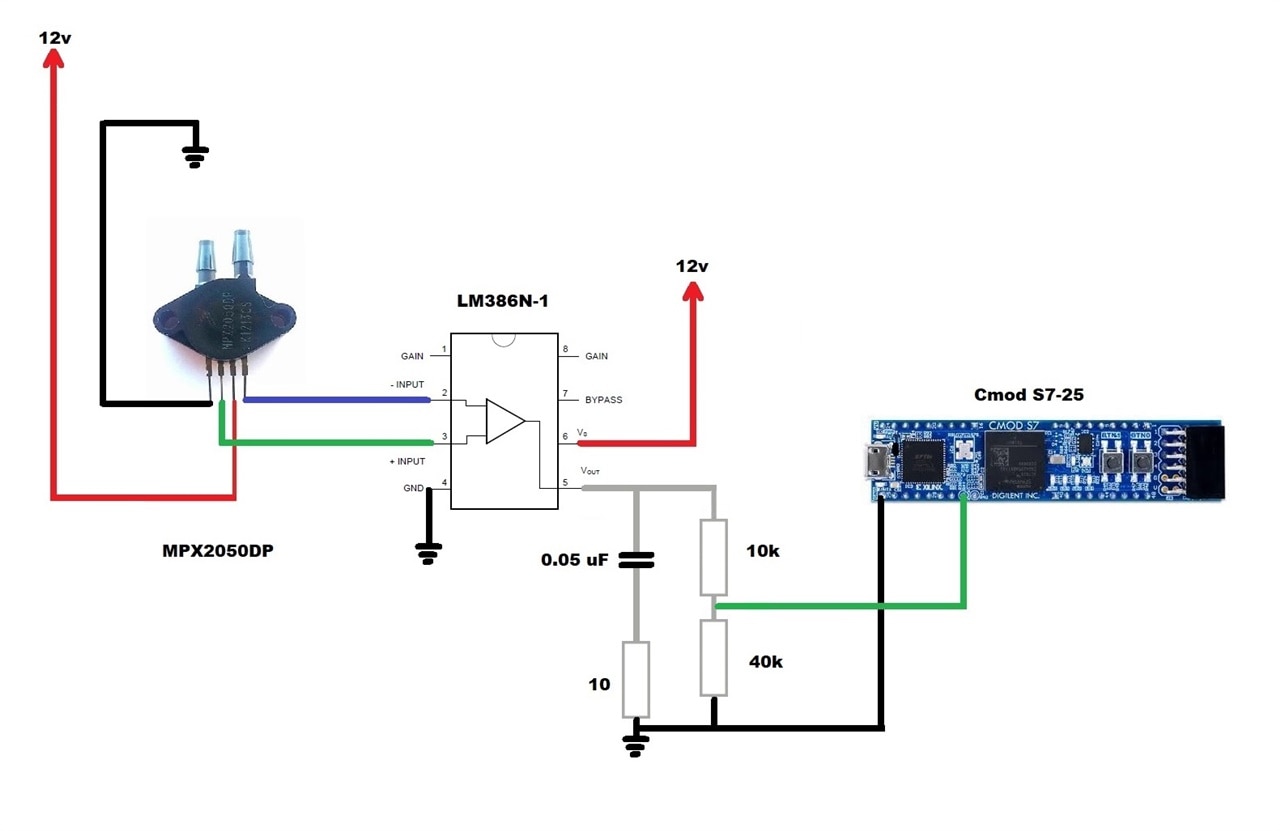
When working with small voltages, any noise can cause incorrect readings. To avoid incorrect readings, take a series of measures such as the following: place a 20 picofarad capacitor between ground and Vcc, power the LM386N-1 operational amplifier with 12 vols because its gain is more stable, remove the potentiometer that feeds the MPX2050DP pressure sensor and connect it to 12 volts from the source, remove the potentiometer connected to pin 5 of the LM386N-1 operational amplifier and put a voltage divider with precision resistors, and finally solder pins to the MPX2050DP pressure sensor, as these are very thin and avoid make false contact. The final schematic diagram would look like the one below.

Using Vivado and Testing the System
Finally, I have used and modified the code: "Cmod S7-25 XADC Demo" to do the final tests of my project. I consider that this design with the MPX2050DP pressure sensor will be very useful to measure precise levels of water in large containers such as water tanks or swimming pools since its range of pressure values is high. For other cases of measuring smaller water levels and with good precision, perhaps I would use another pressure sensor such as the MPX5010.

Download code
You can obtain the modified and compiled code of the project in the download link at the end of this post: Cmod-S7-25-XADC.zip
References:
- https://www.xilinx.com/
- https://digilent.com/reference/programmable-logic/cmod-s7/reference-manual
- /technologies/fpga-group/b/blog/posts/learning-verilog-with-the-digilent-cmod-s7
- https://github.com/Digilent/Cmod-S7-25-XADC
- https://www.xilinx.com/video/soc/rfsoc-creating-adc-system-in-ipi.html
- https://controlautomaticoeducacion.com/arduino/medidor-de-nivel-de-agua-por-presion-con-arduino/
- https://datasheetspdf.com/pdf-file/916537/FreescaleSemiconductor/MPX2050DP/1
