


Blog 6: Project Demonstration and Final Words
Yes, we are now down to my final blog. The goal of this last blog is to show how to use my project, demonstrate the project in action, and have some final words. Materials needed?
- CMOD S7 FPGA
- XIlinx Vivado
- MicroSD card
- MIcroSD card adapter
- PIR Sensor
- Sound Sensor
- Temperature Sensor

Steps to Use this Security Camera Project
- Download the Security_Camera.zip file (attached at the end) then extract it .
- Run Vivado and open the Security_Camera.xpr.
- Download the bitstream to the CMOD S7 FPGA Board.
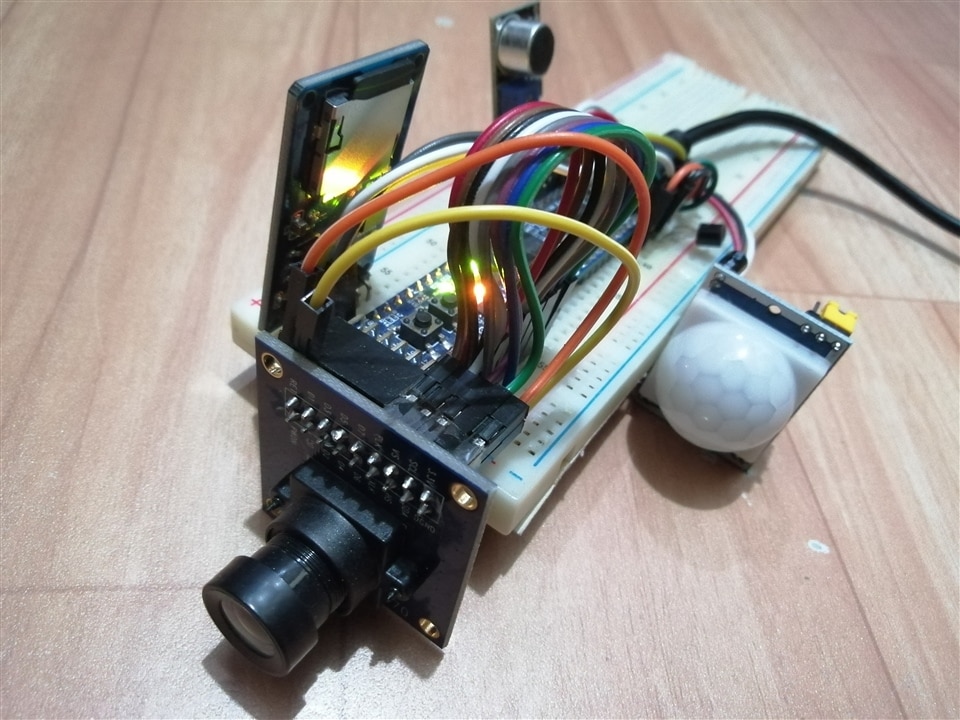
- Setup your breadboard connections by using the pin constraint file as the guide. It will look something like the image above.
- Play with it! It saves the image when it detects movements, loud sounds, and abnormally high temperatures. You can also push the btn1 to trigger the save operation.
- To extract the binary data, connect the SD card to your computer and use the "dd command" we talked about earlier. A file named sdcard.bin will be saved to your current directory:
sudo dd bs=512 count=12000 skip=2050 if=/dev/sdc of=sdcard.bin - To convert the binary data to image, use the script ov7670.m found inside the directory of the extracted zip file. Run the script on MATLAB/Octave on the same directory as the sdcard.bin. For example, to extract 10 images type in the command line: ov7670(10)
- Wait for some time and TA-DAH! All of the of the images will be displayed on the figure window. Images will also be stored inside the folder OV7670_images.
My Project Demonstration
The demonstration is very simple, I triggered the Security Camera in 3 different ways: first take is using movement, second take is through loud sounds, and third take using fire. Here are the main extracted images for that demonstration:


If you are curious why my hands did not appear in the first take, the reason is that the PIR sensor already detected my hand way above(PIR sensors has 180 degrees of visibility) and triggered the SD card driver to save the frame. It was already too late when my hand reached the paper.
As a proof that these are really the saved data in my SD card, use the bin file I extracted from the SD card for this demonstration as the input to ov7670.m script (bin file is also included in the zip file).
More images that I captured using this Security Camera:


Final Words
Although I call this a Security Camera, it is still way below of your average security camera. First is that we are only storing images one at a time instead of a continuous video. In my 32Gb SD card, one shot takes almost 1.5 seconds to save. The biggest bottleneck here is the SD card which we can only interface in SPI mode (instead of SD mode used in phones). But, as you can see above, the image results are not bad. In fact, I expected the 640x480 image to look terrible but how wrong I was! The captured images are actually pretty decent.
There are many things to improve on this project, first is adding a file system when saving the images. This will make it easier to see the stored images in the SD card and will not require the user to go through the tedious process of extracting data from the SD card sectors and use a MATLAB script just to convert the binary data to image. Second is adding some image processing. But as I had said on my first blog, the goal of this project is to only do the most basic function of a camera and that is to capture images. This is to make the project as beginner friendly as possible. I hope this project were able to engage other people on the potentials of an FPGA when it comes to interfacing with a hardware with a high throughput like the camera.
The main brain of this project is the CMOD S7. This FPGA board might be pretty small (this is the smallest FPGA board I had seen yet) but it packs power! Camera projects are very exhaustive on hardware requirements since data pixels are flowing non-stop from the camera and it is up to the FPGA to catch all of that. I used 70% of the block ram and used more than 50% of the available pins yet I found no problem in closing the timing of my design. I'm very much satisfied with the results of this security camera project and I highly recommend the CMOD S7 FPGA board for any kind of hobbyist projects.
Woah, its finally over! I did a lot of all-nighters to design, code, and test every modules used in this project. A job well done I must say to myself! I'm very happy that this Security Camera project worked as expected and produced the best results. Thank you very much Element14 and Digilent for this Summer of FPGA Design Challenge and for sponsoring my CMOD S7 FPGA board. I learned a lot from this 2-month design challenge. I hope to my readers that this six-part blog series were engaging and you were able to follow the project from start to finish. Thank you everyone for keeping up with me and see you soon.
6-Part Blog Series
- Security Camera #1: Project Proposal
- Security Camera #2: SD Card Interfacing
- Security Camera #3: Testing the SD Card Driver
- Security Camera #4: Interfacing with OV7670 Camera
- Security Camera #5: Adding Peripheral Sensors
- Security Camera #6: Project Demonstration and Final Words
To see more of my FPGA projects, visit my GitHub account: https://github.com/AngeloJacobo