

In this video, Milos builds a fully custom micro drone from scratch using the Arduino Nicla Vision board—no off-the-shelf flight controllers, just custom PCBs, hand-written flight control code, and a lot of trial and error. He walks through the full process from hardware design to PID-based stabilization and joystick-controlled flight via Python. Watch the full build and flight test to see how it all came together.
Watch the Video
There aren’t many people who tried flying a drone and then didn’t like it! It’s incredibly fun to control something that you can look at soar through the air. In this video, Milos wanted to make a tiny drone from zero without relying on things like already tested flight controllers but do all of the electronics and code from scratch!
Building on a Previous Project
This isn’t the first drone Milos made, back in 2021, for a Project14 Competition called Attack of the Drones, Milos made a big Arduino based drone that he named the SRD1. It was based on 3 Arduino Nano boards, one for the flight controller, one for the radio receiver and one for the radio transmitted. If you’re interested in that big drone, look at these links:
- SRD-1 - 3D Printed Drone (Arduino + Raspberry) - June 11th Update - It Flies!
- https://github.com/MilosRasic98/SRD-1
The drone he wanted to make this time was different. The size he was going for was two times smaller than the propeller of the original drone! He came onto this idea while working with the tiny Arduino Nicla vision board.
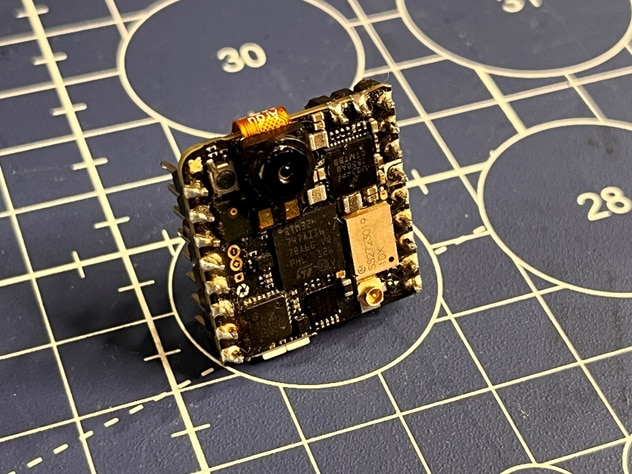
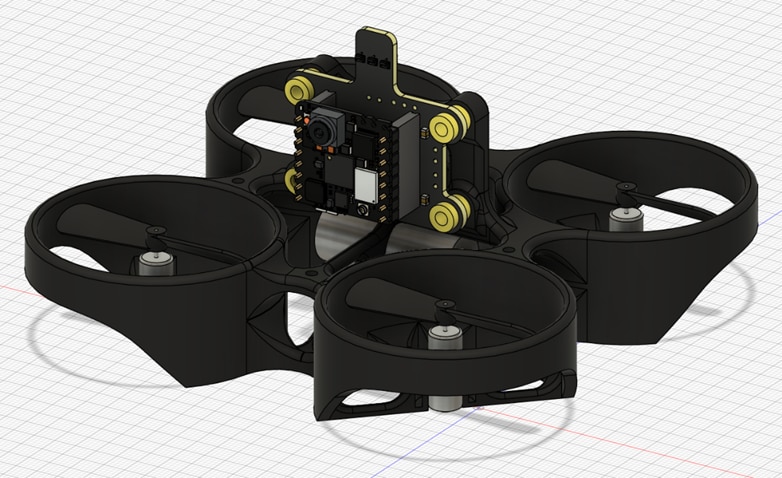
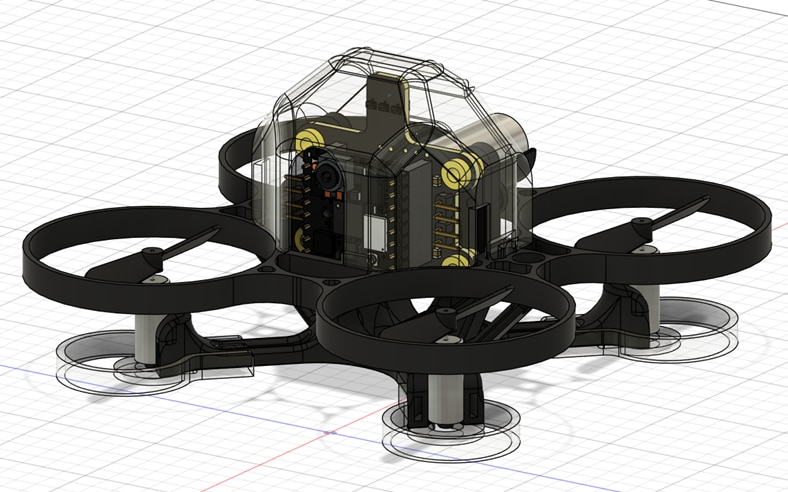
This little board packs a serious punch. It has a built-in camera, IMU, ToF sensor, Wifi, it has everything you need to make a drone! Milos decided to build a custom PCB that will work as a shield for the Arduino Nicla Vision and that will house the rest of the electronics to keep everything as compact as possible.
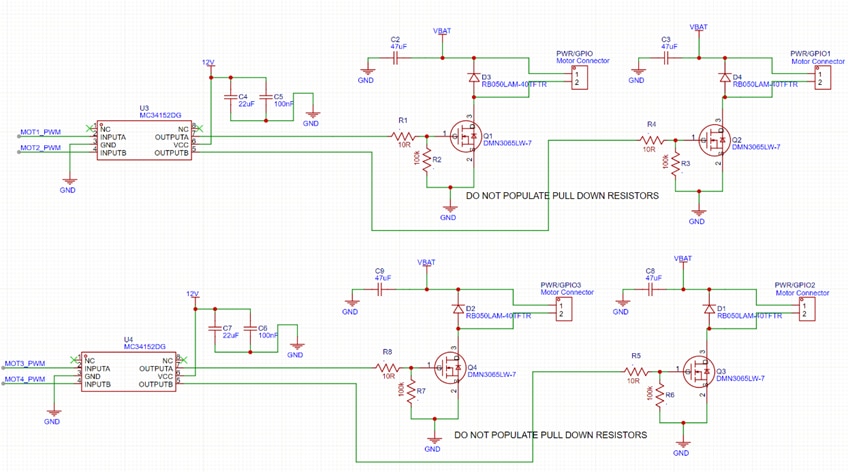
Schematics of Electronics
This is where the “fun” began for Milos as he explains in the video. For the first PCB he didn’t go thoroughly through the data sheet, and the pinout was wrong for the Nicla Vision, so while he was trying to make it work, he managed to burn the onboard battery regulator… This didn’t deter him, and he continued by designing a new PCB. While still not perfect, it was good enough for him to make it work! Here are the full schematics and the look of the final PCB.
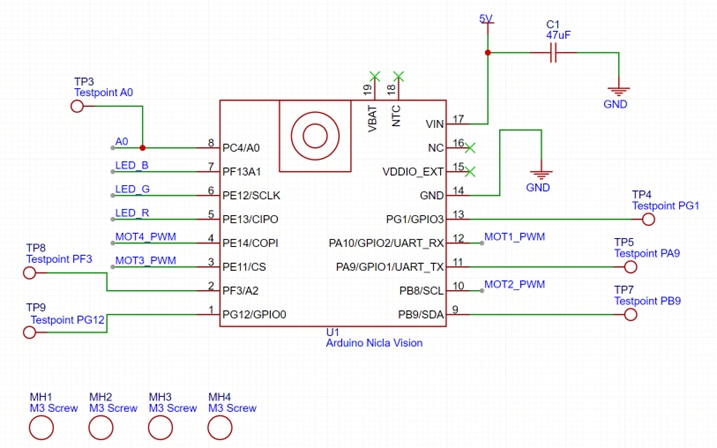

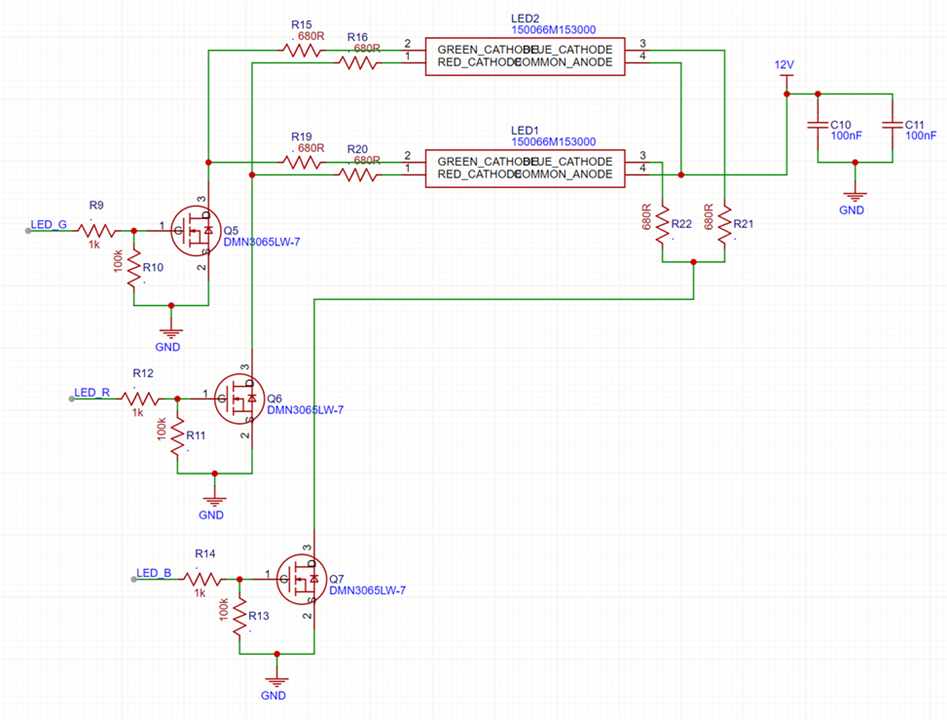
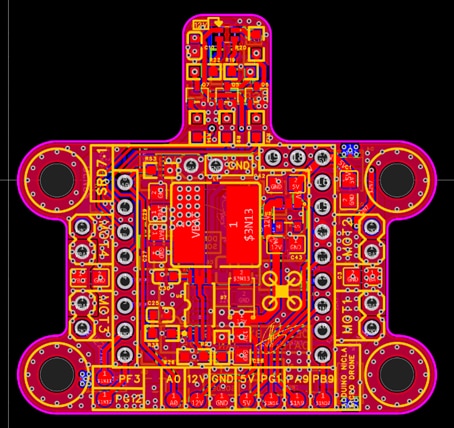
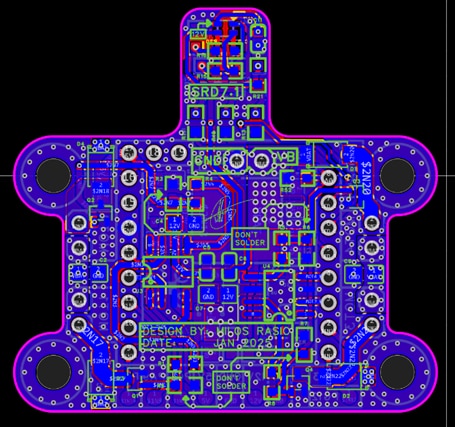
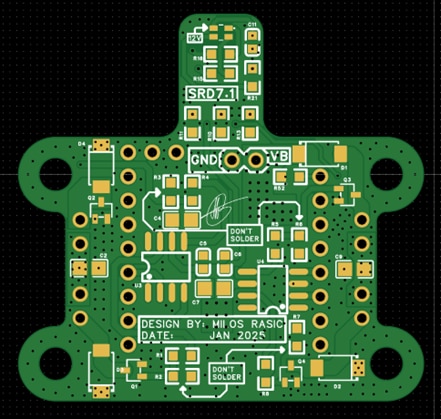
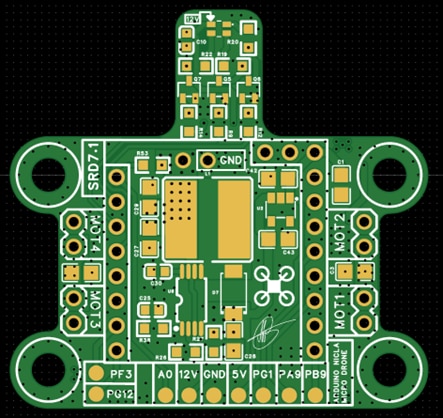
The PCB was designed to be as small as possible with the Arduino taking the central position because of the IMU. Acting as a roll bar, he added a part of the PCB to stick out at the top, so it protects the delicate (and costly!) Arduino Nicla Vision in case of some crashes. This was also a perfect place for putting some LED-s that can be used to show the state the drone is in, for example, flashing green means it’s safe to touch, while flashing red means the drone is armed and could spin any of the motors up.
Practical and Mechanical Design
Mechanical design has taken a few attempts to get just right. He initially wanted to use small 717 motors, but they were too lacking in thrust, so he decided to instead go with the much more powerful 8520 motors, which are some motors used in the DJI Tello drone. These motors proved to be more than powerful enough for this drone. Nevertheless, Milos still tried keeping the drone as light as possible and he tried maximising that by designing the frame to be as tiny as possible while still being strong. Here are some of the designs he tried before settling on the final one.

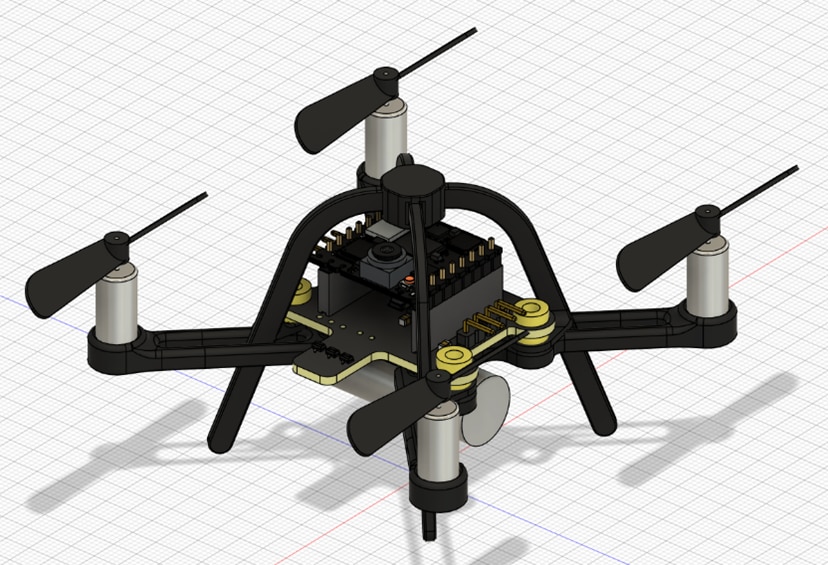
For printing materials, he experimented both with PLA and PETG. PLA gives a stiffer frame but is more brittle and more likely to crack on impact. While PETG is a bit less stiff, it takes impacts incredibly well with less chance of something breaking. In the end, both materials proved to work rather well, so you can choose any, or experiment with something more exotic.
Coding the Software
With all the mechanical and electrical stuff figured out, the only thing left now is controlling the drone and software. For this, Milos decided to go on a route that he believes will be natural for most people, and that’s by using a joystick connected to a PC. He used a regular flight joystick stick for this, but you can use any joystick that connects over USB. A code in Python using the PyGame library captures all the inputs from the joystick and then sends them over UDP to the drone. Important thing to note here, the PC and the Drone must be on the same network for this work in this setup!
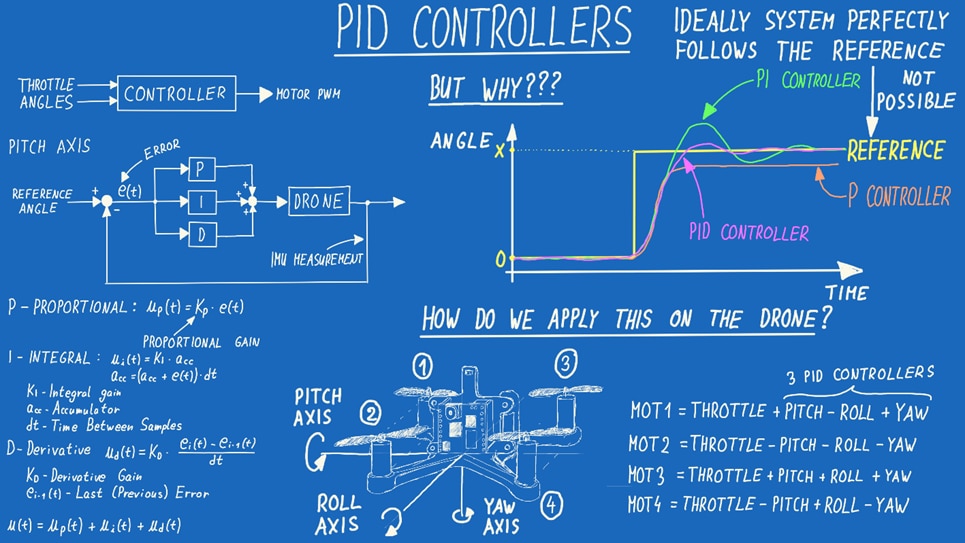
Since Milos wanted to do everything from zero and make this video as educational as possible, this included the flight controller software as well. There are a lot of open-source flight controllers that you can flash to an Arduino, such as MultiWii, but Milos wanted to try writing a bare bones controller from scratch. This meant he had to write 3 PID controllers for the Pitch, Roll & Yaw axis to stabilise the drone in flight. If you’re interested in more detail, he did a full explanation on how PID controllers work, and why they are necessary for the drone in the video.
After all of this, the only thing left to do was test the drone, but to find out how that went, you’ll need to check out the video above!
Supporting Links and Files
- SRD-1 - 3D Printed Drone (Arduino + Raspberry) - June 11th Update - It Flies!
- Spying Under the Christmas Tree with an Arduino-powered Ornament -- Episode-633
- Supporting Files for Episode 668 of element14 presents
Bill of Materials
| Product Name | Manufacturer | Quantity | Buy Kit |
|---|---|---|---|
| Arduino Nicla Vision - ABX00051 | ARDUINO | 1 | Buy Now |
| MCPAS03W4J0472T5E | MULTICOMP PRO | 2 | Buy Now |
| GRT21BR60J476ME13L | MURATA | 5 | Buy Now |
| DMN3065LW-7 | DIODES INC | 7 | Buy Now |
| RBR3LAM40CTFTR | ROHM | 5 | Buy Now |
| MC34152DG | ONSEMI | 2 | Buy Now |
| GRM21BR61E226ME44L | MURATA | 6 | Buy Now |
| C0603X104K8RACAUTO | YAGEO | 5 | Buy Now |
| RCG060310R0FKEA | VISHAY | 4 | Buy Now |
| TPS61085PWR | TEXAS INSTRUMENTS | 1 | Buy Now |
| MSS7341-502NLB | COILCRAFT | 1 | Buy Now |
| C0603C112J5GACTU | YAGEO | 1 | Buy Now |
| RP0603BRD0730KL | YAGEO | 1 | Buy Now |
| ERJP03F7502V | PANASONIC | 2 | Buy Now |
| RC0603JR-07100KL | YAGEO | 4 | Buy Now |
| ERA3VRB8201V | PANASONIC | 1 | Buy Now |
| 150066M153000 | WURTH | 2 | Buy Now |
| ERJUP3J681V | PANASONIC | 6 | Buy Now |
| CRCW06031K00JNEAIF | VISHAY | 3 | Buy Now |
Additional Parts
| Product Name | Manufacturer | Quantity |
|---|---|---|
| 2.54mm Pitch Male and Female Headers | ||
| 8520 Motors with Propellers | ||
| PLA or PETG filament for 3D Printing | ||
| USB Joystick | ||
| Small 1S LION Battery |

Top Comments