


We will use machine learning to build a gesture recognition system that runs on a microcontroller, with the help of Edge Impulse Studio.
Preparing Edge Impulse Studio for the project
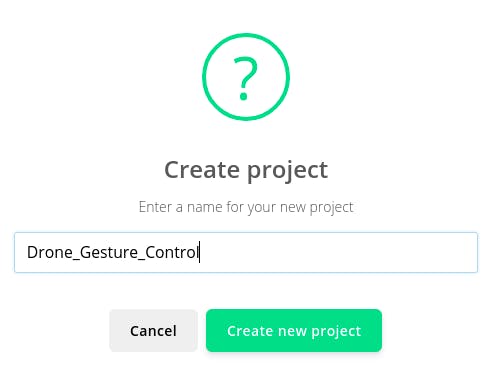
- Log in to https://www.edgeimpulse.com/
- Click Create Project.

- Give Project name and click Create.
- Head over to the "Devices" tab from the left menu and choose "Connect a new device".

- You will be greeted with a variety of device options.
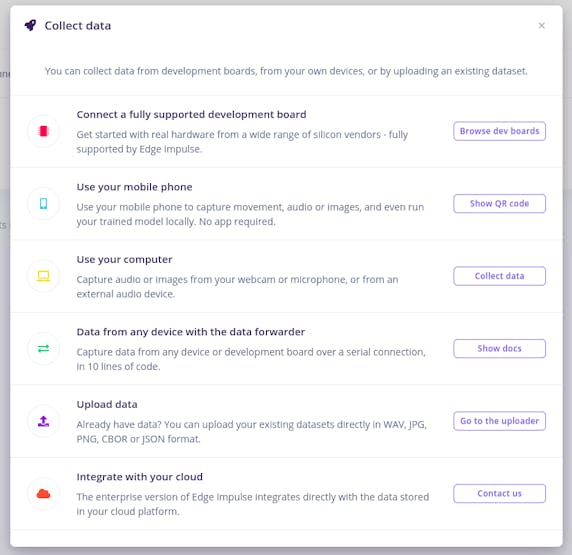
- To make things simple, let's connect our smartphone device. Since all modern smartphones have onboard accelerometers, it will be easy-peasy.
- Next, you will be given a QR code and a link to allow the collection of data from your smartphone.
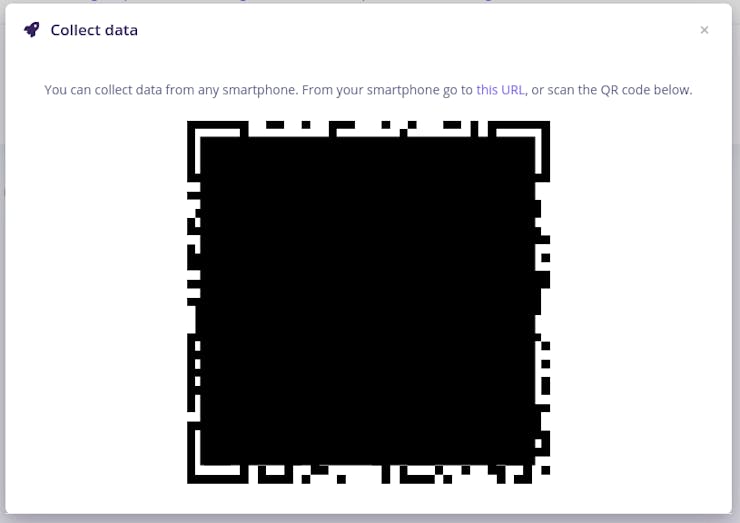
- Scan this QR code or open the link via your smartphone device.

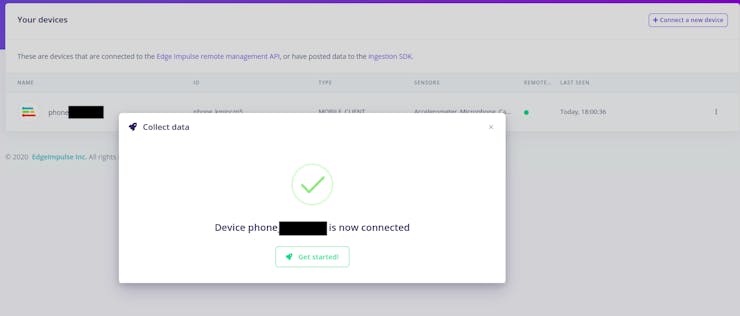
- Once the link is opened via your smartphone, the smartphone will show up in the "Devices" section.
Data collection
For collecting the data for our machine learning model, we will use the 3-axis accelerometer sensor present onboard our smartphone.
- Once the smartphone is connected to Edge Impulse, head over to the "
Data Acquisition" tab.
Select our phone from the device, give labels (let's start with 'idle'), Sample length of 10000 (10s), Sensor as accelerometer, and a Frequency of 62.5Hz.
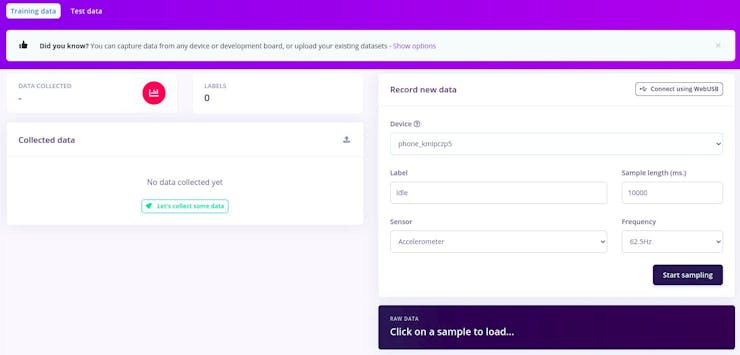
- Click on "
Start Sampling" to begin sampling for the set sample length.
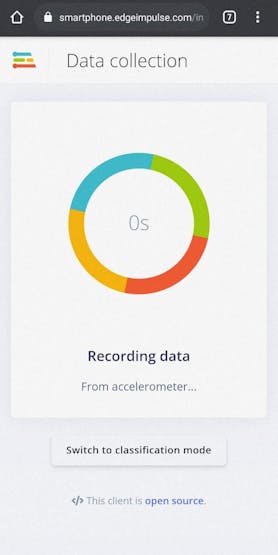
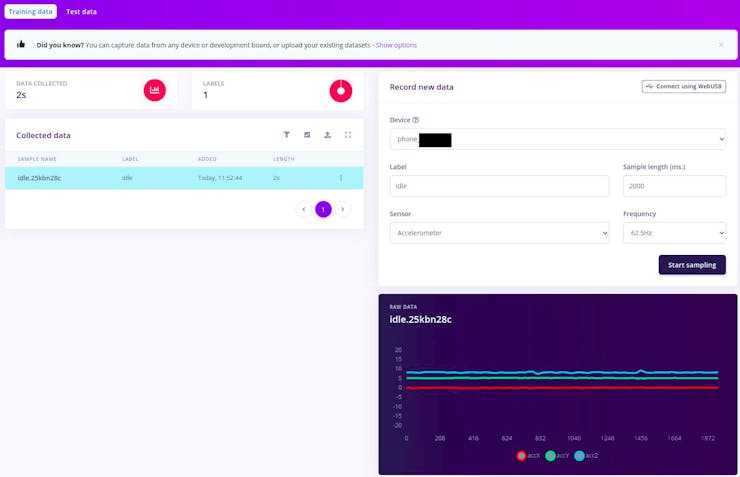
- In about two seconds the device should complete sampling and upload the file back to Edge Impulse. Once sampled, the data will appear in the data acquisition.
- You see a new line appear under '
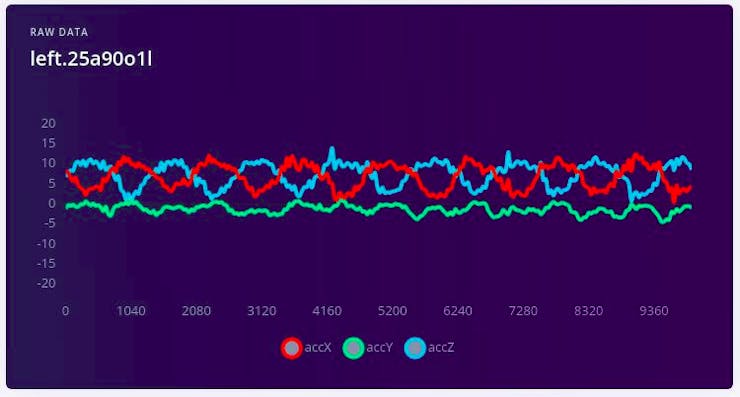
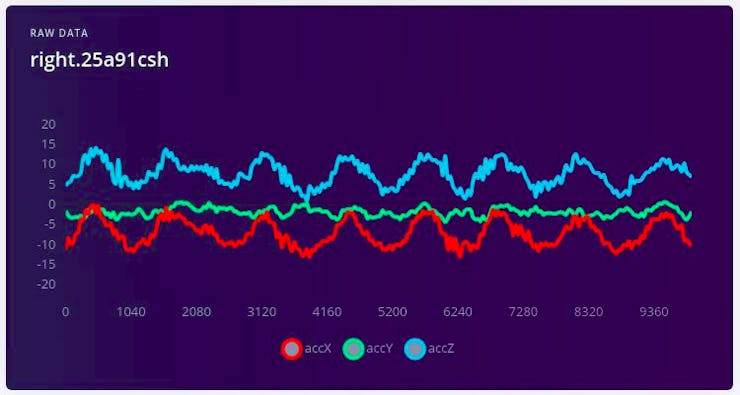
Collected data' in the studio. - When you click it you now see the raw data graphed out. As the accelerometer on the development board has three axes you'll notice three different lines, one for each axis.
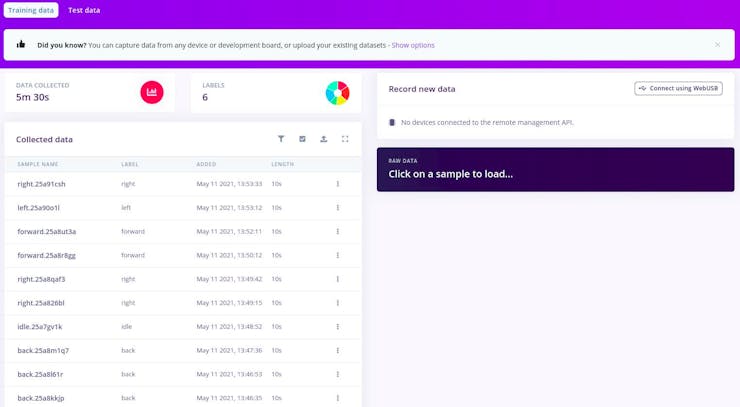
- Repeat this process to collect as many samples as we can.
- Repeat for the other labels takeoff/land, forward, back, left, and right.
- Make sure to perform variations on the motions. E.g. do both slow and fast movements and slightly vary the orientation of the board. You'll never know how your user will use the device.
- Once sufficient data is collected, they will be shown under the same tab.
- Click on each data row to view their raw value graph for 10s sample length.
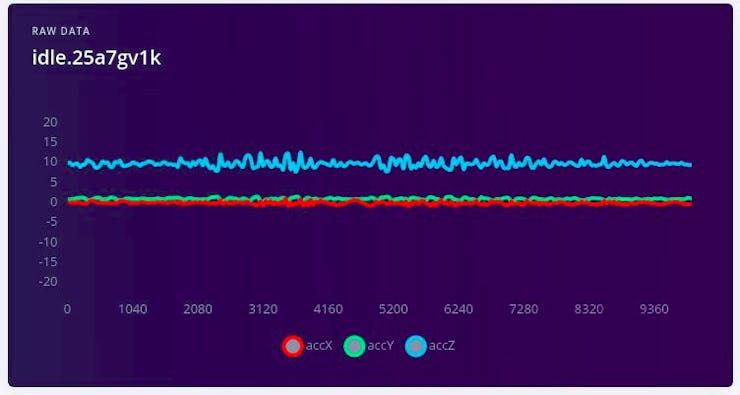
Idle
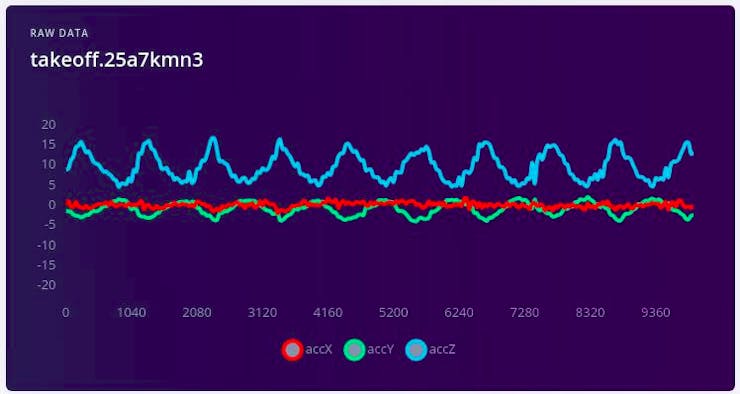
takeoff/land
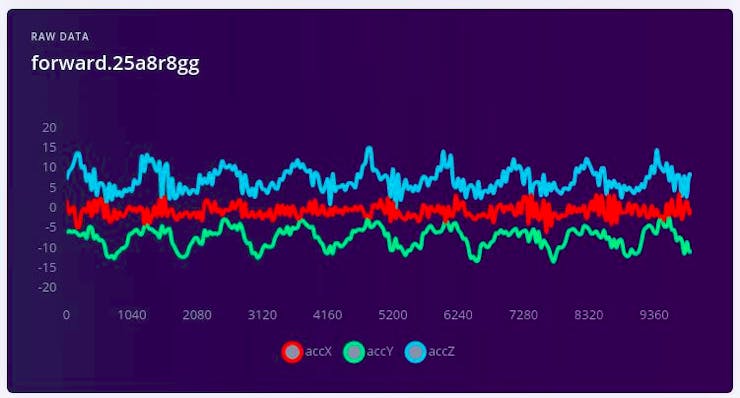
forward
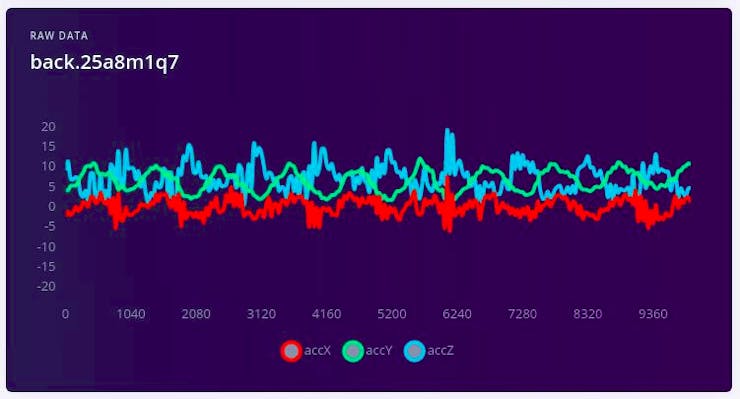
back
left
right
- Now that we have sufficient data, we need to split the data into a
training datasetand atest dataset. - Don't worry. The Edge Impulse Studio makes that easy for us too.
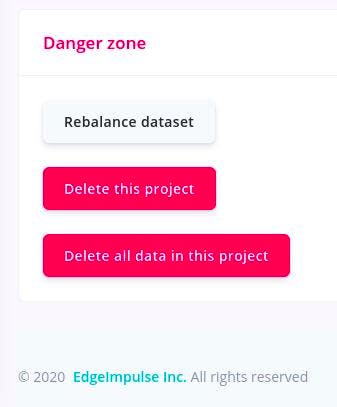
- Head over to the "
Dashboard section" and scroll down to the "Danger Zone". - Click in "
Rebalance datasheet" to automatically split the dataset into training and test with a ratio of 80/20.
- Now we have acquired and set up our training data for further processing.
Gesture Model Training
Since we have acquired all the data, it's time for us to train the dataset to fit a gesture model and Edge Impulse makes it very easier for us to generate a model without writing a single line of code.With the training set in place, we can design an impulse. An impulse takes the raw data, slices it up in smaller windows, uses signal processing blocks to extract features, and then uses a learning block to classify new data. Signal processing blocks always return the same values for the same input and are used to make raw data easier to process, while learning blocks learn from past experiences.
- Head over to the "
Impulse Design" tab. - We will already have the
Time series datasection populated for us.
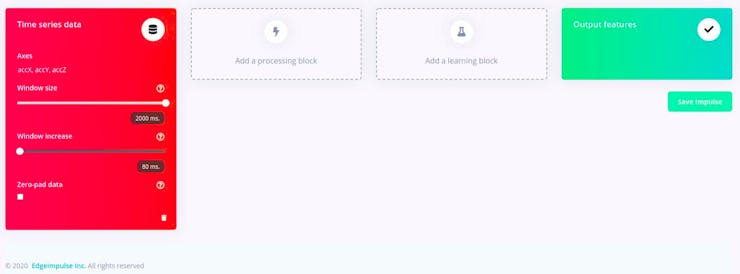
- Select a
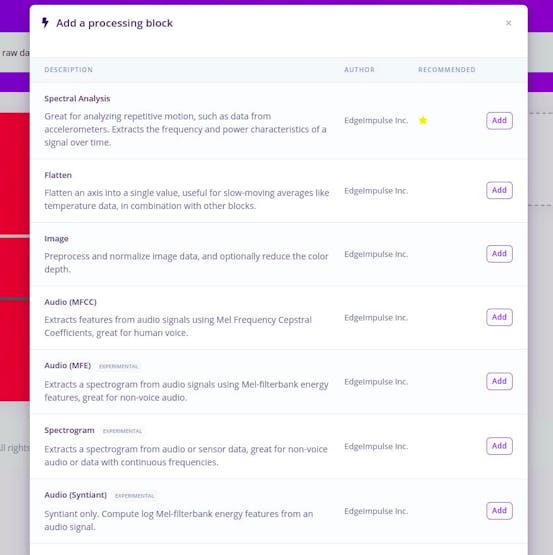
window sizeof2000(2s) and awindow increaseof80ms. - Now click
Add a processing blockand selectSpectral Analysis. - The parameters will be auto-populated for us.
- This block applies a filter, performs spectral analysis on the signal, and extracts frequency and spectral power data.
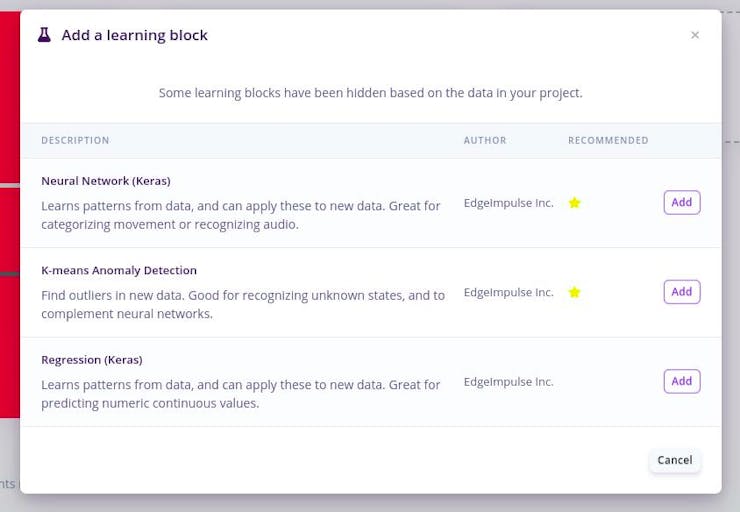
- Now click Add a learning block and select Neural Network (Keras).
- The parameters will be auto-populated for us.
- This block takes these spectral features and learns to distinguish between the six (idle, takeoff, forward, back, left, right) classes.
- The
Output featuresblock will have all the labels that we have acquired. - Now click on
Save Impulseto save the configuration.

- Head over to the
Spectral Featurestab. - This will show you the raw data on top of the screen (you can select other files via the drop-down menu), and the results of the signal processing through graphs on the right.
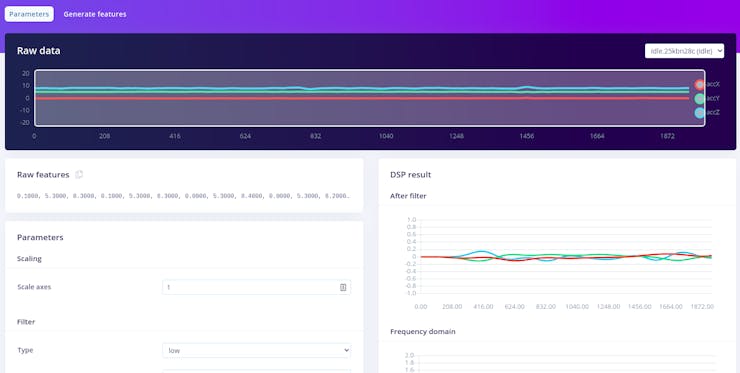
- For the spectral features block you'll see the following graphs:
After filter - the signal after applying a low-pass filter. This will remove noise.
Frequency domain - the frequency at which signal is repeating (e.g. making one wave movement per second will show a peak at 1 Hz).
Spectral power - the amount of power that went into the signal at each frequency.
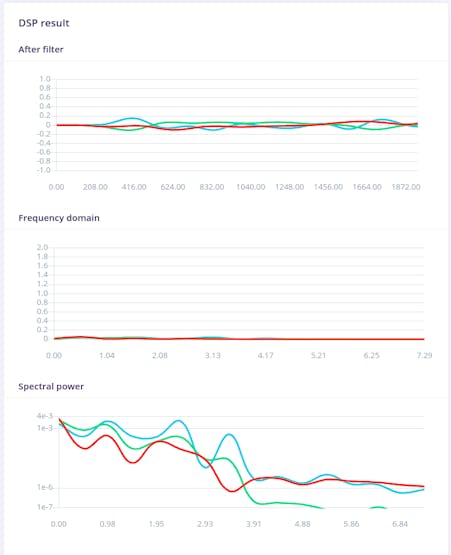
- A good signal processing block will yield similar results for similar data. If you move the sliding window (on the raw data graph) around, the graphs should remain similar.
- Also, when we switch to another file with the same label, you should see similar graphs, even if the orientation of the device was different.
- Click
Save parameters. This will send you to theFeature generationscreen.

- Here we will split all raw data up in windows (based on the window size and the window increase selected in creating impulse step) and apply the spectral features block on all these windows.
- Click
Generate features.
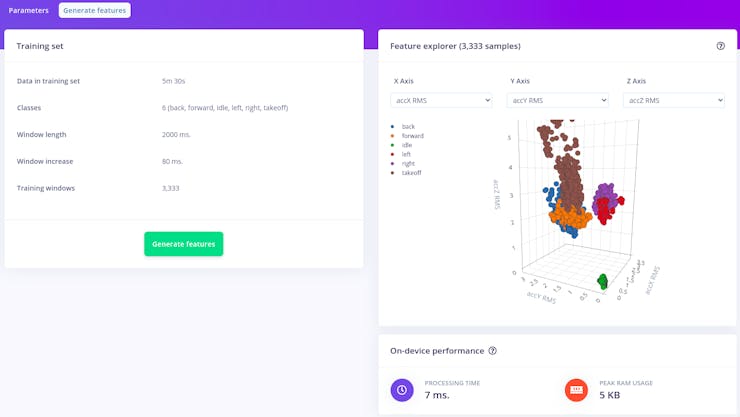
- The
Feature explorerwill load. This is a plot of all the extracted features against all the generated windows. - You can use this graph to compare your complete data set. E.g. by plotting the height of the first peak on the X-axis against the spectral power between 0.5 Hz and 1 Hz on the Y-axis.
- A good rule of thumb is that if you can visually separate the data on a number of axes, then the machine learning model will be able to do so as well.
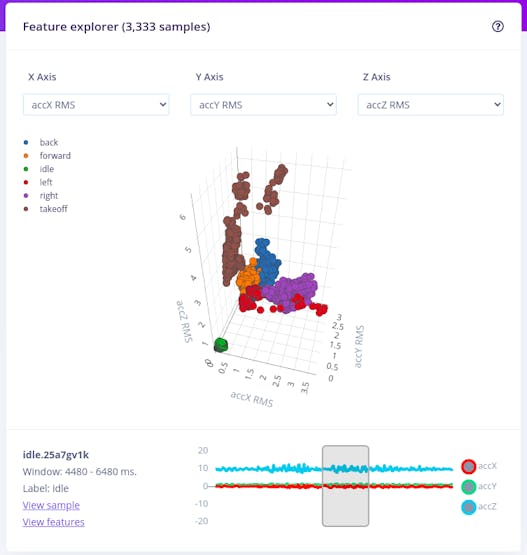
- For our dataset, the feature data are more or less separated which is a good sign. In case your features are overlapping, it is better to acquire more data.
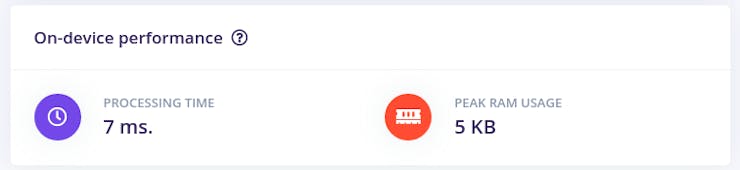
- The page also shows the expected on-device performance with processing time and peak RAM usage for calculating features.
With all data processed it's time to start training a neural network. Neural networks are a set of algorithms, modeled loosely after the human brain, that are designed to recognize patterns. The network that we're training here will take the signal processing data as an input, and try to map this to one of the four classes.
So how does a neural network know what to predict?
A neural network consists of layers of neurons, all interconnected, and each connection has a weight. One such neuron in the input layer would be the height of the first peak of the X-axis (from the signal processing block), and one such neuron in the output layer would be takeoff (one of the classes). When defining the neural network all these connections are initialized randomly, and thus the neural network will make random predictions. During training, we then take all the raw data, ask the network to make a prediction, and then make tiny alterations to the weights depending on the outcome (this is why labeling raw data is important).
This way, after a lot of iterations, the neural network learns; and will eventually become much better at predicting new data.
- Head over to the
NN classifiertab.
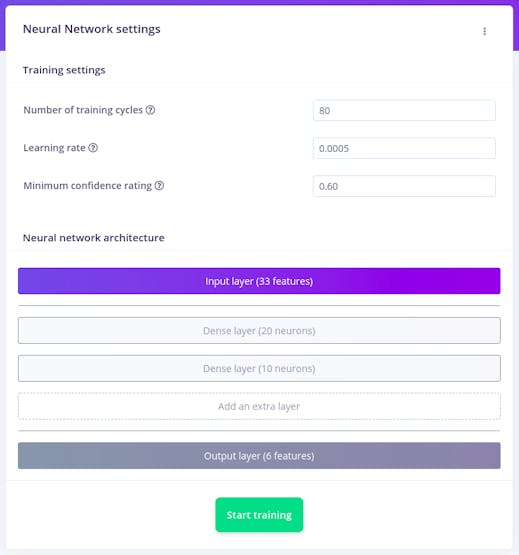
- Set
Number of training cyclesto80,Learning rateto0.0005, andMinimum confidence ratingto0.60. You can play around with these values to adjust the accuracy of the trained model. - Leave the other parameters default for now and click
Start training. - Now the
Training Outputsection gets populated.
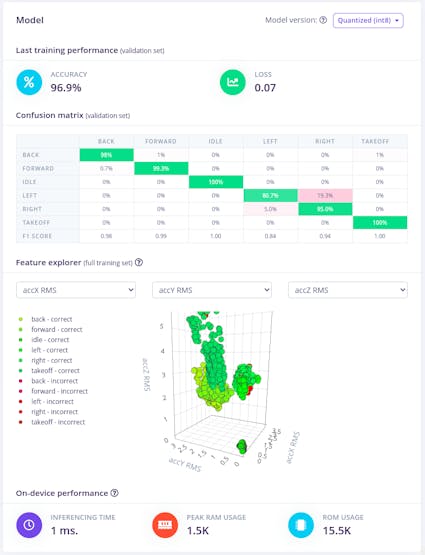
- It displays the accuracy of the network and a confusion matrix. This matrix shows when the network made correct and incorrect decisions. You see that
idleandtakeoffare relatively easy to predict. - It also shows the expected On-device performance for this model.
- Now that we have generated the model, we need to test it.
Gesture Model Testing
- Head over to the
Model Testingtab.
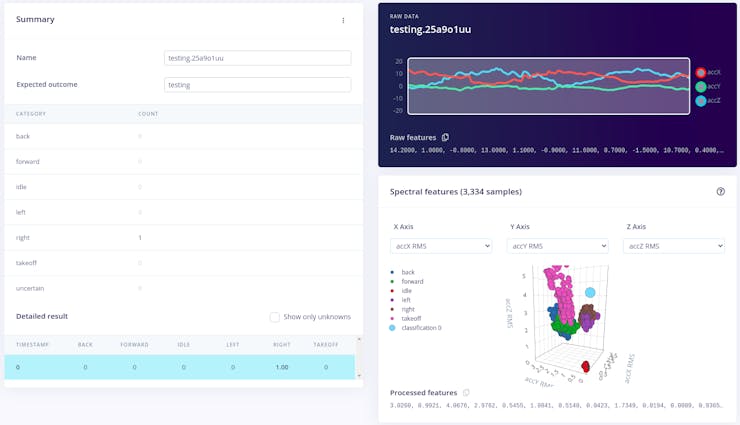
We can see our training dataset here. Click Classify all.
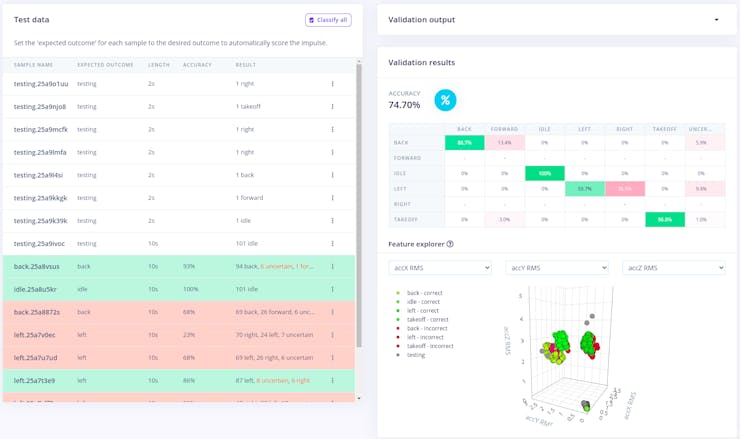
- This will generate the model validation outcome using the training data that was unknown to the model. We can see that our trained model was able to classify with an accuracy of 74.70% which is quite good considering the small amount of training data fed to the model in the training section.
- It also shows which labels were incorrectly predicted.
- By checking these results in
Feature explorer, we can understand which labels were misclassified and use more training data to re-train our model for better classification of those data. - You can also do a live classification of data from the smartphone from the
Live classificationtab. Your device should show as online underClassify new data. Set the 'Sample length' to 2000(2 seconds), clickStart sampling, and start doing movements. - Afterward, you'll get a full report on what the network thought that you did.
- Now that we have trained and tested our model, let's deploy it in our M5Stack module.
Gesture Model Deployment
With the impulse designed, trained, and verified you can deploy this model back to your device. This makes the model run without an internet connection, minimizes latency, and runs with minimum power consumption. Edge Impulse can package up the complete impulse - including the signal processing code, neural network weights, and classification code - up in a single C++ library that you can include in your embedded software.
- Head over to the
Deploymenttab. - Select
Arduino library. - If you need the build for a specific Edge Impulse supported hardware, under
Build firmwareselect your development board - Click
Build. This will export the impulse, and build a library that will run on the development board in a single step. - We will see a pop-up with text and video instructions on how to deploy the model to our device.
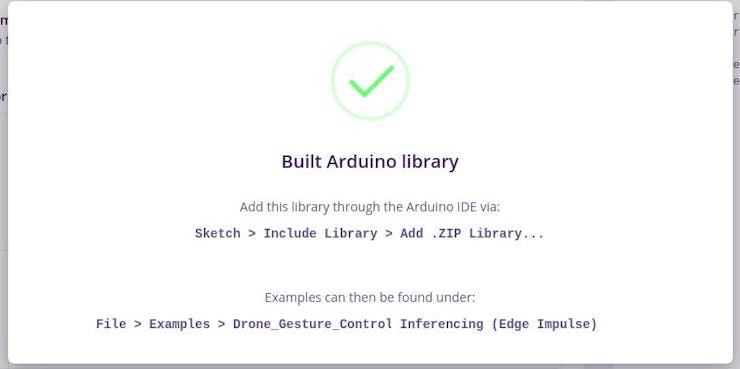
- After the build is completed you'll get prompted to download the library zip file.
- Save the zip file to our project directory.
References:
https://docs.edgeimpulse.com/docs/continuous-motion-recognition
https://docs.edgeimpulse.com/docs/using-your-mobile-phone
Blog Series:
Gesture Controlled Drone #1 : Introduction
Gesture Controlled Drone #2 : Preperation - Drone
Gesture Controlled Drone #3 : Preperation - M5Stack
Gesture Controlled Drone #4 : Gesture Control
Gesture Controlled Drone #5 : Gesture Recognition using Edge Impulse
