Intro
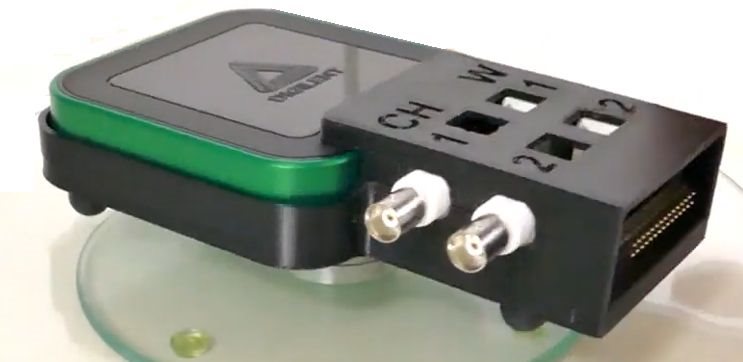
I am road testing a Digilent Analog Discovery 3 which included a BNC Adapter accessory module. The adapter connects to the Analog Discovery module via a 30 pin header, but there are no other mechanical fasteners to stabilize the connection. BNC cables are usually stiff enough to create stress on the header connection so I designed a chassis to mount both modules and stabilize the connection.
Enclosure Image

Design Features
- Shelters exposed PCB and connections from accidental touching and ESD
- Provides mechanical stability between the modules
- Prevents random metal objects from accidentally shorting pins on the pass-through 30 pin connector
- Prevents the pass-through connector pins from getting bumped and bent
- Retains visual access to labels on the main module
- Holds the 2 modules rigidly in optimal mating positions
- Provides clear labels for the BNC connectors
- Provides access to the configuration jumpers without any disassembly
- Provides easy access to the pass-through logic analyzer pins without any disassembly
- Provides non-slip feet that prevent the device from slipping around on the bench
- Provides clearance under the BNC connectors to allow adequate finger access to operate BNC connectors
- The case is a snug fit and quick to assemble
- Matches the black color scheme while still exposing the green side walls
- Provides the system with a robust, functional, "finished product" aesthetic
Enclosure Video
Discussion
I put some significant thought into designing an appropriate enclosure for the AD3 and BNC adapter assembly and it paid off with a very functional system that meets all my design criteria.
I am very pleased with the way it turned out. It definitely makes the AD3 into a more useful instrument.
AD3Case .stl files
Links:
Pretty Cool Raster Text Display on an AD3
AD# - Frequency-to-Voltage Converter
AD3 - Capacitance-to-Voltage Converter
My Road Test of the Analog Discovery 3
