


One of the coolest technologies to emerge in the last decade is 3D printing. 3D printers are incredibly versatile tools that can print virtually anything you need. The technology has improved by leaps and bounds since its inception, and incredibly accurate, high resolution 3D prints can now be made pretty inexpensively.
We've put together a wish list with all the fundamental items needed to set you up for a life in 3D Printing
3D Printers
Let's start with the 3D printer itself. There is a wide range to choose from. Select based on what you want to print, your skill level, the materials you want to print with, the size of the prints you want to make, and most importantly, budget. Whether you're printing industrial parts for machine automation or little knick-knacks to decorate your desk, there's a 3D printer for you.


Glue Stick
In order to create a great 3D print, build plate adhesion is extremely important. If your print won't stay still, accuracy will suffer. Hairspray is popular for adhesion, but glue is more precise and creates less of a mess.

Deburring Tool
Many 3D prints end up with small pieces of protruding plastic that have to be cleaned up. A deburring tool makes the process easier, and with less chance of screwing up and destroying your print. Deburring tools are especially good for cleaning up modeled holes.

Pliers
Pliers are useful on any bench and 3D printing is no exception. Use your pliers for print core maintenance, repairs, or removing support material.

Masking Tape
Masking tape is incredibly versatile in 3D printing. Add it to the print bed to protect it from scratches and to help 3D prints adhere. Heat resistant masking tape is preferred for heated beds.

Dremel
Dremels make smoothing a lot easier, but be careful! A Dremel can get hot, and material like PLA can melt. The sanding attachments work well, but keep those RPMs low.

Different-sized Nozzles
Grab a vriety of nozzles for your 3D printer. Larger ones can print faster at the expense of resolution. Smaller ones can print with more detail, but are slower.
This example works with Ultimaker 3D printers.
0.4mm

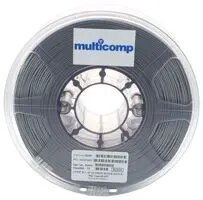
Filament
Don't forget to stock up on filaments in a variety of colors, including the shiny and translucent ones.
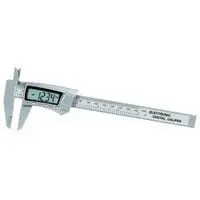
Measuring Tools
Measuring tools are required for checking machine setup and print accuracy. You've probably already got a nice ruler, but adding something like digital calipers will take your accuracy to a new level.
Raspberry Pi to run OctoPrint.
OctoPrint (https://octoprint.org) is software that can control and monitor every aspect of your 3D printer from within a browser. You can do things like viewing a webcam feed of your print, monitor temperatures, or start/stop/pause the current print job. It's completely free. OctoPrint is also open source, and there are already a bunch of plugins from 3rd party developers available for it.


How to 3D Print Webinar Series
Watch our 4 Part Webinar Series on 3D Printing on demand. We'll take you from your first print to designing prototypes.

|

|

|

|
Top Comments