


Hi!
I have created this little tutorial how to prepare your Minized for some acceleration in Vitis 2019.2 
Project is built based on Avnet BSP and shows whole platform creation process.
Acceleration BSP is included in project, feel free to use your own XSA for design.
Creating your first project using Vitis acceleration flow could be a really time-consuming if you don't know its specific workflow. In this tutorial, I hope to give you some insight into creating Minized platform based on resources provided by Avnet. This specific platform will be based on 2019.2 version of tools, but the workflow in future releases should be similar
Good tutorials:
https://www.element14.com/community/groups/fpga-group/blog/2020/04/28/avnet-hdl-git-howto
https://www.hackster.io/news/microzed-chronicles-vitis-sw-platform-fd3921137bcf
So, let's get started!
Preparing the environment
First, we need to create some working folder for example in home directory.
Go to your home directory and type
mkdir AvnetMine working directory is located in:
/home/bartek/Magisterka/Tutorial/Avnet/
cd AvnetClone Avnet's repositories containing necessary files:
git clone https://github.com/Avnet/bdf.git --branch master;
git clone https://github.com/Avnet/hdl.git --branch 2019.2;
git clone https://github.com/Avnet/petalinux.git --branch 2019.2;
Necessary modifications
Scripts we wish to use are still could not be ready! If you changed default directories, petalinux scripts will not be built bsp's properly.
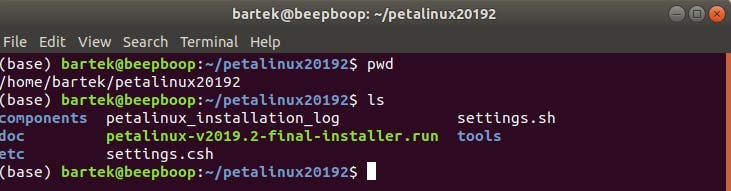
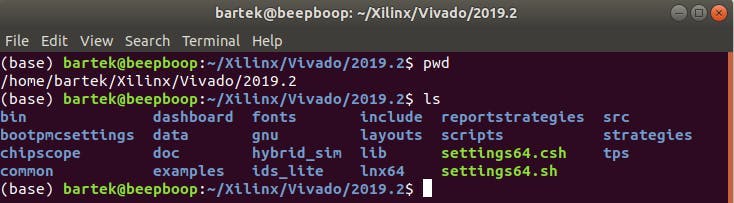
The first thing we want to check the installation folder of Vivado and Petalinux
I have installed them in:
/home/bartek/Xilinx/Vivado/2019.2
/home/bartek/petalinux20192
Now knowing the right paths we can modify building scripts.
cd petalinux/scripts
gedit make_minized_emmc_enhanced_bsp.sh
and change:
APP_PETALINUX_INSTALL_PATH=/opt/petalinux-v2019.2-final
APP_VIVADO_INSTALL_PATH=/opt/Xilinx/Vivado/2019.2
To:
APP_PETALINUX_INSTALL_PATH=(petalinux install directory)
APP_VIVADO_INSTALL_PATH=(Vivado install directory)
For me it is:
APP_PETALINUX_INSTALL_PATH=/home/bartek/petalinux20192
APP_VIVADO_INSTALL_PATH=/home/bartek/Xilinx/Vivado/2019.2
it should look like this:
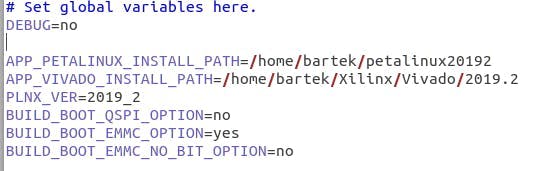
save changes and type:
./make_minized_emmc_enhanced_bsp.shWait for the script to finish it could take some time.
Modify Vivado project
In this step, we will import Minized SD-CARD manager IP and connect it to EMIO ports of ZYNQ.
(If you don't have SD-CARD or PMOD just skip this step and Minized will boot using EMMC memory)
First, we need to open a project we want to modify. Open Vivado search for the project you want to work on. For this example, I will be using the"minized_petalinux" project.
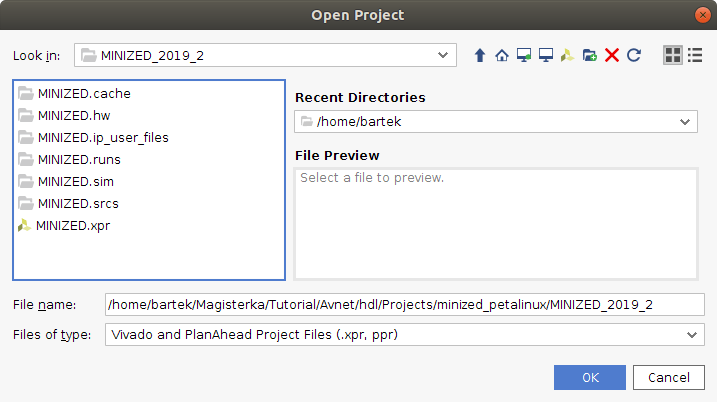
Just double-click MINIZED.xpr and the project should open.
Click "Open Block Design"
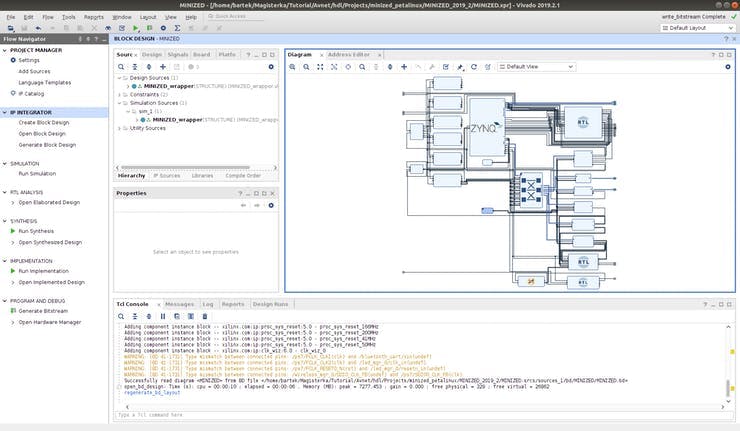
As you can see the script you have used generated Vivado project and used it in creating petalinux system for your board!
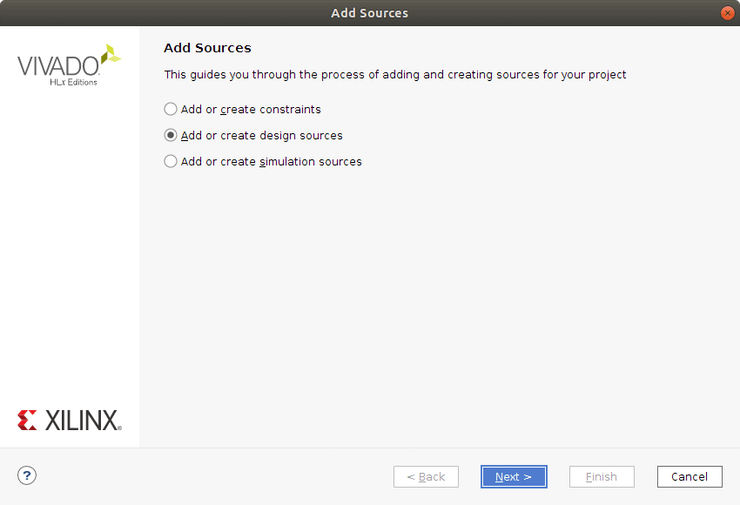
Click "Add Sources"
The dialog should pop up
Click "Add Files" and search for sdcard_mgr.vhd
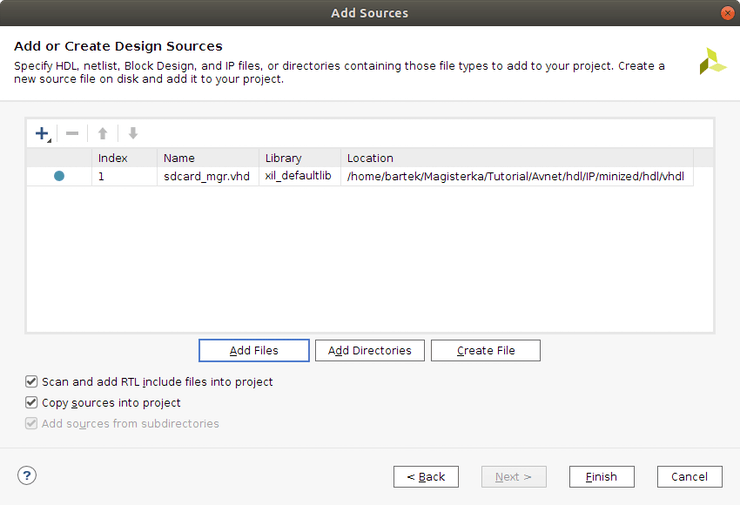
Click "Finish"
Now you need to add this IP to your already existing block design. Just drag and drop from your "Design Sources" to block design (Diagram window on the right)
Double click on ZYNQ "ps7" and click "SD 1"
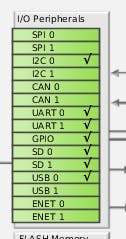
Now modify ZYNQ PS to use EMIO ports instead of MIO.
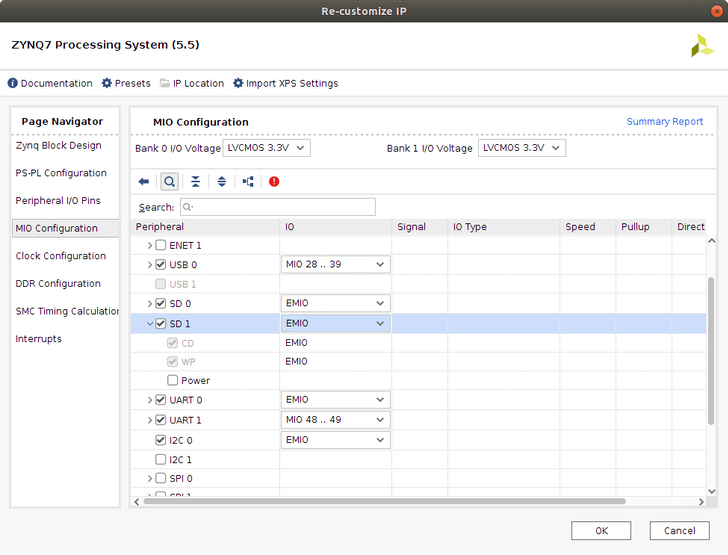
Set SD 1 to EMIO and click "OK"
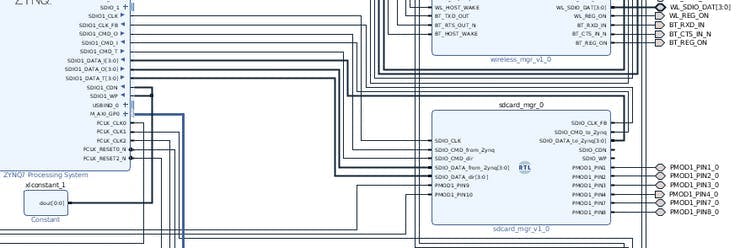
Now we need to connect IP core to EMIO ports and make external PMOD ports
Select all PMOD pins and click "ctrl + t" to make them external
Connect other pins to ZYNQ PS
The next step is adding new constrains regarding PMOD pins.
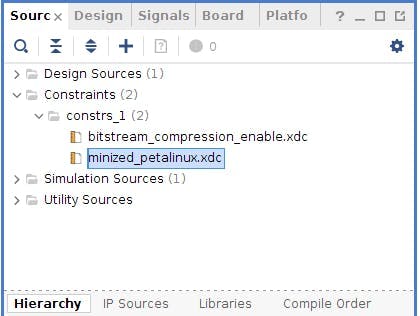
Open minized_petalinux.xdc and add:
#SD - CARD
set_property PACKAGE_PIN L15 [get_ports PMOD1_PIN1_0]
set_property IOSTANDARD LVCMOS33 [get_ports PMOD1_PIN1_0]

set_property PACKAGE_PIN M15 [get_ports PMOD1_PIN2_0]
set_property IOSTANDARD LVCMOS33 [get_ports PMOD1_PIN2_0]

set_property PACKAGE_PIN L14 [get_ports PMOD1_PIN3_0]
set_property IOSTANDARD LVCMOS33 [get_ports PMOD1_PIN3_0]

set_property PACKAGE_PIN M14 [get_ports PMOD1_PIN4_0]
set_property IOSTANDARD LVCMOS33 [get_ports PMOD1_PIN4_0]

set_property PACKAGE_PIN K13 [get_ports PMOD1_PIN7_0]
set_property IOSTANDARD LVCMOS33 [get_ports PMOD1_PIN7_0]

set_property PACKAGE_PIN L13 [get_ports PMOD1_PIN8_0]
set_property IOSTANDARD LVCMOS33 [get_ports PMOD1_PIN8_0]

set_property PACKAGE_PIN N13 [get_ports PMOD1_PIN9_0]
set_property IOSTANDARD LVCMOS33 [get_ports PMOD1_PIN9_0]

set_property PACKAGE_PIN N14 [get_ports PMOD1_PIN10_0]
set_property IOSTANDARD LVCMOS33 [get_ports PMOD1_PIN10_0]
Save everything then
Click "generate bitstream"
After generating finishes write in Tcl Console
write_hw_platform -force -include_bit -file <your working dir>For me:
write_hw_platform -force -include_bit -file /home/bartek/Magisterka/Tutorial/Avnet/petalinux/projects/minized_emmc_enhanced_2019_2/MINIZED_SD_MY_XSA.xsaModify Petalinux project
Open a new terminal in your minized_emmc_enhanced project

Now we need to source Petalinux settings.sh file.
Type in terminal:
source <dir to Petalinux installation folder>/settings.shFor me:
source /home/bartek/petalinux20192/settings.shChange referenced xsa by writing:
petalinux-config --get-hw-description=<path to generated XSA>This should pop up:
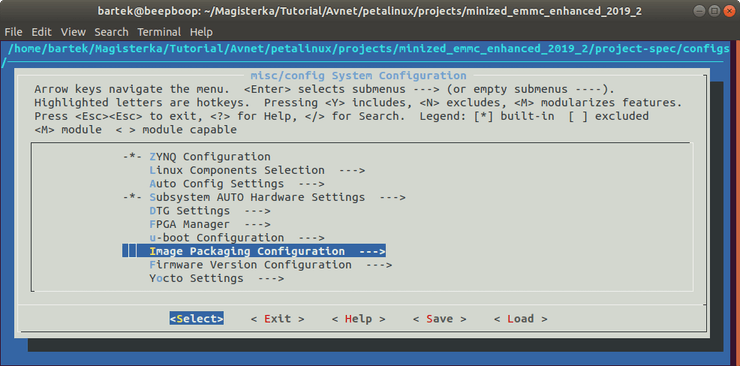
Open "Image Packaging Configuration"
and change root filesystem type, device node and the filesystem formats like this:

Go to DTG settings -> Kernel Bootargs

add "clk_ignore_unused"
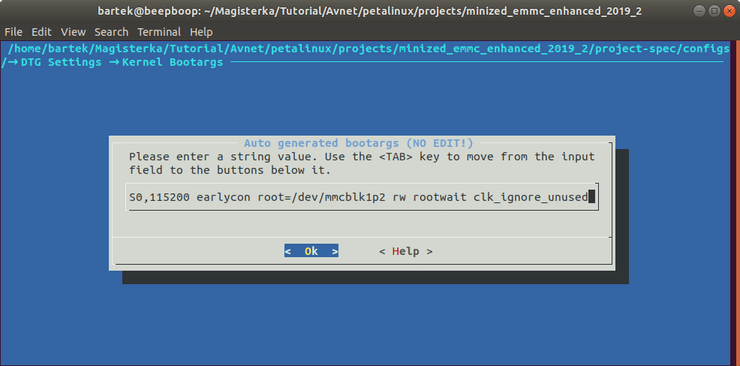
Exit popup while saving changes.
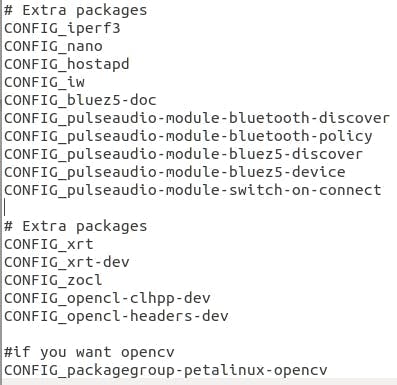
Now we need to add Vitis XRT and ZOCL to our petalinux project.
We need to add:
CONFIG_xrt
CONFIG_xrt-dev
CONFIG_zocl
CONFIG_opencl-clhpp-dev
CONFIG_opencl-headers-dev
CONFIG_packagegroup-petalinux-opencv
to "user-rootfsconfig"

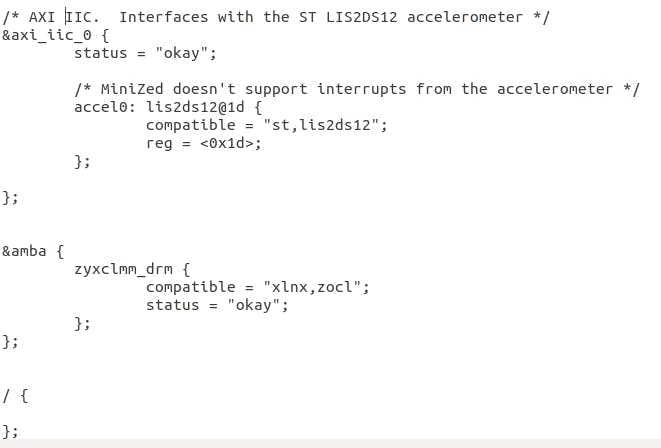
And modify "system-user.dtsi"

We need to add:
&amba {
     zyxclmm_drm {
          compatible = "xlnx,zocl";
          status = "okay";
     };
};
If you encounter errors from dtsi write this by your own hand and do not copy!
Save and exit
Type:
petalinux-config -c rootfsGo to "user packages"
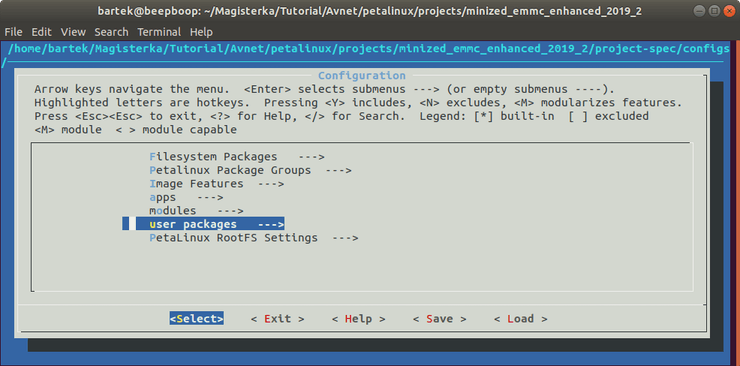
and turn on additional packages
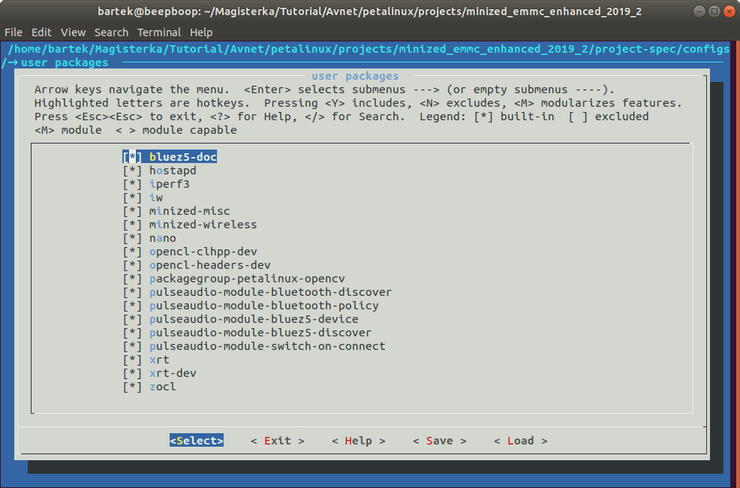
If you are missing some library just go to "Filesystem Packages" or "Petalinux Package Groups" and add some, like python3, opg, openAMP or TOOLS TO FORMAT EMMC from ZYNQ.
Save and exit
Now we need to add DMA drivers to the kernel.
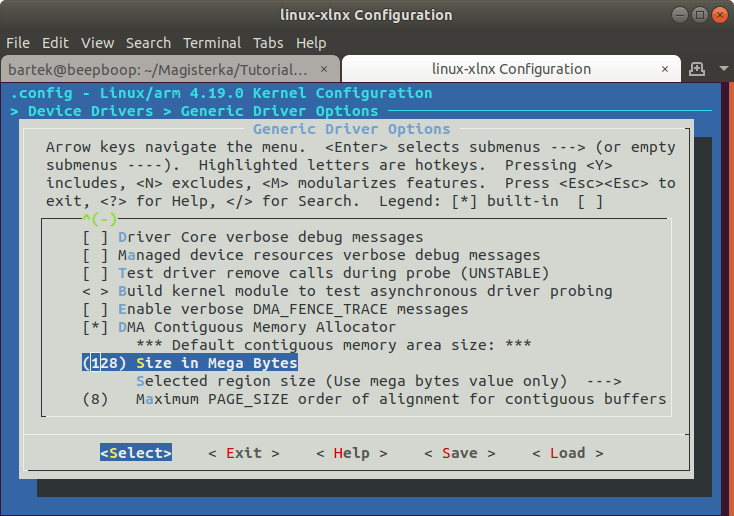
petalinux-config -c kernel
Make the following changes:
Device Drivers -> Generic Driver Options -> DMA Contiguous Memory Allocator -> Size in Mega Bytes change the size from 16 to 128 MB
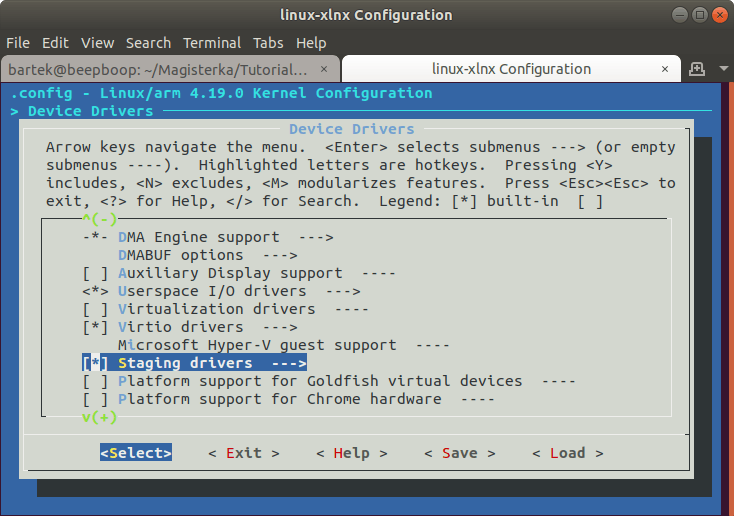
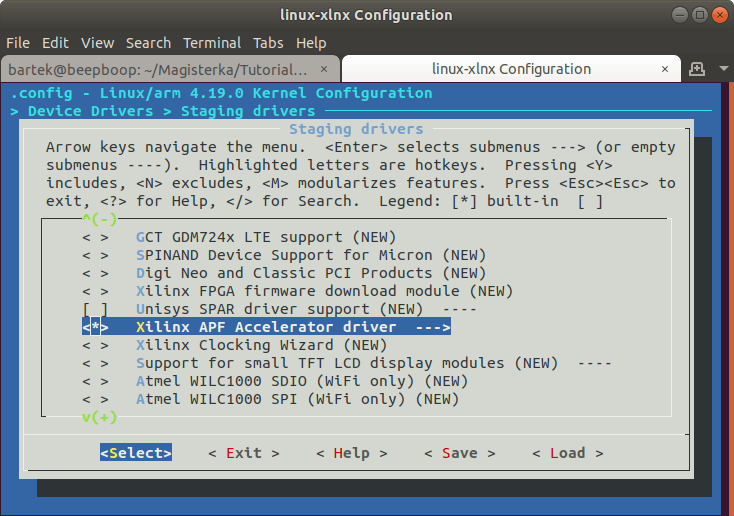
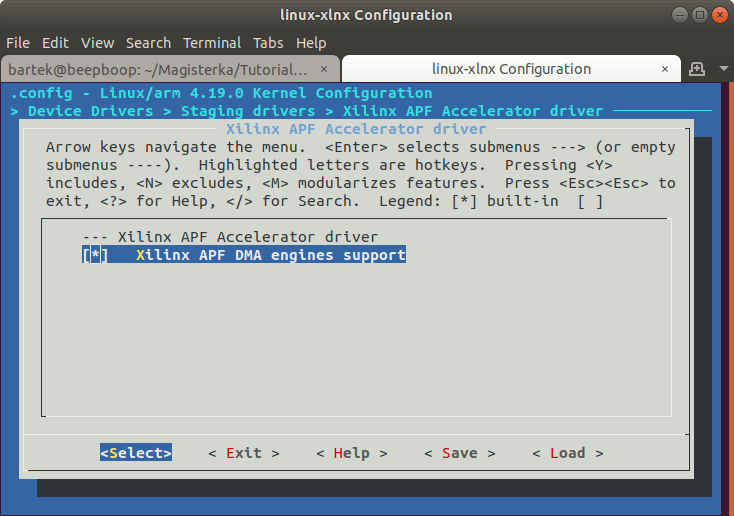
Device Drivers -> Staging drivers -> Xilinx APF Accelerator driver
Device Drivers -> Staging drivers -> Xilinx APF Accelerator driver -> Xilinx APF DMA engines support
Save and exit
Time to build our system!
petalinux-build; petalinux-build --sdk;The project should use the cache directory to speed up the build.
"petalinux-build" will generate files for ZYNQ to use.
petalinux-build --sdk will generate "sdk.sh" script that contains files for Vitis.
In the meantime
Prepare SD-CARD
We need to create two partitions on our SD-CARD one is for BOOT (/dev/mmcblk1p1) and one for ROOTFS (/dev/mmcblk1p2)
I will be using gparted for this step:
sudo gparted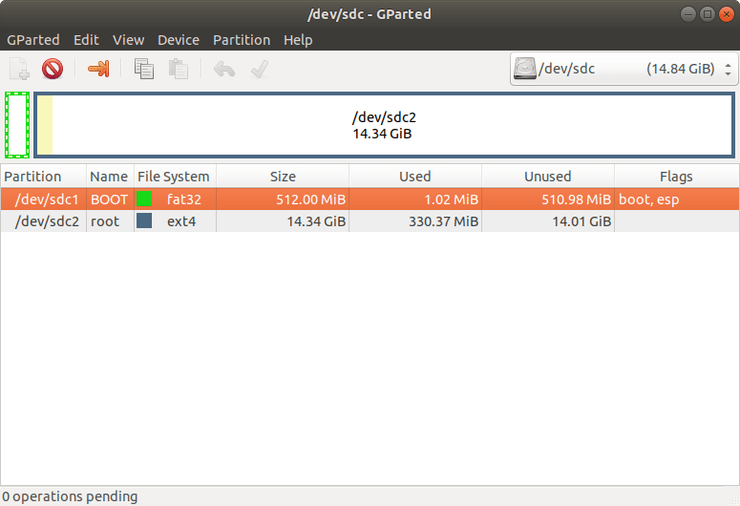
Create two partitions.
One fat32 "BOOT" with "boot, esp" flag.
Second ext4 "root"
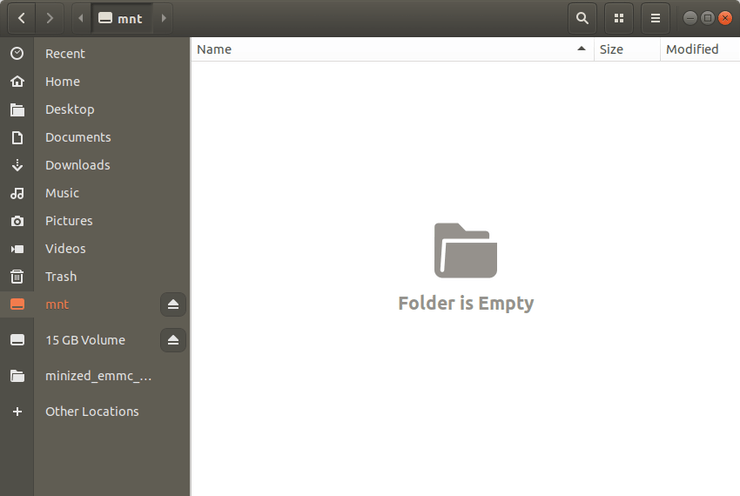
Now we need to mount our SD-CARD.
Create a temporary mounting directory:
cd ~;
mkdir mnt;
To see what devices are connected to our PC type:
ls -l /dev/ | grep sdMy SD card is named "sdc" and has two partitions "sdc1" - BOOT and "sdc2" - ROOT

We need to mount these.
To mount BOOT partition to /home/bartek/mnt type:
sudo mount /dev/sdc1 /home/bartek/mntThe second partition mounted automatically for me.
Copy files to SD-CARD
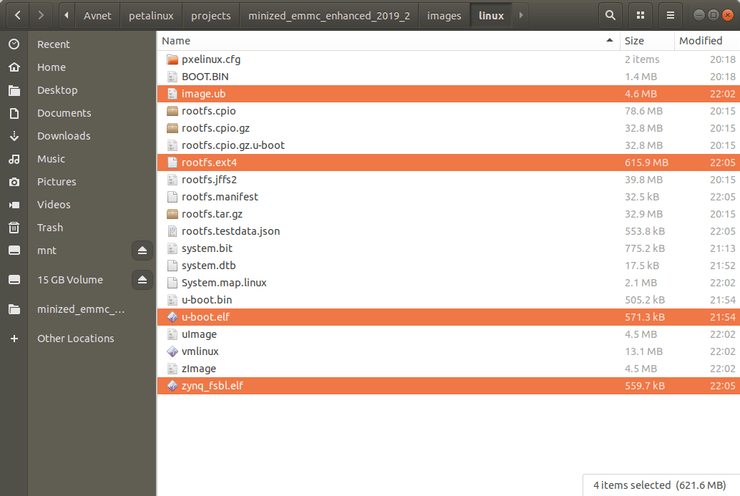
Go to minized_emmc_enhanced project and go to /images/linux
The files we need:
rootfs.cpio etc... are remnants from the older build.
Make new directories for image.ub and boot components, copy generated files to new folders.
mkdir imageDir;
mkdir bootComponents;
mkdir rootfs;

cp image.ub imageDir/image.ub;

cp u-boot.elf bootComponents/u-boot.elf;
cp zynq_fsbl.elf bootComponents/zynq_fsbl.elf;

cp rootfs.ext4 rootfs/rootfs.ext4;
imageDir should contain "image.ub"
bootComponents contain "u-boot.elf", "zynq_fsbl.elf"
rootfs contain "rootfs.ext4"
Go to rootfs and make new folder for mounting "rootfs.ext4"
cd rootfs;
mkdir mntpoint;
sudo mount rootfs.ext4 mntpoint;
Now type
sudo cp -rf mntpoint/* <second partition of SD-CARD>for me:
sudo cp -rf mntpoint/* /media/bartek/252142d1-65c2-4f9c-9e9b-89a4bb450dbdand copy "image.ub" to the first partition.
Go to "imageDir" and type:
sudo cp image.ub /home/bartek/mntAfter copying remember to use "sync" to prevent data loss.
syncUnmount file systems.
sudo umount /home/bartek/mntSD-CARD is ready. Put it into PMOD.
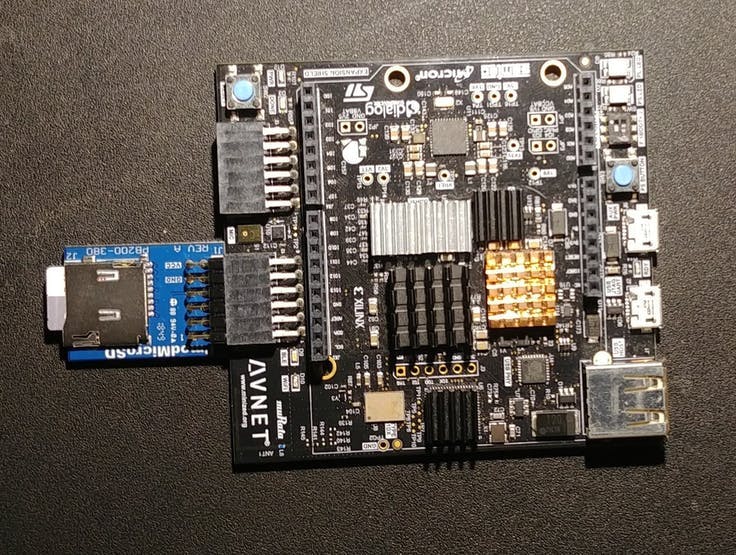
Let's try to boot it
Go to Petalinux project and type:
petalinux-boot --jtag --fpga --u-bootOpen your favorite terminal (I'm using CuteCom).
The default password for root is root.
root
root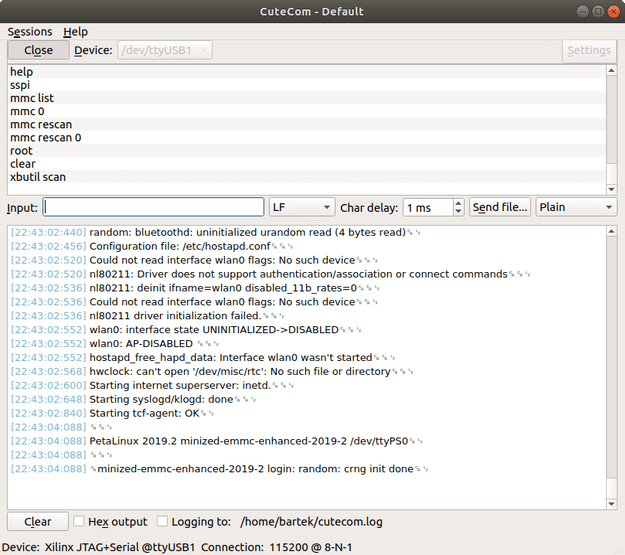
Now check if XRT is initialized successfully:
xbutil scan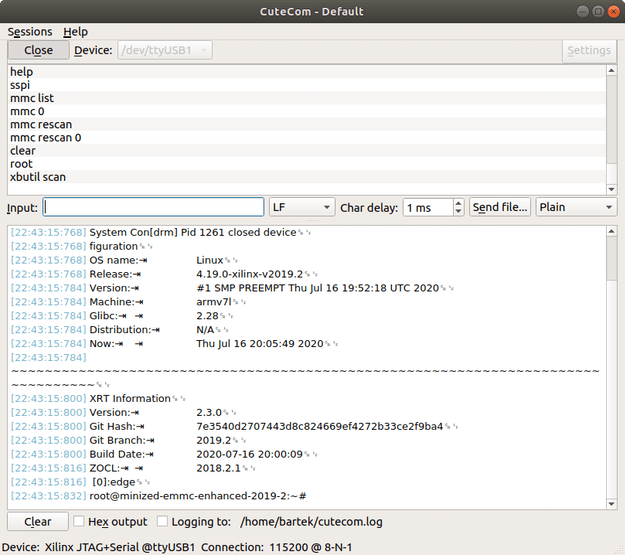
XRT have detected [0] Edge device, so its all good.
Create bif file
We need to create bif file, that Vitis will use to generate BOOT.BIN for our system.
gedit output.bifBif should look like this:
//arch = zynq; split = false; format = BIN
the_ROM_image:
{
     [bootloader] <zynq_fsbl.elf>
     <bitstream>
     <u-boot.elf>
}
Create Vitis Minized Acceleration Platform
We will need to extract data from "sdk.sh" generated by "petalinux-build --sdk"
for this, we go to our
Avnet/petalinux/projects/minized_emmc_enhanced_2019_2/images/linux
folder and type:
./sdk.shAnd choose output location:
../linux/The files will be extracted in images/linux/sysroots folder.
Open Vitis and create new platform project
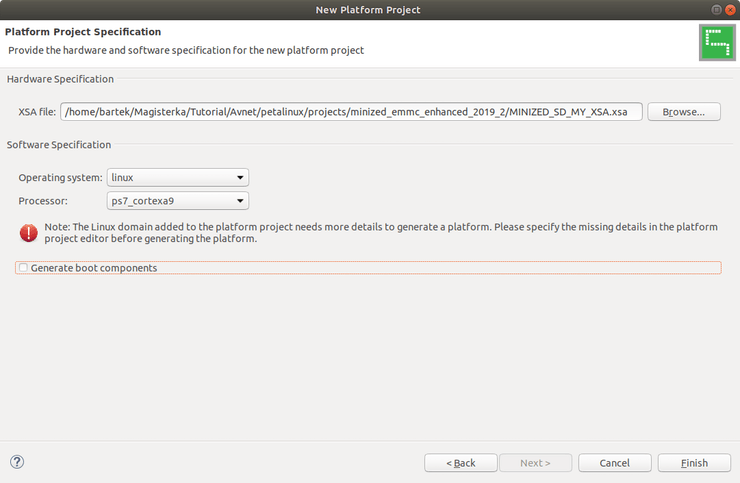
Click "Finish"

Select "zynq_fsbl.elf" in bootComponents
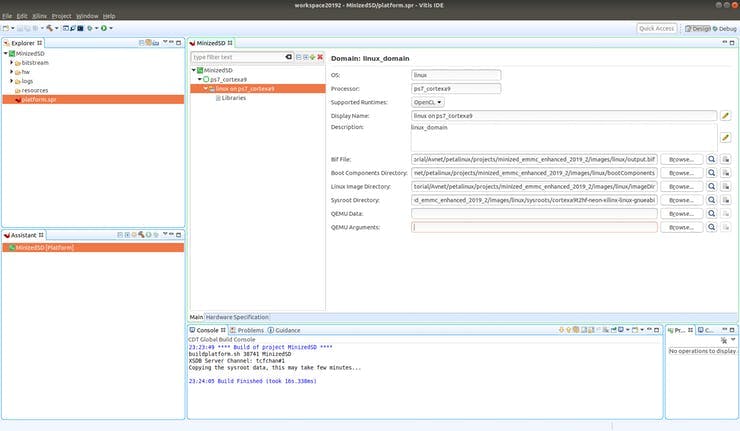
Select all the other files and build platform
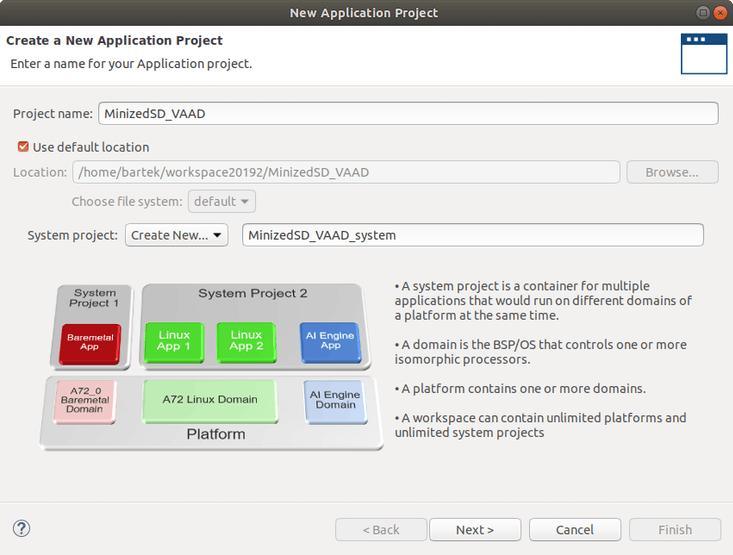

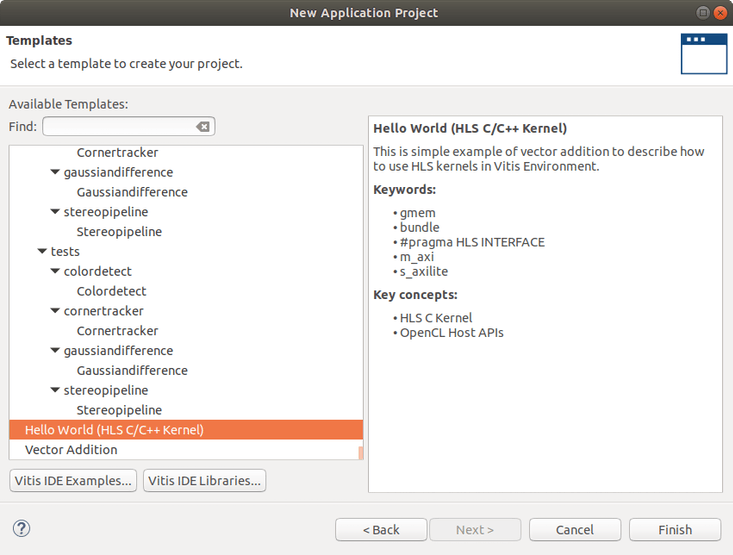
Create new application based on MinizedSD platform
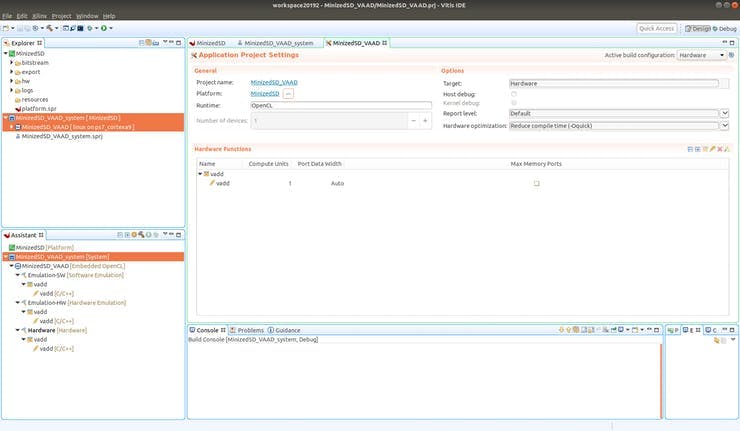
Change target to "Hardware"
And build project.
After build finishes copy "MinizedSD_APP.exe" and "vadd.xclbin" to your "/home/root" folder on SD-card.
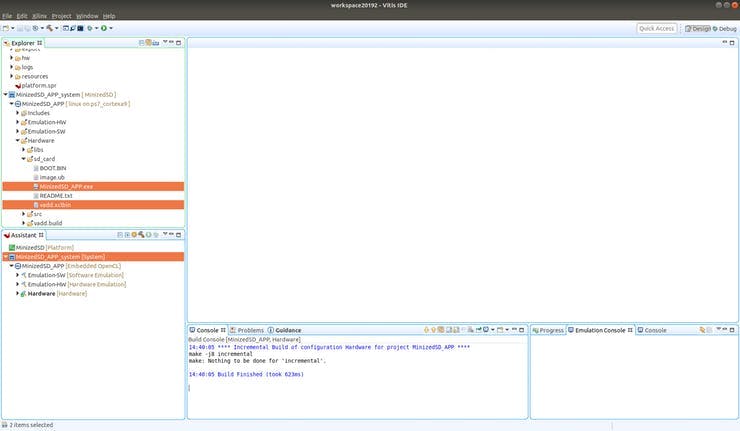
As you can see from console log:
sdcard_gen --xpfm /home/bartek/workspace20192/MinizedSD/export/MinizedSD/MinizedSD.xpfm --sys_config MinizedSD --bif /home/bartek/workspace20192/Minized_APP_system/Debug/system.bif --no_bitstream --sd_file /home/bartek/workspace20192/Minized_APP/Hardware/Minized_APP.exe
Vitis didn't packed our new bitstream in system project. To bypass this we could create our own BOOT.BIN
Click XIlinx -> Create boot image

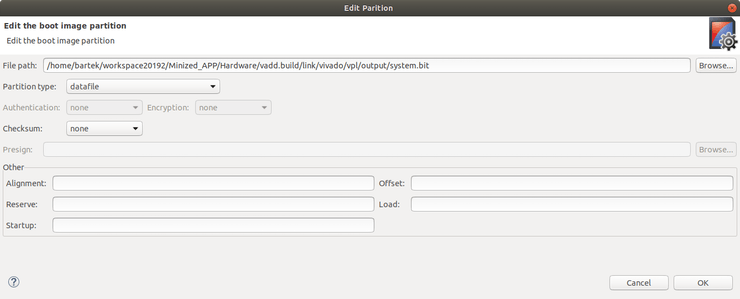
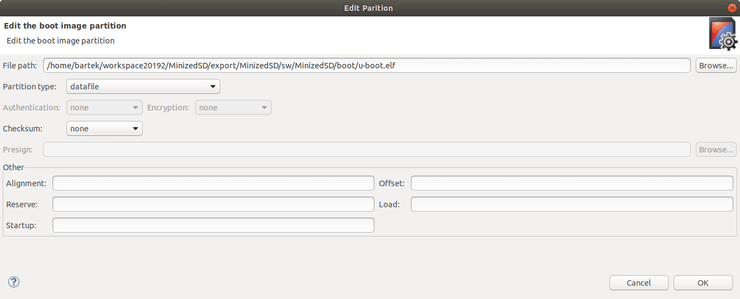
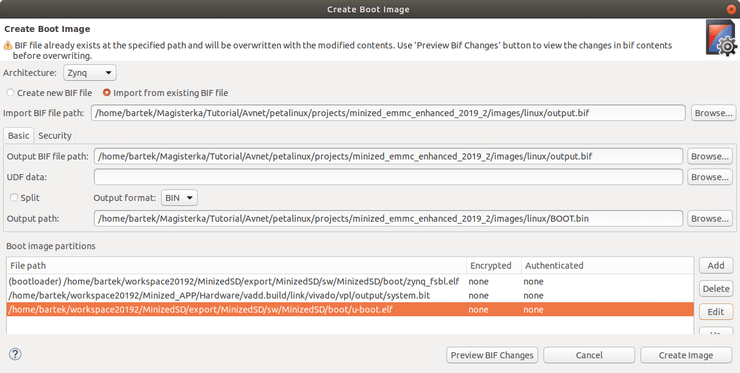
And click "Create Image"
In the top left corner
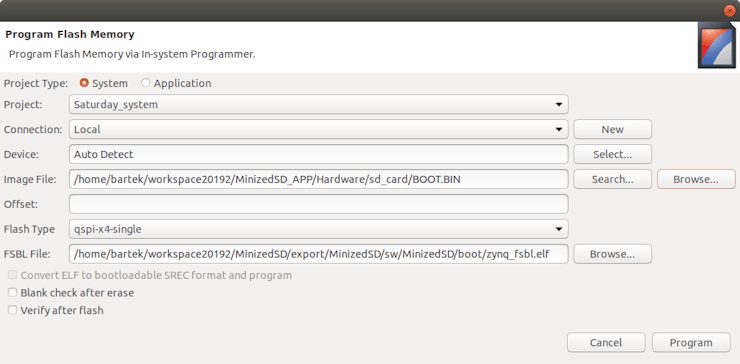
Click Xilinx -> Program Flash
Set Minized to JTAG mode, find new BOOT.BIN and click "program"

OR
Use BOOT.BIN generated by Vitis in application SD-CARD folder.

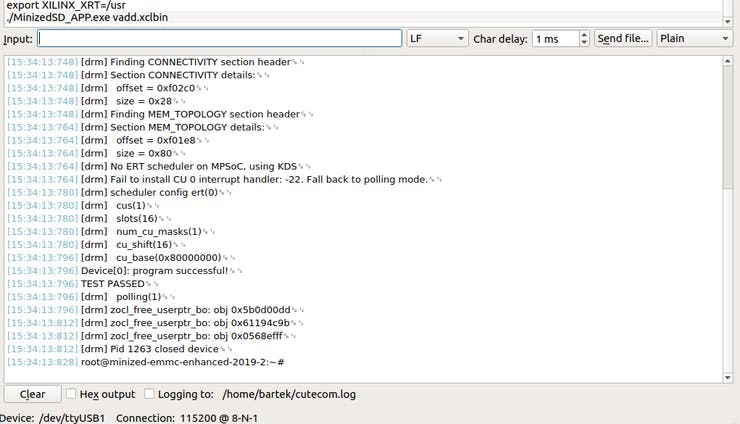
Turn on your Minized in QSPI boot mode, and in terminal write:
export XILINX_XRT=/usrAnd run our example program!
./MinizedSD_APP.exe vadd.xclbin
End
Thank you for your time.
I wish you successful projects!