I previously wrote about Board Definitions in this blog:
How to Leverage Board Presets to Accelerate Your Vivado Design
That blog discussed creating your own Board Repo to add Board Definitions. Vivado has a built-in way to do this graphically, pulling the Board Definitions from a resource called the Xilinx Board Store. The purpose of this blog is to show an alternative way to add Board Definitions to Vivado. It is not intended that you do them both, so pick which method you prefer!
These screenshots come from Vivado 2020.2 running on the Avnet-recommend Linux Virtual Machine.
After you open Vivado, create a new project. In the dialog to select the Part, select the Boards tab, and then click on the button Install/Update Boards.
You'll get a notification that you are about to install board files. Click OK.
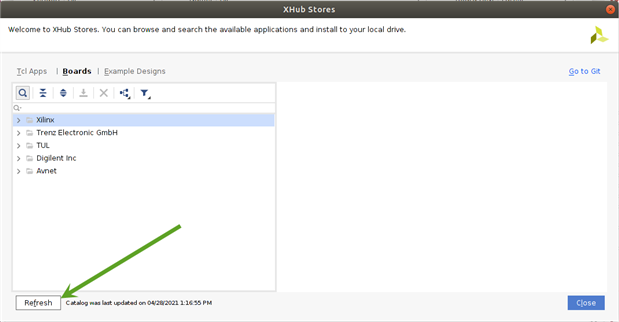
The next screen takes you to the XHub Stores. MAKE SURE YOU CLICK REFRESH. Otherwise, what you see will be out-dated.
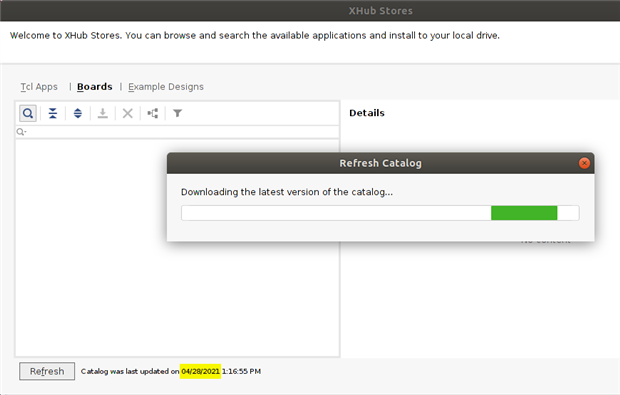
You'll see that Vivado is Downloading the latest version of the catalog. Notice in this screenshot that my previous catalog was dated April 28th.
After the update, the Catalog should be dated with the current date.
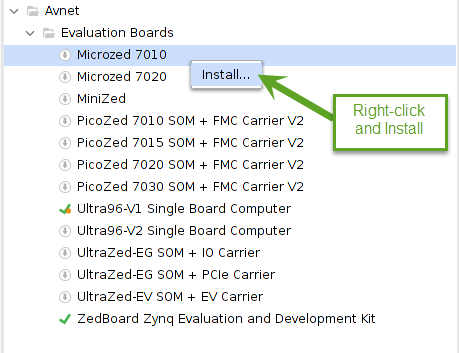
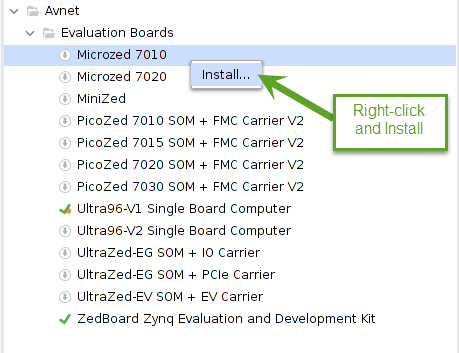
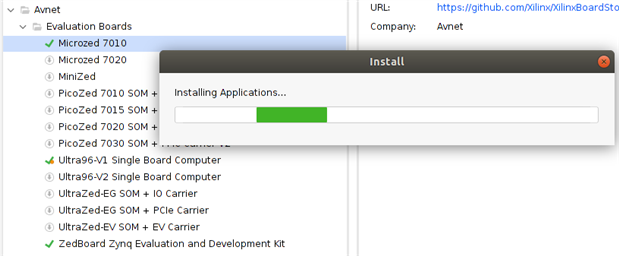
Next, I'll show examples for adding the Avnet boards. You can do this for each Vendor. In this next example, I have expanded Avnet > Evaluation Boards, at which point you see all the Avnet boards that you can add to your Vivado install. In this screenshot, you'll notice the green checkmark in front of ZedBoard (meaning I already installed it), and a green checkmark with orange dot in front of Ultra96-V1 (meaning I installed it previously but there is an update available). To install any one board, you select that board, then right-click and select Install.
You can also install multiple boards at once by shift-clicking to select multiple boards, then right-click and select Install.
Once you click Install, it will take a minute or two while it downloads and populates the various boards in your local Repo.
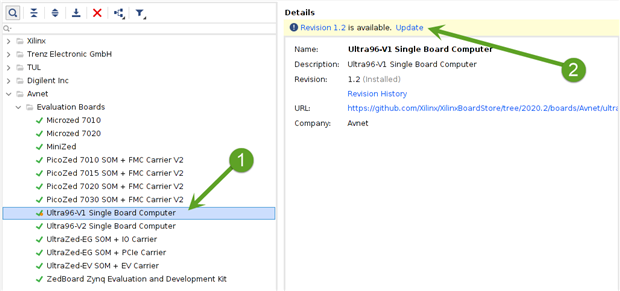
Here you see what it looks like after installing all of them, but note that you still see the green checkmark with orange dot in front of Ultra96-V1. Performing an Install will NOT perform an Update. You must do that separately. Here you see that I select the Ultra96-V1, and then click on Update.
At that point, you'll be warned that you are about to overwrite the definition for that board in your local Repo, so click OK.
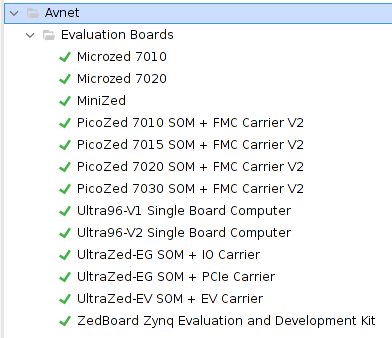
And now you see everything is checked and up-to-date.
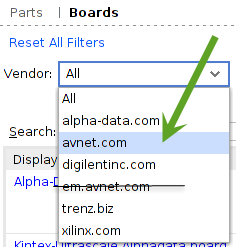
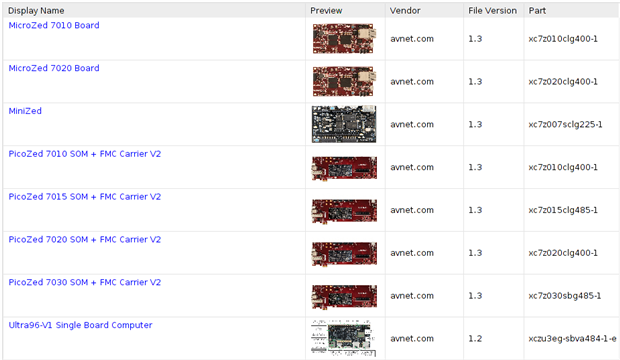
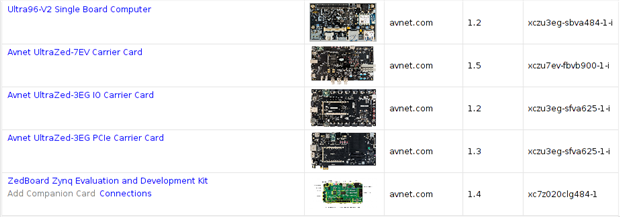
Click Close to close the Board Installation dialog. Now, back in the Part selection with the Boards tab selecting, you can choose the Vendor. To find the latest Avnet files, you should select "avnet.com" from the list. The "em.avnet.com" points to out-dated files that will be removed in 2021 tools.
With "avnet.com" selected, now you can select any of the boards that were just installed to your local Repo.
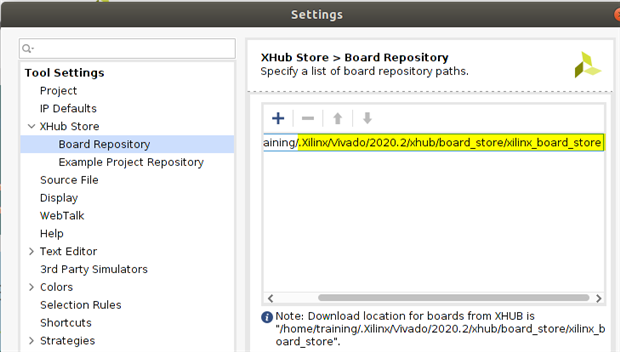
If you are wondering where that local Repo came from, it is something that Vivado automatically created for you. It is linked now automatically in your Vivado tools. You can see this by selecting Tools > Settings > XHub Store > Board Repository. For my installation, this is point in my Home directory (/home/training) at the path highlighted below.
With the Board Definitions in place, you can now move on to developing a hardware platform and simple Vitis applications, as described here:
Developing Simple Applications in Xilinx Vitis for Ultra96-V2
Buy Ultra96-V2Buy Ultra96-V2
Buy UltraZed-EG Starter KitBuy UltraZed-EG Starter Kit
Buy UltraZed-EV Starter KitBuy UltraZed-EV Starter Kit
Buy MicroZed Evaluation KitBuy MicroZed Evaluation Kit
Buy MiniZedBuy MiniZed




Top Comments
-

spinden
-
Cancel
-
Vote Up
+1
Vote Down
-
-
Sign in to reply
-
More
-
Cancel
Comment-

spinden
-
Cancel
-
Vote Up
+1
Vote Down
-
-
Sign in to reply
-
More
-
Cancel
Children