element14 Community
element14 Community
    Register Log In
  • Site
  • Search
  • Log In Register
  • About Us
  • Community Hub
    Community Hub
    • What's New on element14
    • Feedback and Support
    • Benefits of Membership
    • Personal Blogs
    • Members Area
    • Achievement Levels
  • Learn
    Learn
    • Ask an Expert
    • eBooks
    • element14 presents
    • Learning Center
    • Tech Spotlight
    • STEM Academy
    • Webinars, Training and Events
    • Learning Groups
  • Technologies
    Technologies
    • 3D Printing
    • FPGA
    • Industrial Automation
    • Internet of Things
    • Power & Energy
    • Sensors
    • Technology Groups
  • Challenges & Projects
    Challenges & Projects
    • Design Challenges
    • element14 presents Projects
    • Project14
    • Arduino Projects
    • Raspberry Pi Projects
    • Project Groups
  • Products
    Products
    • Arduino
    • Avnet Boards Community
    • Dev Tools
    • Manufacturers
    • Multicomp Pro
    • Product Groups
    • Raspberry Pi
    • RoadTests & Reviews
  • Store
    Store
    • Visit Your Store
    • Choose another store...
      • Europe
      •  Austria (German)
      •  Belgium (Dutch, French)
      •  Bulgaria (Bulgarian)
      •  Czech Republic (Czech)
      •  Denmark (Danish)
      •  Estonia (Estonian)
      •  Finland (Finnish)
      •  France (French)
      •  Germany (German)
      •  Hungary (Hungarian)
      •  Ireland
      •  Israel
      •  Italy (Italian)
      •  Latvia (Latvian)
      •  
      •  Lithuania (Lithuanian)
      •  Netherlands (Dutch)
      •  Norway (Norwegian)
      •  Poland (Polish)
      •  Portugal (Portuguese)
      •  Romania (Romanian)
      •  Russia (Russian)
      •  Slovakia (Slovak)
      •  Slovenia (Slovenian)
      •  Spain (Spanish)
      •  Sweden (Swedish)
      •  Switzerland(German, French)
      •  Turkey (Turkish)
      •  United Kingdom
      • Asia Pacific
      •  Australia
      •  China
      •  Hong Kong
      •  India
      •  Korea (Korean)
      •  Malaysia
      •  New Zealand
      •  Philippines
      •  Singapore
      •  Taiwan
      •  Thailand (Thai)
      • Americas
      •  Brazil (Portuguese)
      •  Canada
      •  Mexico (Spanish)
      •  United States
      Can't find the country/region you're looking for? Visit our export site or find a local distributor.
  • Translate
  • Profile
  • Settings
PiCasso Design Challenge
  • Challenges & Projects
  • Design Challenges
  • PiCasso Design Challenge
  • More
  • Cancel
PiCasso Design Challenge
Blog Hologram Pi-ramid - Electronic Parts
  • Blog
  • Forum
  • Documents
  • Polls
  • Files
  • Events
  • Mentions
  • Sub-Groups
  • Tags
  • More
  • Cancel
  • New
  • Share
  • More
  • Cancel
Group Actions
  • Group RSS
  • More
  • Cancel
Engagement
  • Author Author: luislabmo
  • Date Created: 29 May 2019 1:39 AM Date Created
  • Views 882 views
  • Likes 6 likes
  • Comments 2 comments
  • pla
  • picasso
  • rpi 3b+
  • addressable led
  • raspberri pi
  • plexiglass
  • ws2812b
  • touchscreen
  • luislab
  • acrylic_welding
  • acrylic
Related
Recommended

Hologram Pi-ramid - Electronic Parts

luislabmo
luislabmo
29 May 2019

I'm finally heading to the conclusion of this project which I have enjoyed beginning-to-end. Essentially this project will use a Raspberry Pi 3B+ and a Raspberry Pi Touch Display to work, but I've added as a bonus a few custom made PCBs and will add a Camera Module V2 to try making it more interesting.


The custom made PCBs have arrived which means is time to gather all the components needed and to start assembling the electronics!.

image

Electronics

BOM

  • 1 x Raspberry Pi 3B+
  • 1 x Raspberry Pi Touch Display
  • 1 x Camera Module V2
  • 4 x M3-0.50 x 4mm Socket Head Cap Screws (to secure the Touchscreen to 3D printed frame)
  • 4 x #2 x 1/4" Slotted Round Head Screws (to secure the Camera to the 3D printed frame)
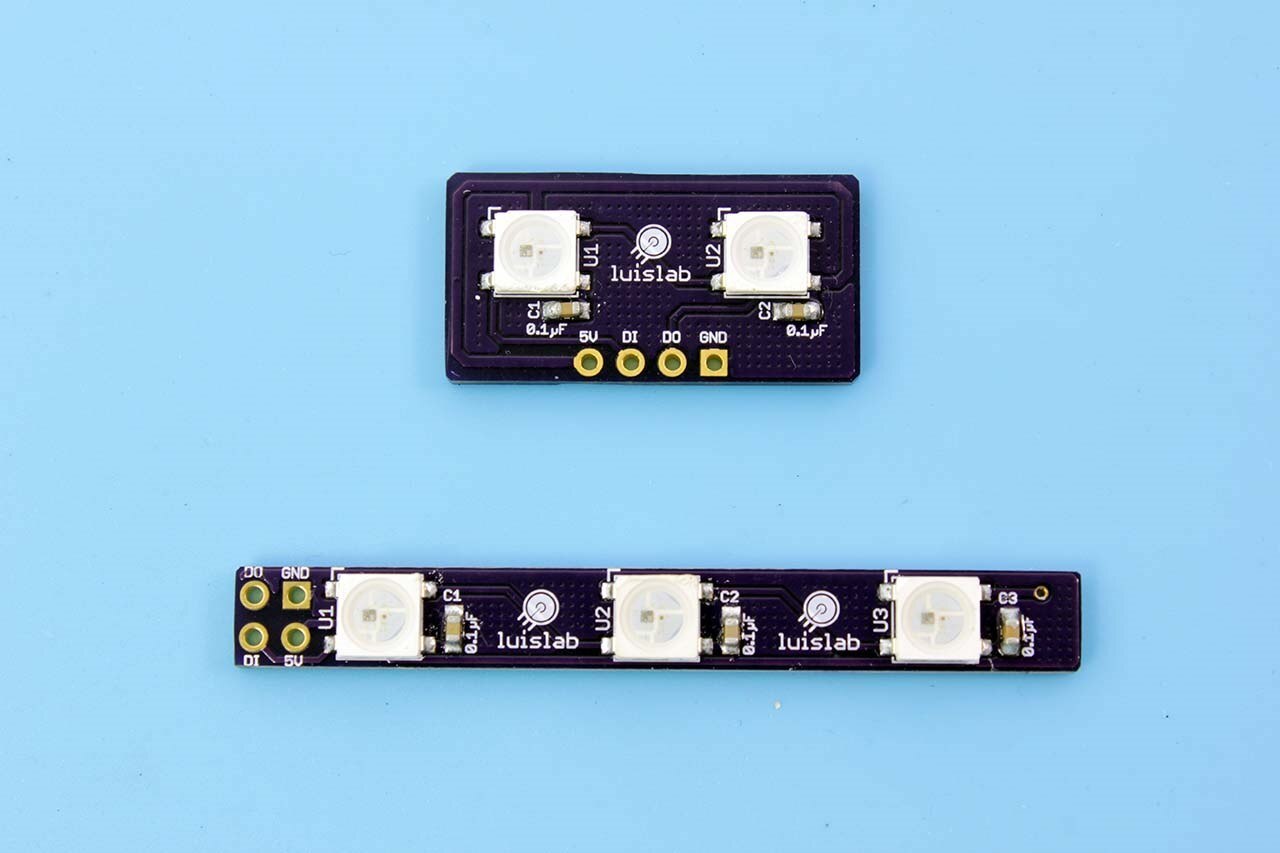
  • 5 x WS2812B Addressable RGB LED
  • 5 x 0.1µF, 6.3V Ceramic Capacitor, 0603[1608]
  • 1 x 0.1" pitch (2.54 mm) Female Header: 1x4-Pin, Straight
  • 1 x 0.1" pitch (2.54 mm) Male Header: 1x4-Pin, Straight
  • Stranded Wire: Various colors, 26/28 AWG
  • Heat-shrink tube


Custom made electronics prep work


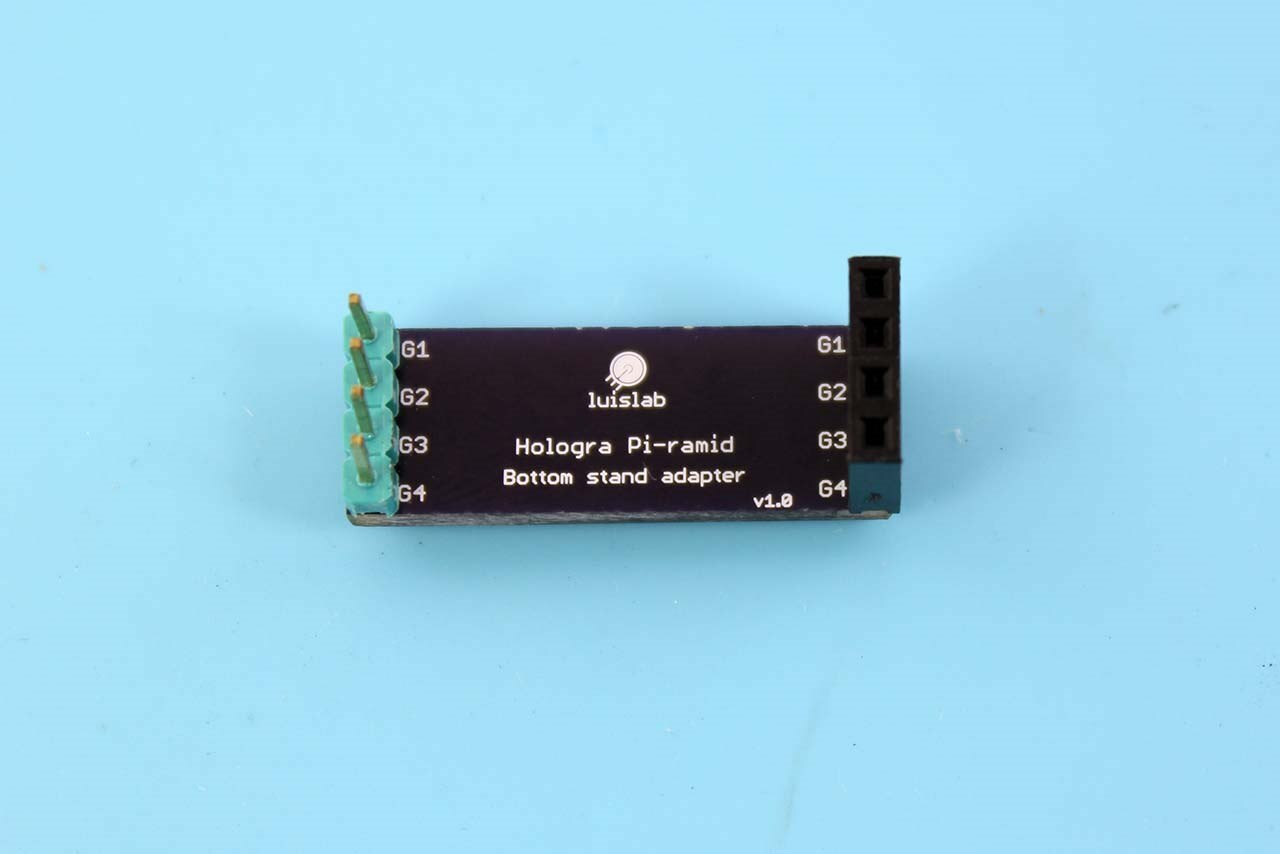
{gallery:width=960,height=768,autoplay=false} Custom made electronics

image

Hologram Pi-ramid: Custom made PCBs

image

Hologram Pi-ramid: Custom made PCB

image

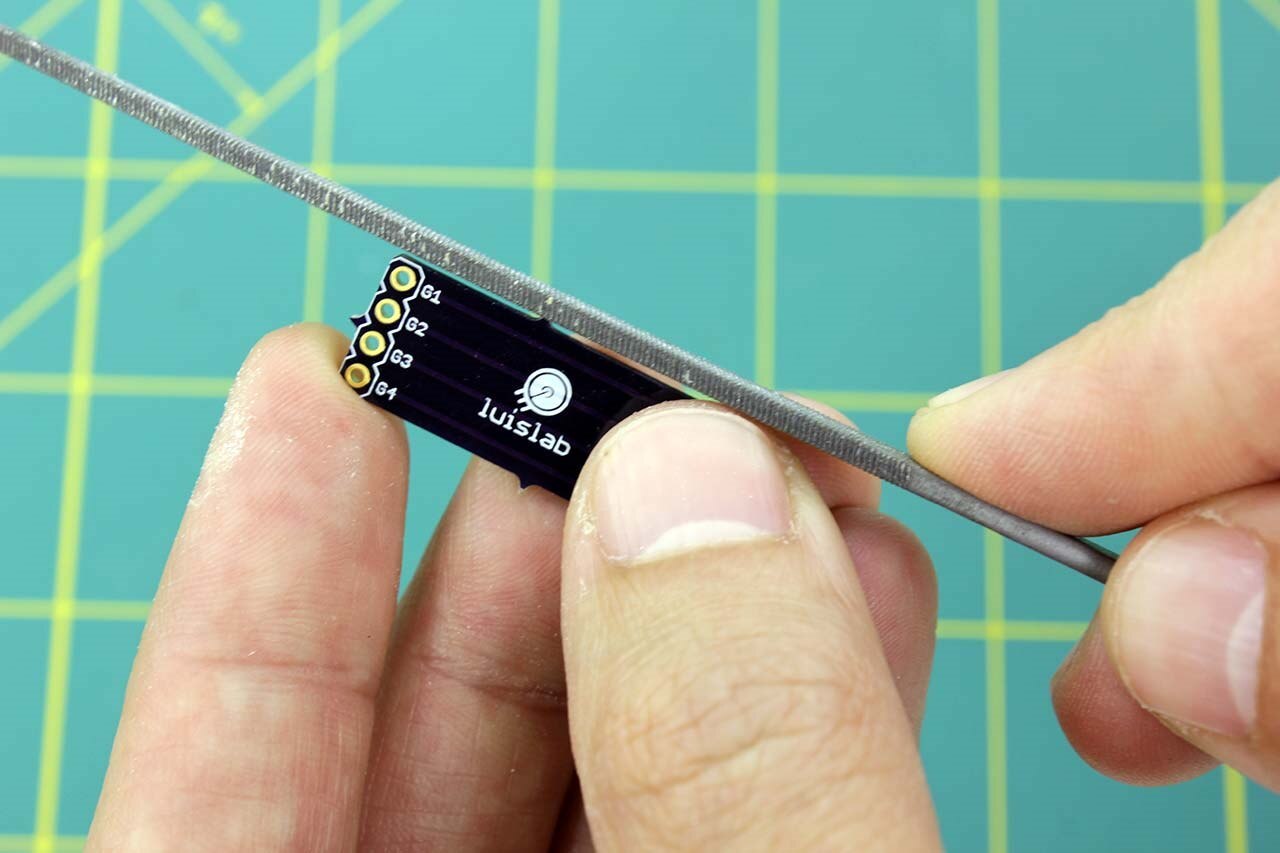
Hologram Pi-ramid: Preparing PCBs

image

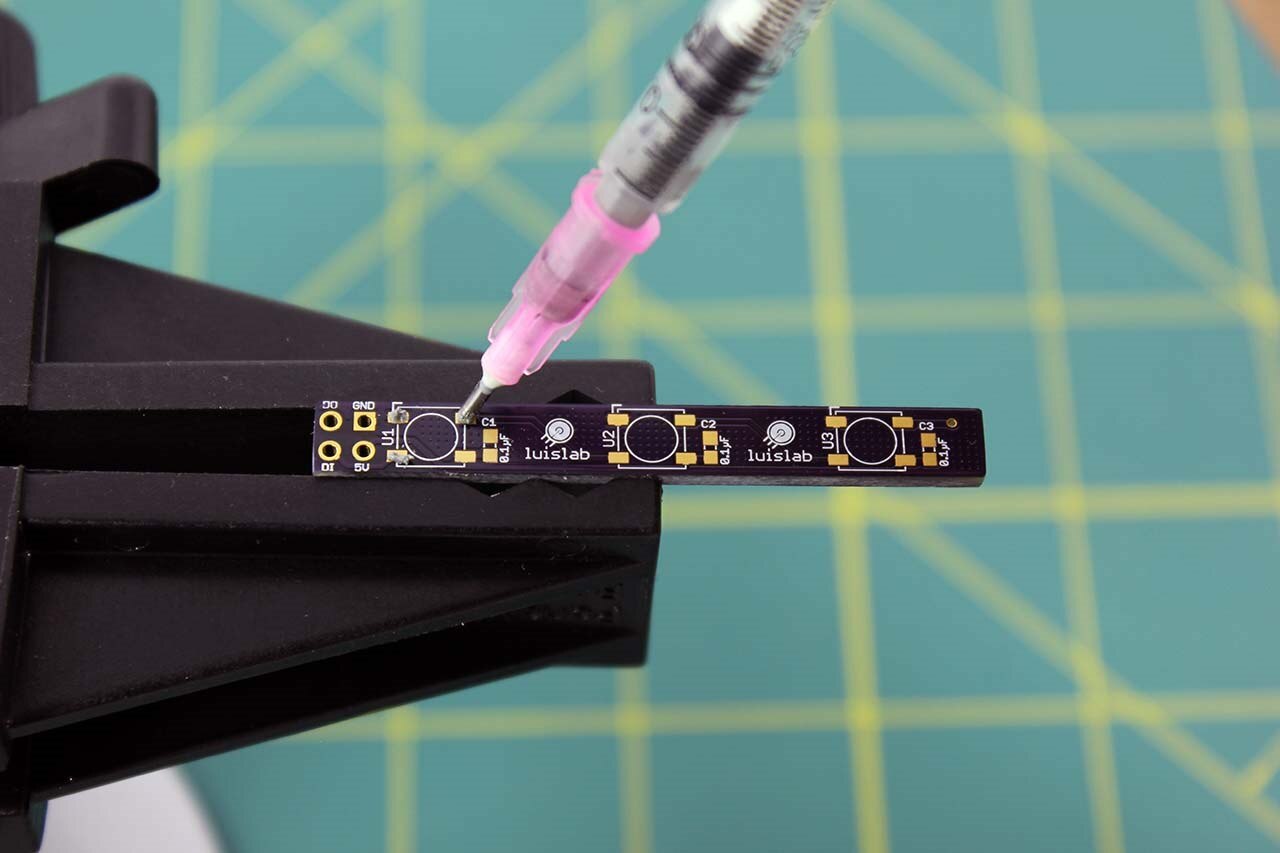
Hologram Pi-ramid: Applying solder paste

image

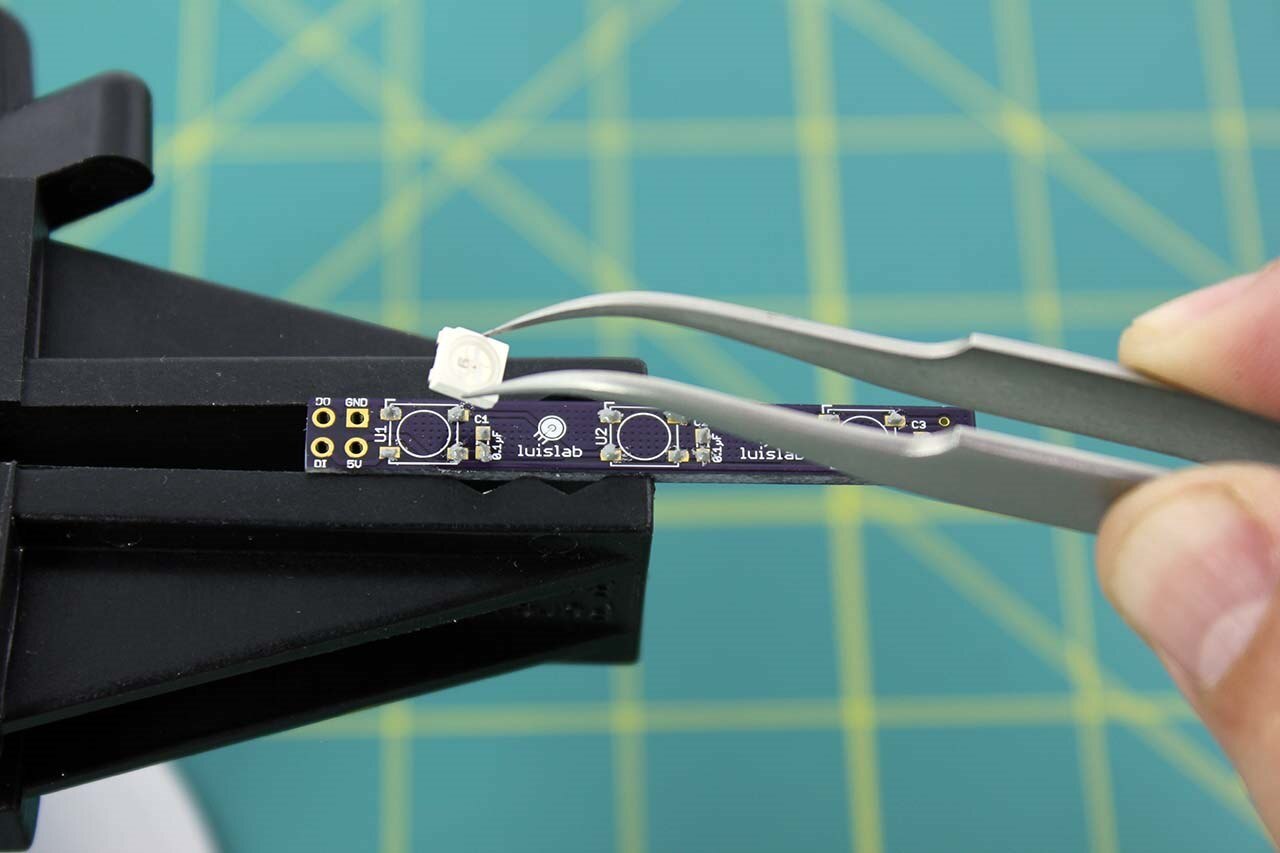
Hologram Pi-ramid: Manually placing SMD

image

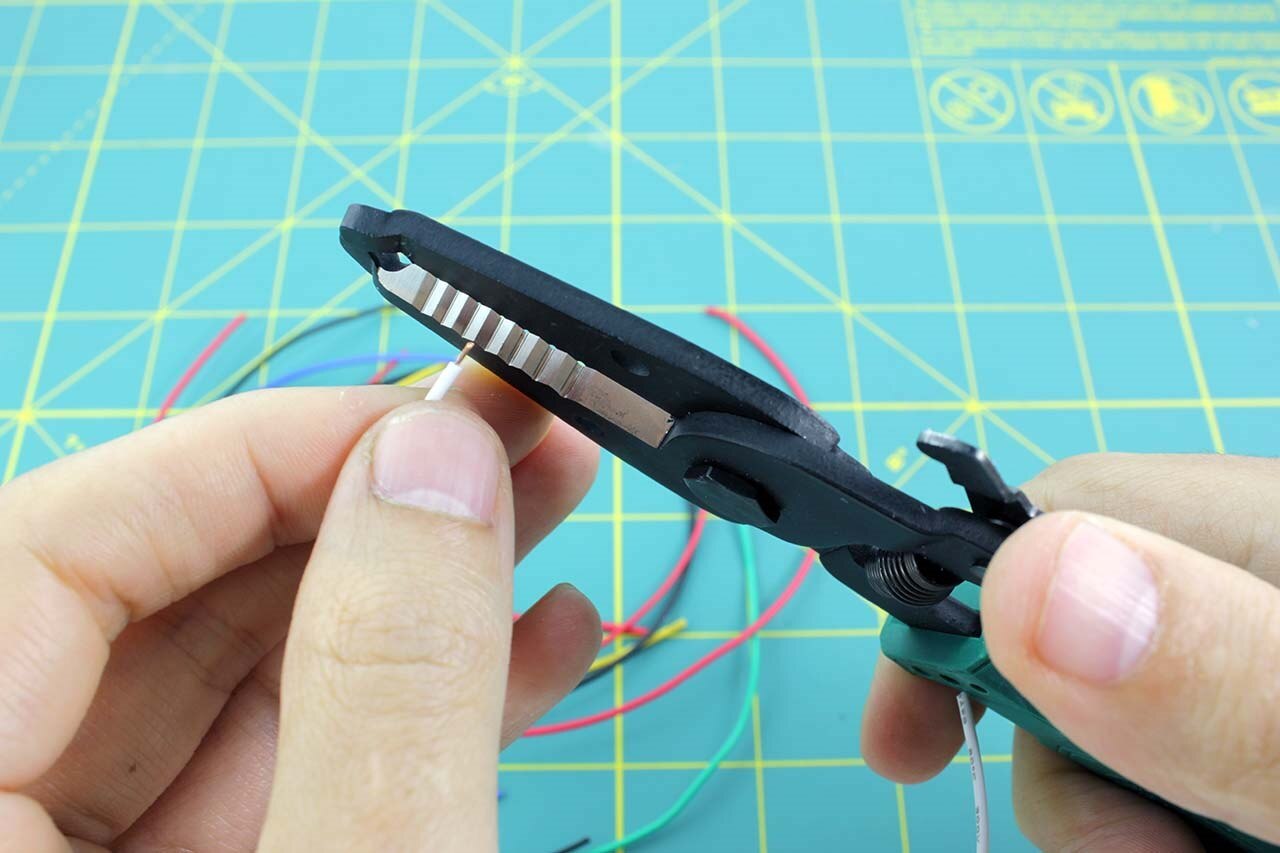
Hologram Pi-ramid: Wire stripping

image

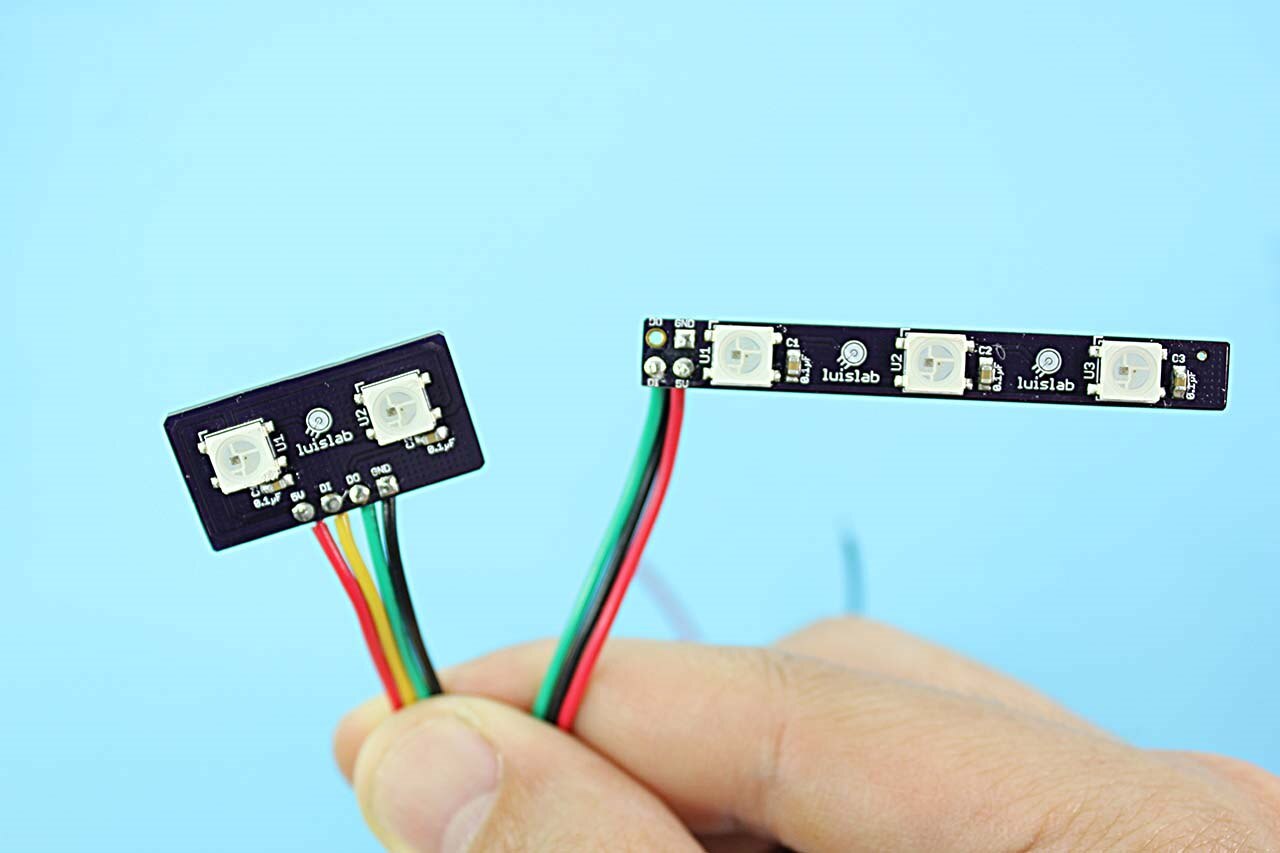
Hologram Pi-ramid: PCBs ready to install


Testing the WS2812B with Python

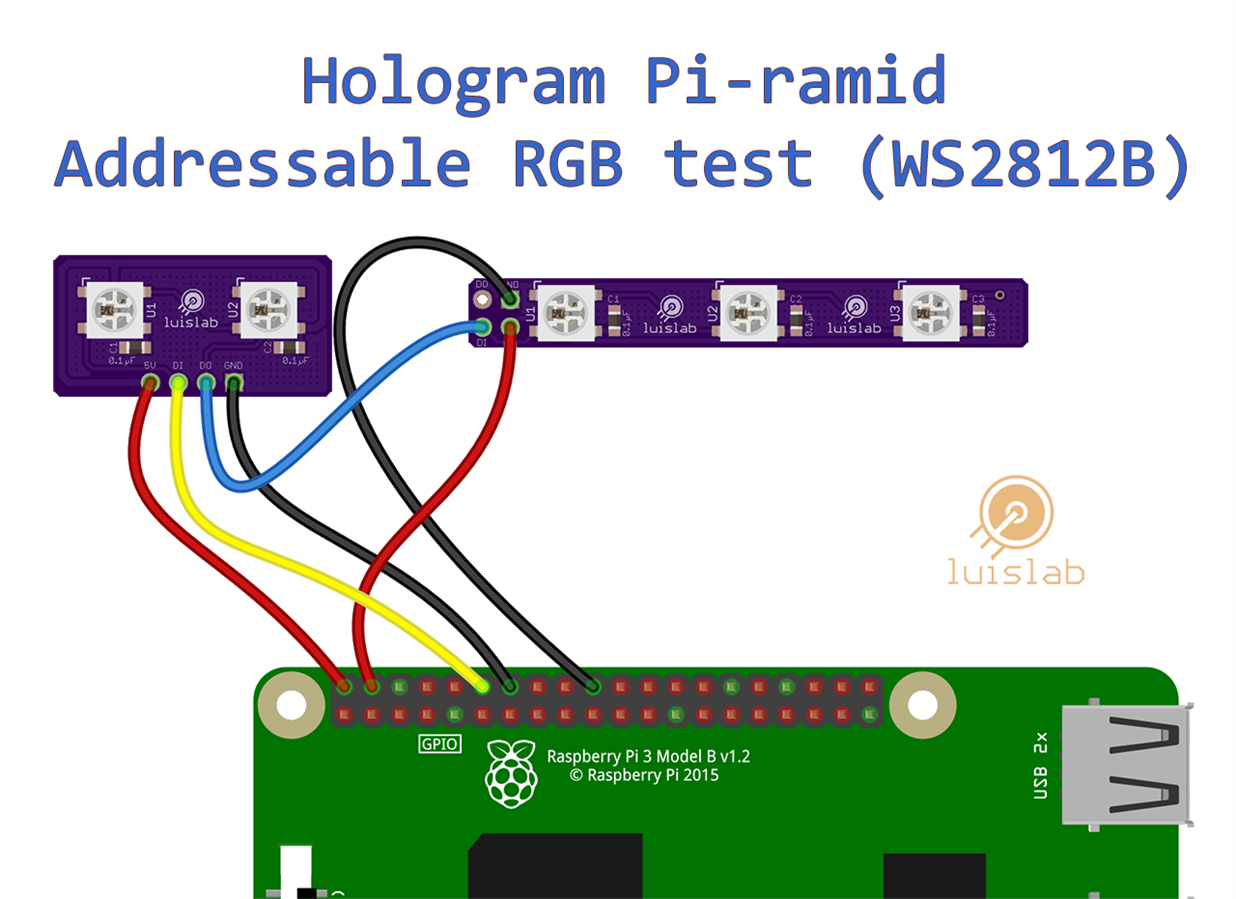
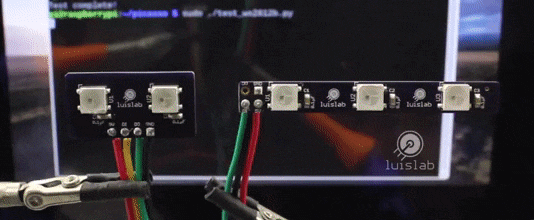
To make sure the WS2812B Addressable RGB LEDs work correctly (all of them) I wrote a simple Python sketch, that lights every LED with different colors for a fraction of a second, the LEDs should be connected as below picture which is how they will assembled into the project as well.

image

NeoPixel Library for Python

There are several libraries out there for controlling WS2812B LEDs with Python and a Raspberry Pi, perhaps the Neopixel is the easiest and the most popular library out there.


To install the Neopixel library I ran the following command:

sudo pip3 install rpi_ws281x adafruit-circuitpython-neopixel


Python RGB test code

When I was reviewing the :GAME ZIP 64 for the BBC micro:bit I remember I had this strange issue where a single RGB LED won't light blue -scenario which I accounted for; the script will turn on each RGB channel independently, then it will turn on the RGB channels in pairs and finally will do few random combinations (all RGB channels combined).


#!/usr/bin/env python3
# # -*- coding: utf-8 -*-


# Tests WS2812B Addressable LED with basic color pattern and some random RGB
#
# Luis Ortiz - luislab.com
# May 19, 2019


import board
import neopixel
import random
from time import sleep
import subprocess


numLEDs = 5


ledStrip = neopixel.NeoPixel(board.D18,
                             numLEDs,
                             brightness=0.01,
                             auto_write=True)


ledPos  = 0


seqNumber = 1
seqArray = [[0, 0, 0],
            [1, 0, 0],
            [0, 1, 0],
            [0, 0, 1],
            [0, 1, 1],
            [1, 0, 1],
            [1, 1, 0],
            [1, 1, 1]]


R = G = B = 0


try:
    while True:
        if (seqNumber < 8):
            R = seqArray[seqNumber][0]*255
            G = seqArray[seqNumber][1]*255
            B = seqArray[seqNumber][2]*255
        elif (seqNumber <= 13 and ledPos == 0):
            R = random.randint(0, 255)
            G = random.randint(0, 255)
            B = random.randint(0, 255)


        ledStrip[ledPos] = (R, G, B)


        ledPos = (ledPos + 1) % numLEDs


        if (ledPos == 0):
            seqNumber = (seqNumber + 1) % 14


        sleep(0.20)


except KeyboardInterrupt:
    ledStrip.fill((0, 0, 0))
    print("\nTest complete!")


image


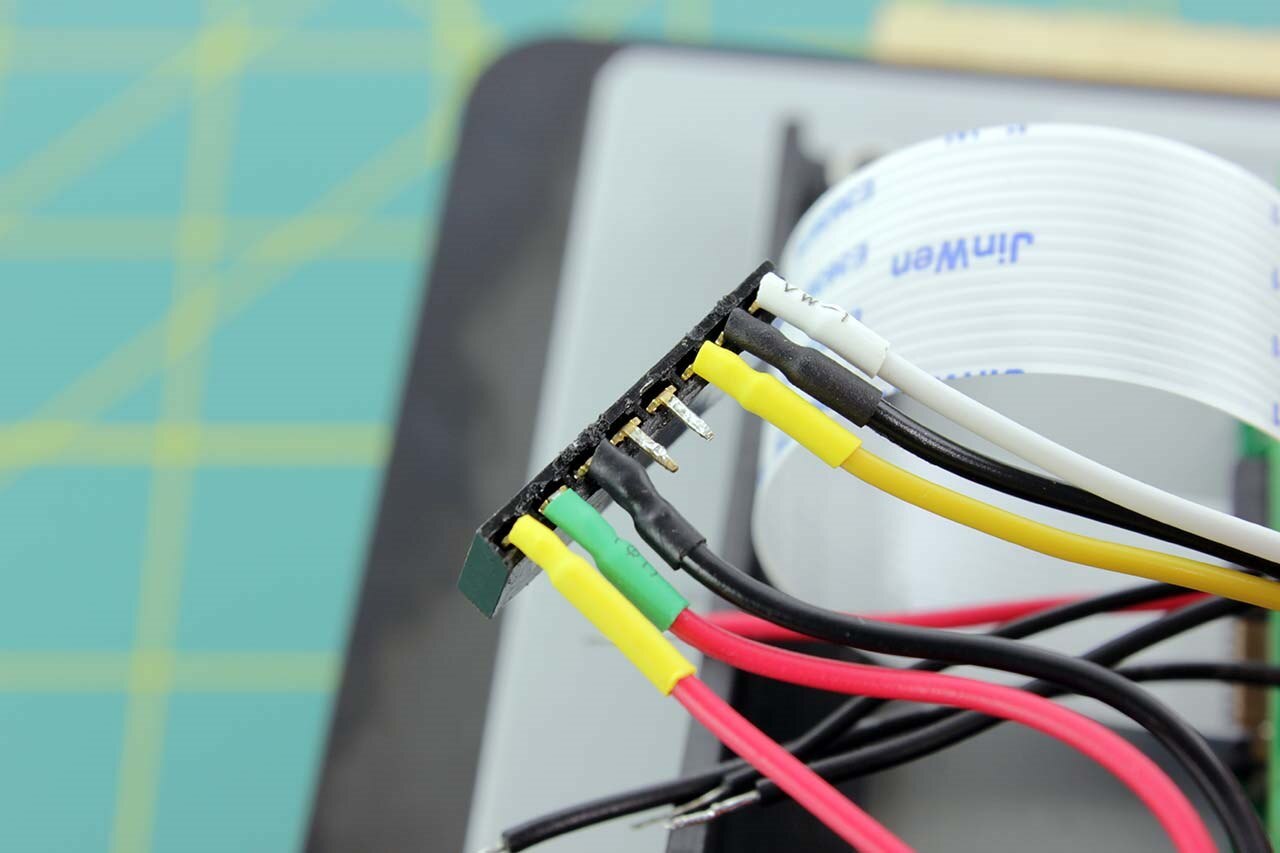
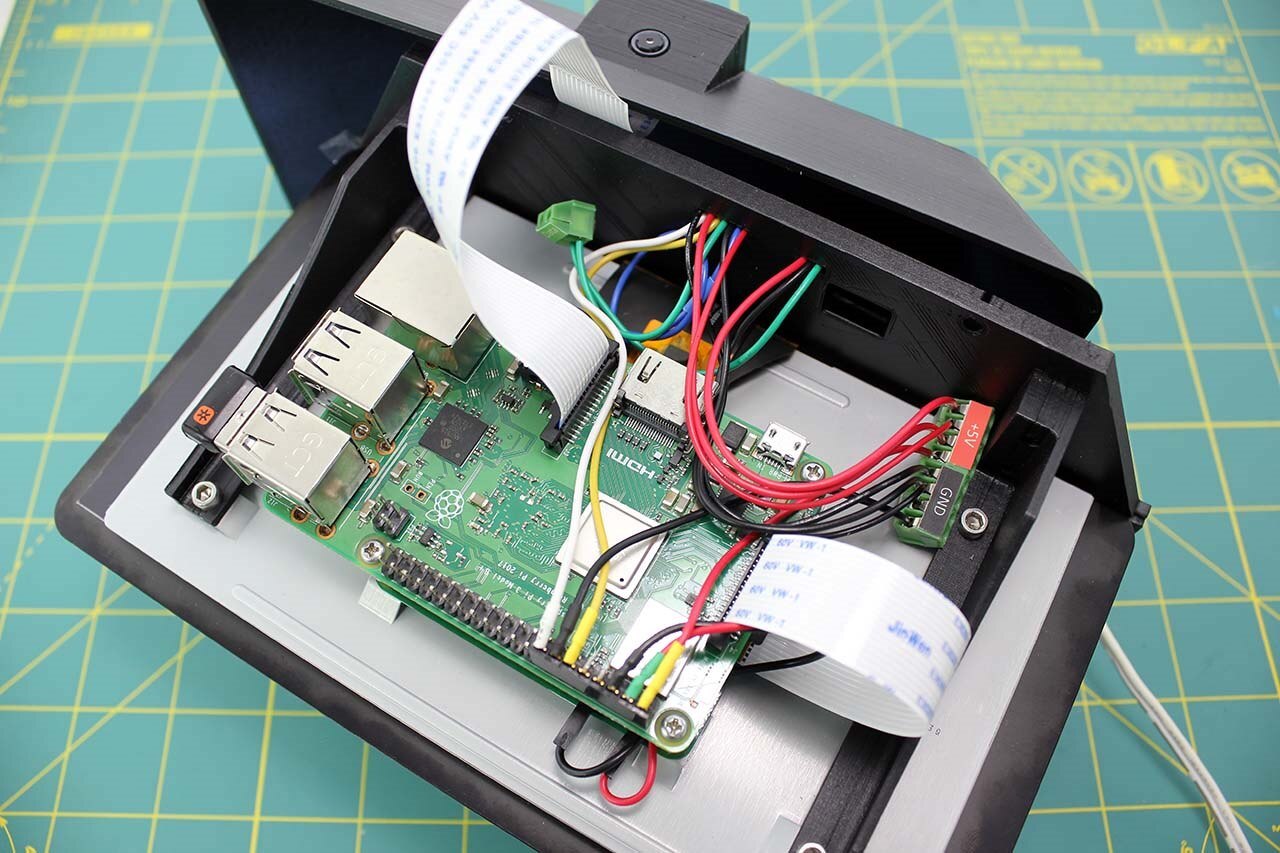
After the testing is complete I continued with the assembly

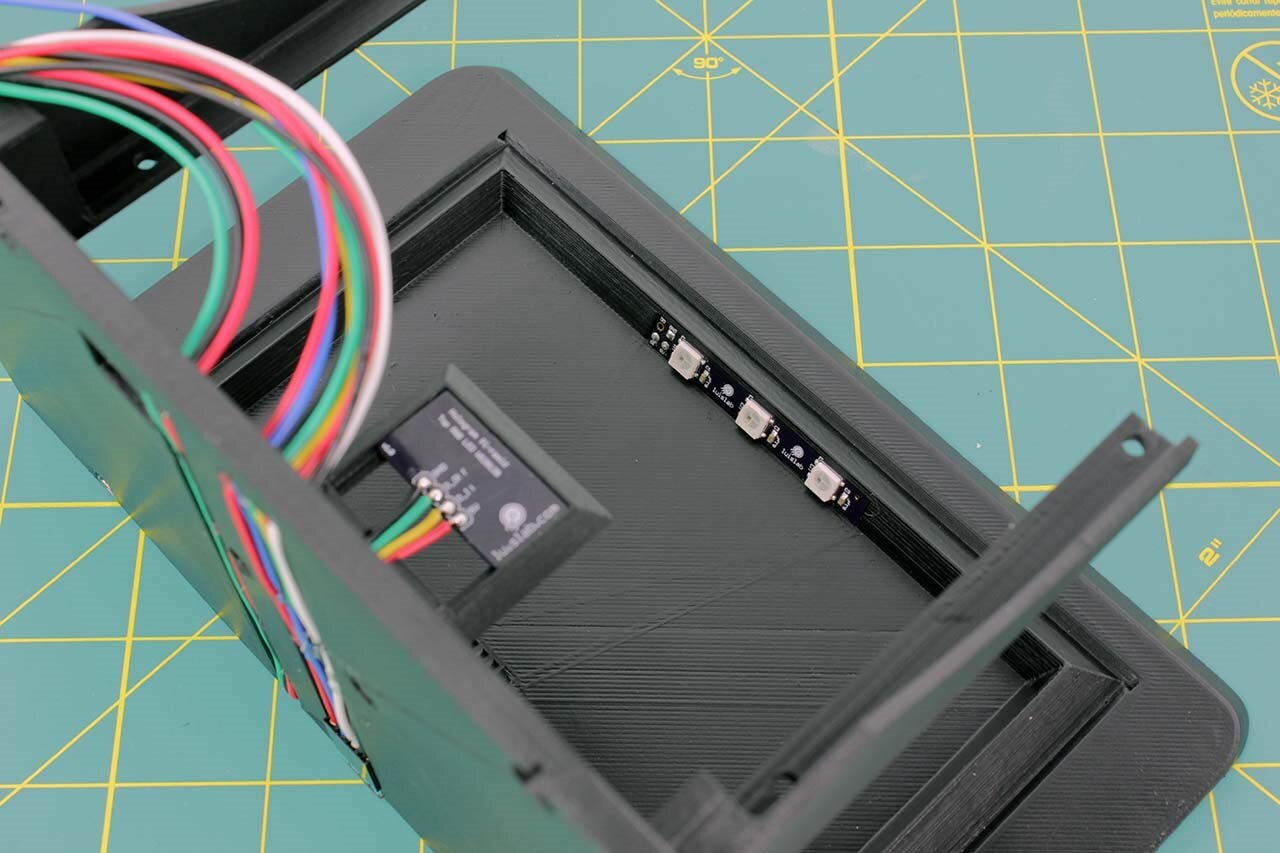
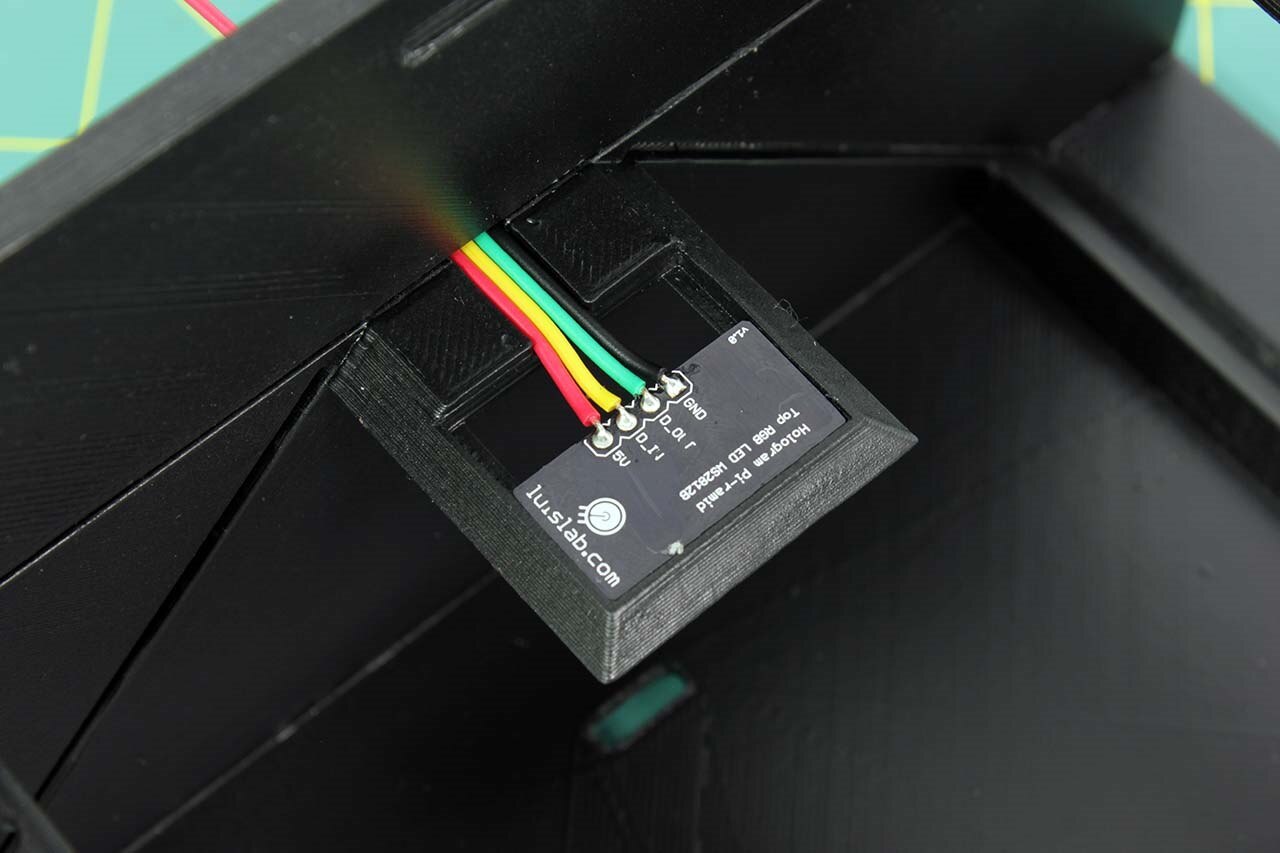
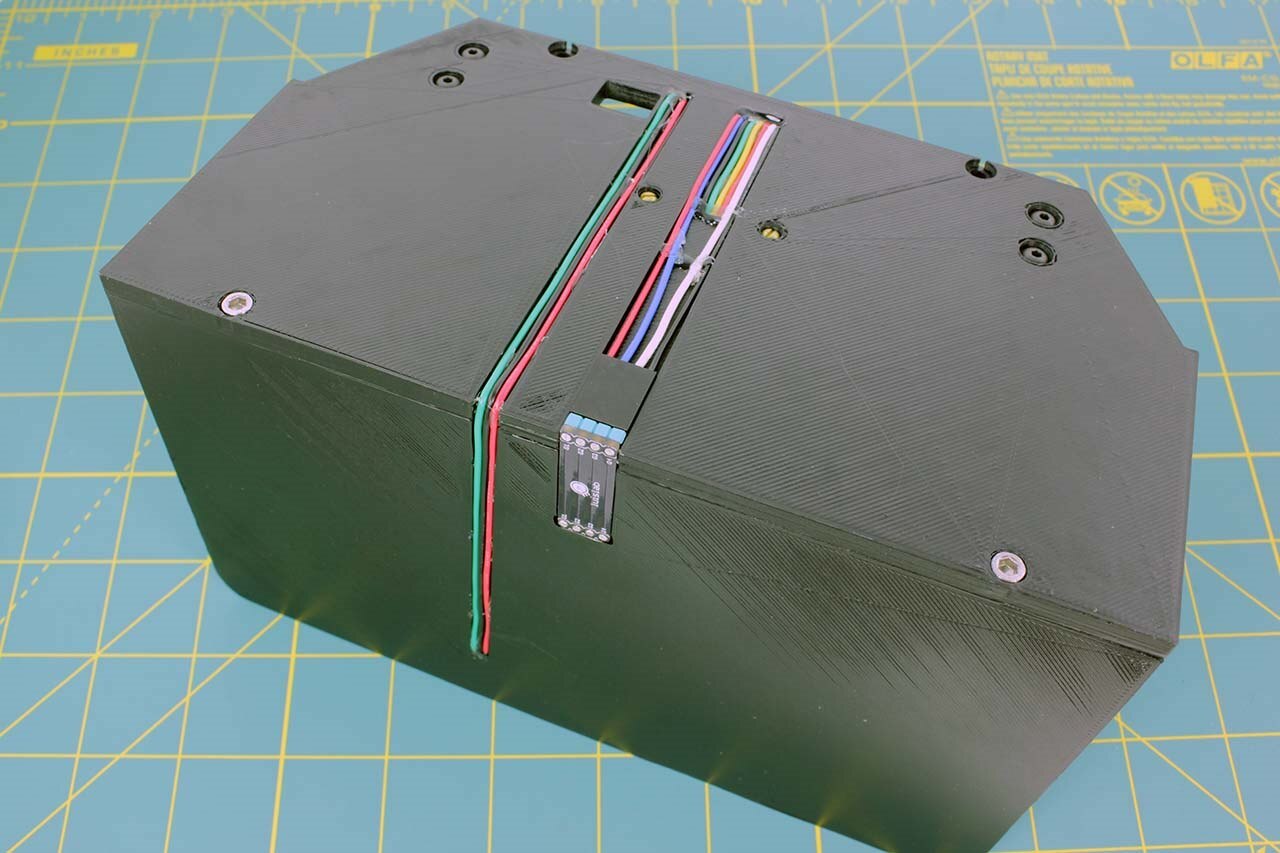
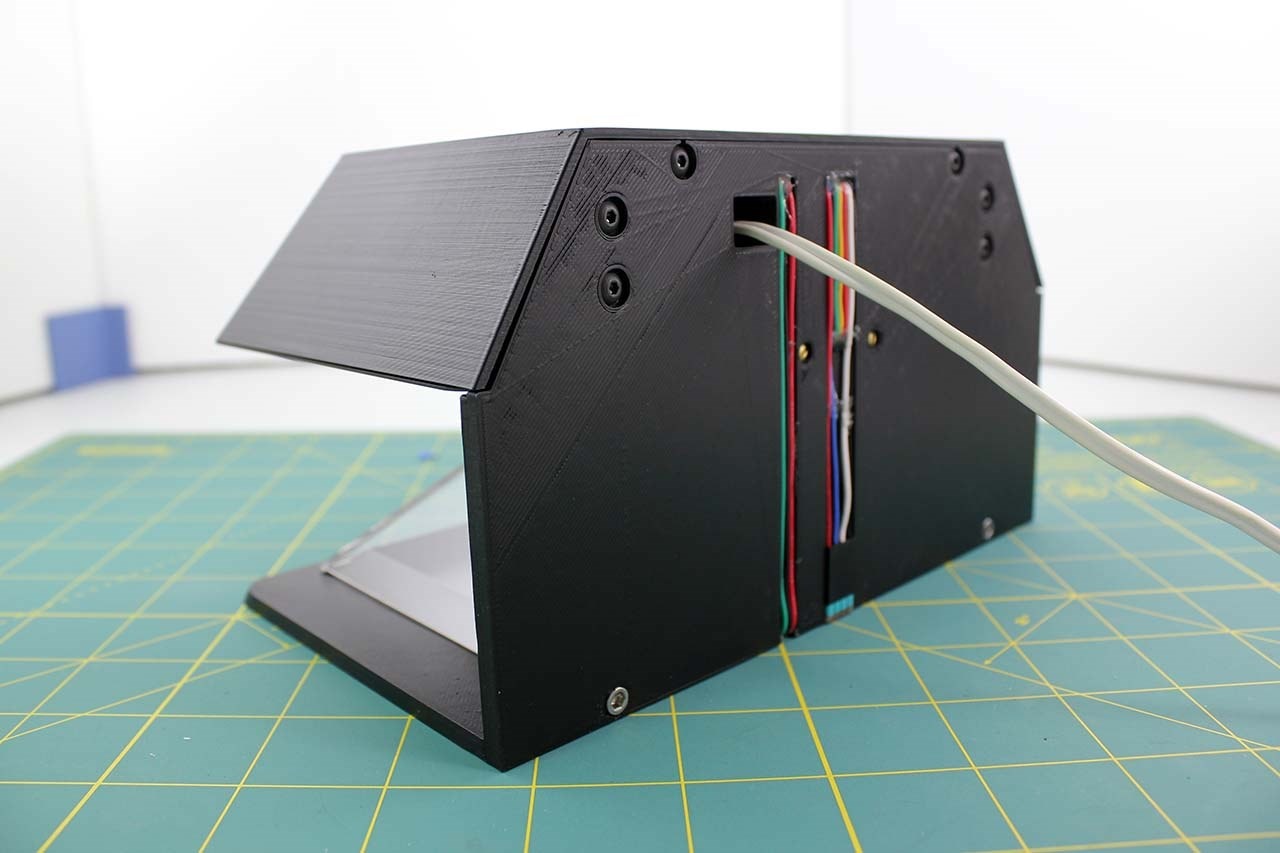
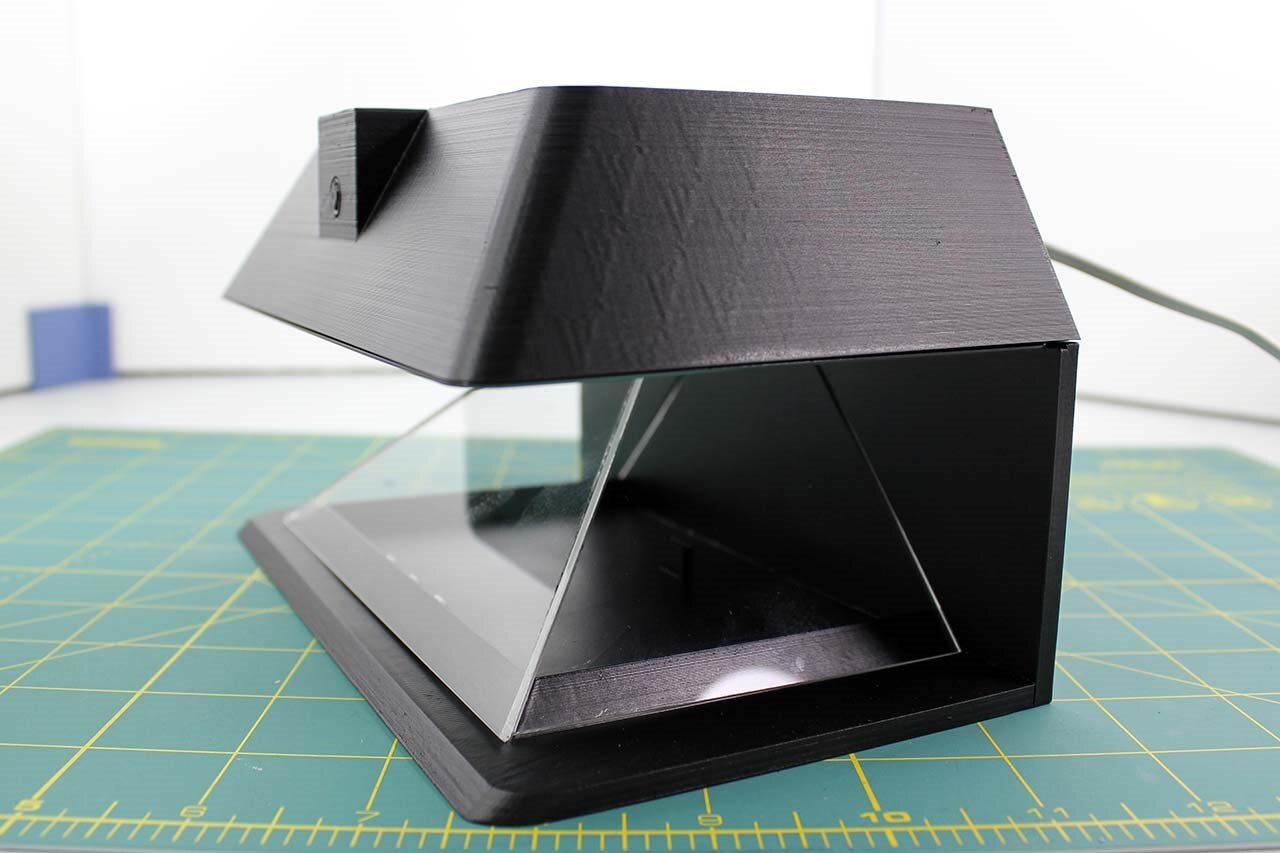
{gallery:width=960,height=768,autoplay=false} Hologram Pi-ramid final assembly

image

Hologram Pi-ramid assembly: Top and Front ambient RGB lightning

image

Hologram Pi-ramid assembly: Top ambient RGB lightning

image

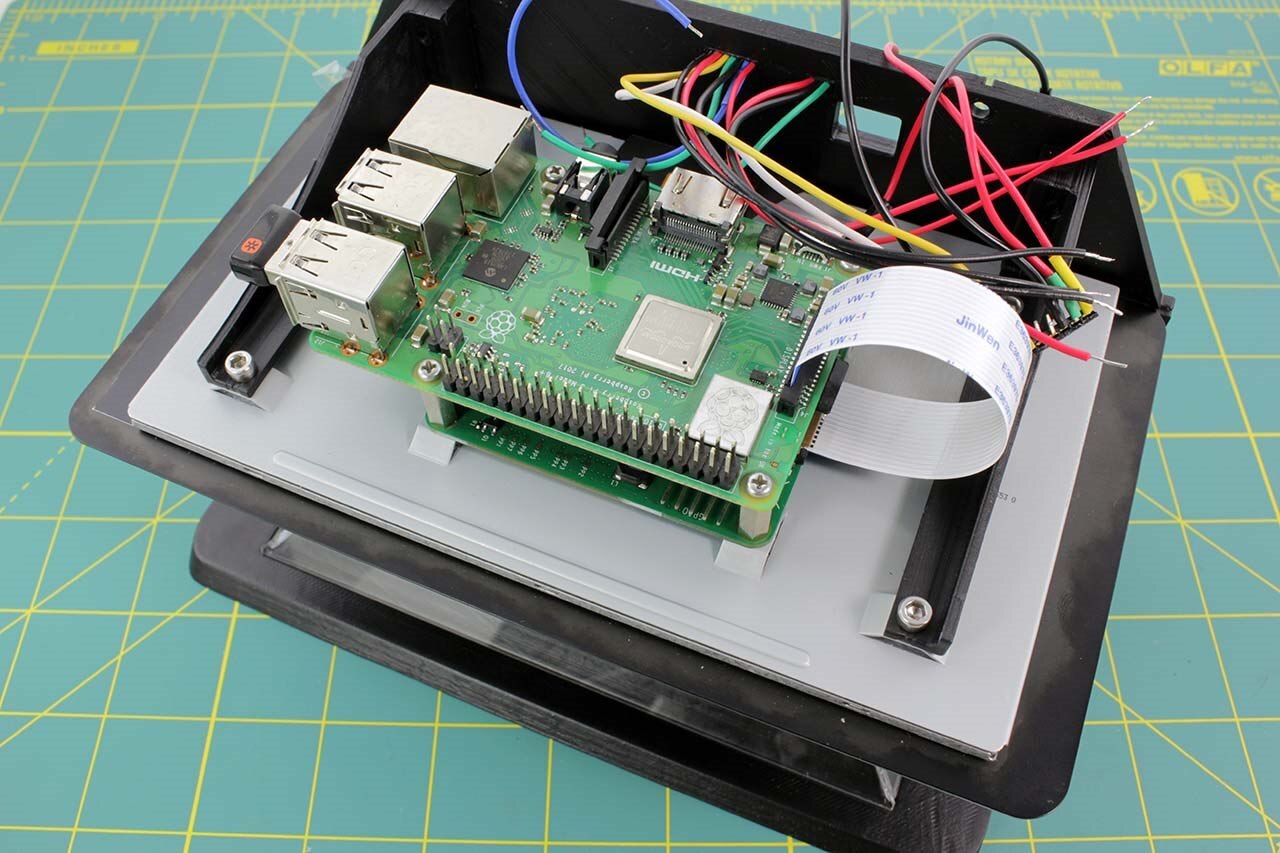
Hologram Pi-ramid assembly: Wires routing

image

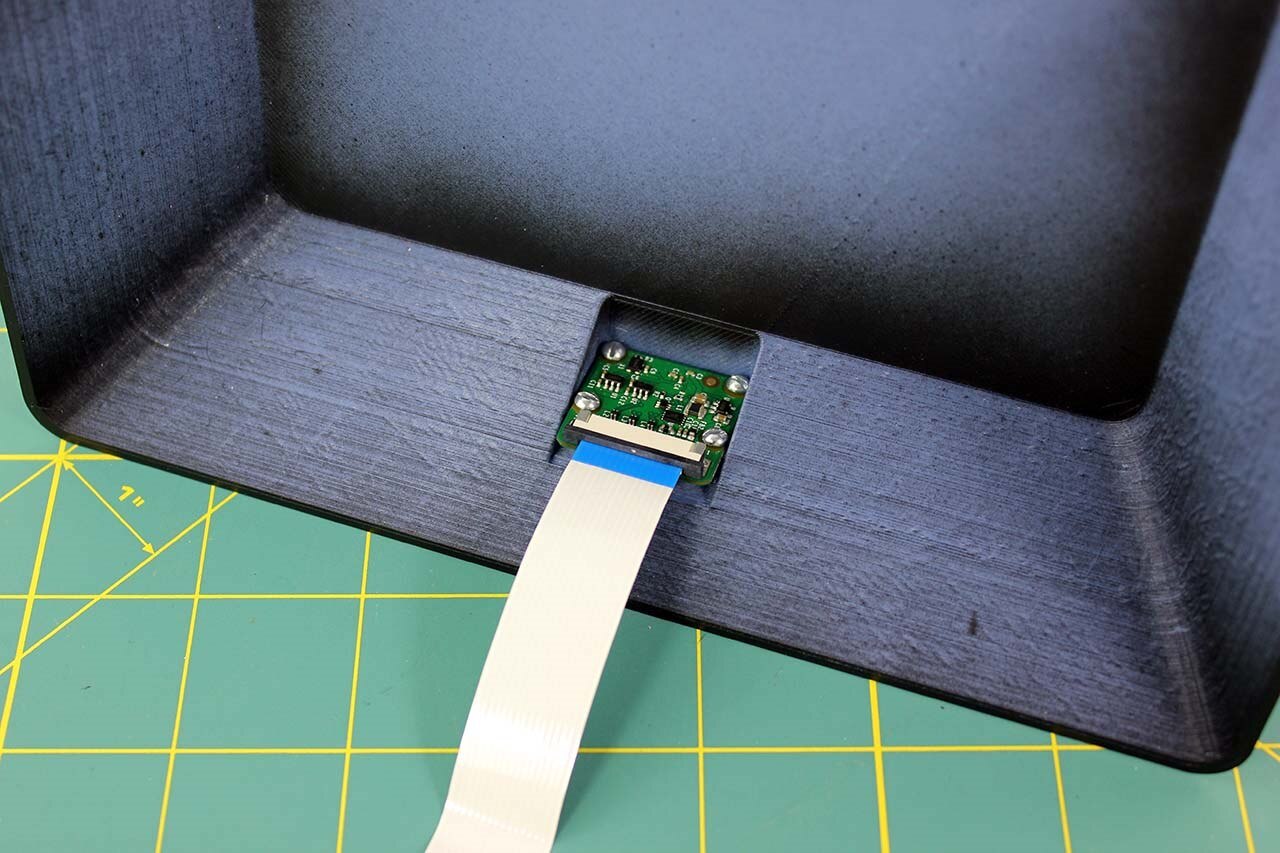
Hologram Pi-ramid assembly: Touch display assembly

image

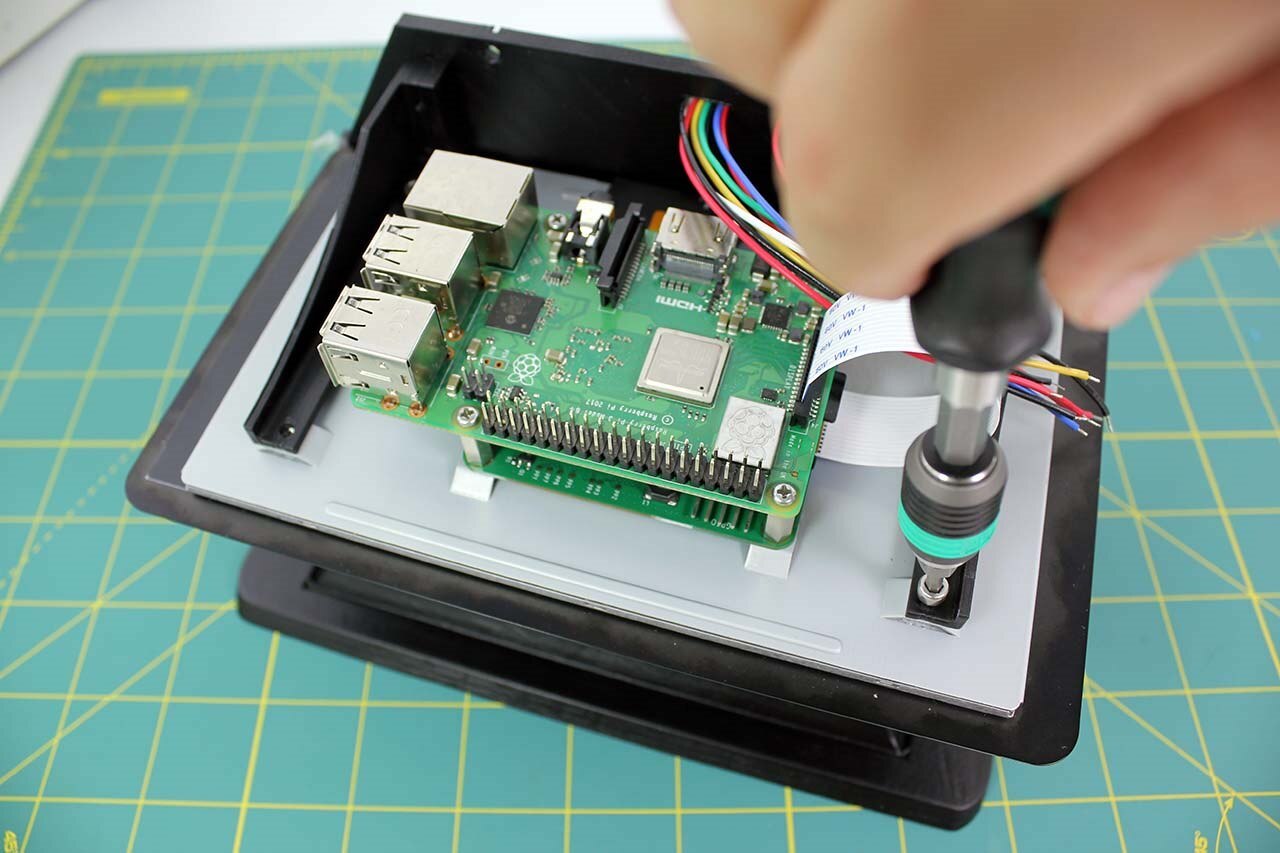
Hologram Pi-ramid assembly: Raspberry Pi assembly

image

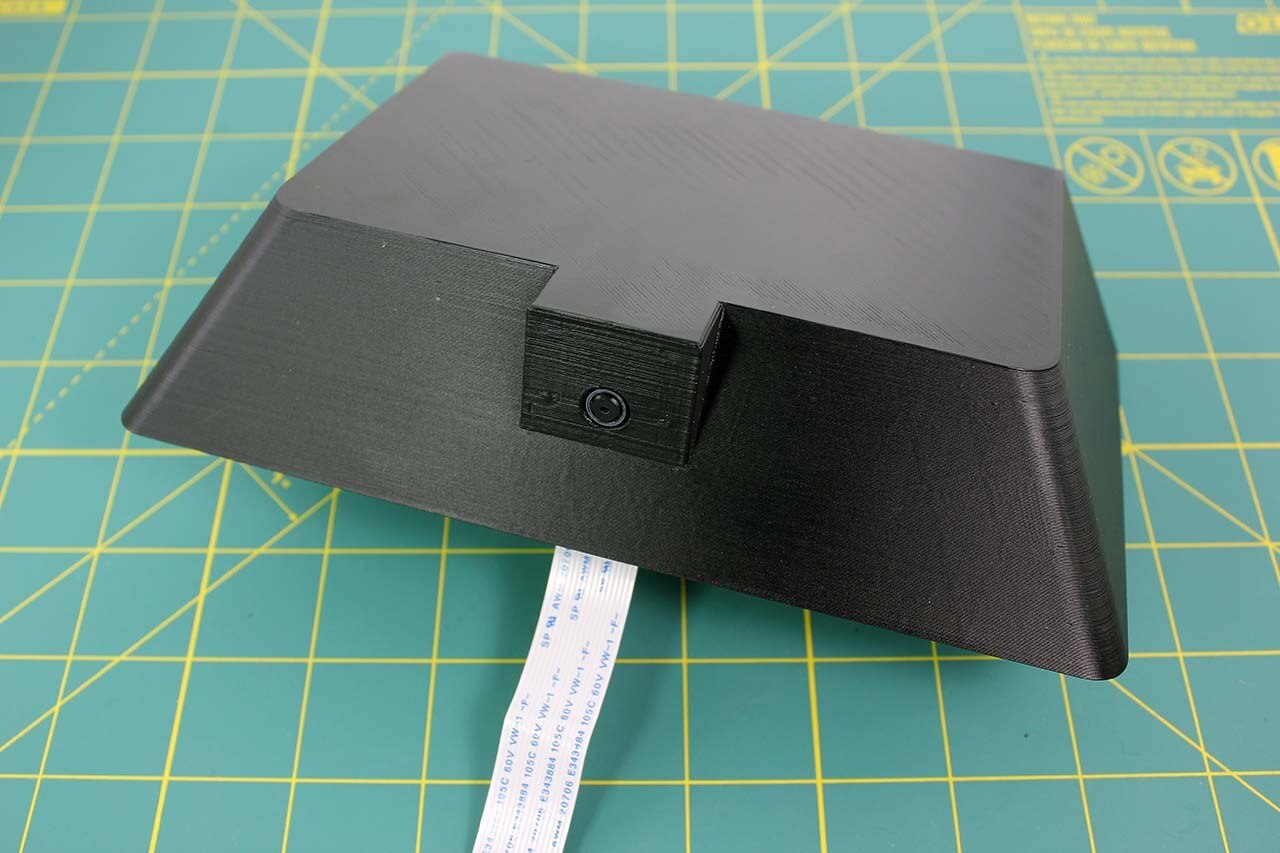
Hologram Pi-ramid assembly: Camera Module V2 assembly

image

Hologram Pi-ramid assembly: Camera Module V2 mounted

image

Hologram Pi-ramid assembly: Header

image

Hologram Pi-ramid: DIY splice connectors

image

Hologram Pi-ramid: Final assembly (back)

image

Hologram Pi-ramid: Final assembly (side)

image

Hologram Pi-ramid: Finally assembled!


Blogs in this series


  1. Hologram Pi-ramid - Intro and initial design
  2. Hologram Pi-ramid - 3D CAD/CAM design
  3. Hologram Pi-ramid - 3D printed parts and initial assembly
  4. Hologram Pi-ramid - Plexiglass Pyramid
  5. Hologram Pi-ramid - My name is Automan
  6. Hologram Pi-ramid - PCB Design
  7. Hologram Pi-ramid - Painting the 3D printed parts
  8. Hologram Pi-ramid - Electronic Parts
  9. Hologram Pi-ramid - Displaying Holograms
  10. Hologram Pi-ramid - Project complete!


  • My Picasso Design Challenge entries


image
Painting the 3D printed parts

image
Displaying Holograms

  • Sign in to reply

Top Comments

  • dubbie
    dubbie over 6 years ago +2
    Very stylish and impressive looking, with professional looking components. I look forward to seeing a video of the working system. Dubbie
  • luislabmo
    luislabmo over 6 years ago in reply to dubbie +2
    Thank you Dubbie!
  • luislabmo
    luislabmo over 6 years ago in reply to dubbie

    Thank you Dubbie!

    • Cancel
    • Vote Up +2 Vote Down
    • Sign in to reply
    • More
    • Cancel
  • dubbie
    dubbie over 6 years ago

    Very stylish and impressive looking, with professional looking components. I look forward to seeing a video of the working system.


    Dubbie

    • Cancel
    • Vote Up +2 Vote Down
    • Sign in to reply
    • More
    • Cancel
element14 Community

element14 is the first online community specifically for engineers. Connect with your peers and get expert answers to your questions.

  • Members
  • Learn
  • Technologies
  • Challenges & Projects
  • Products
  • Store
  • About Us
  • Feedback & Support
  • FAQs
  • Terms of Use
  • Privacy Policy
  • Legal and Copyright Notices
  • Sitemap
  • Cookies

An Avnet Company © 2025 Premier Farnell Limited. All Rights Reserved.

Premier Farnell Ltd, registered in England and Wales (no 00876412), registered office: Farnell House, Forge Lane, Leeds LS12 2NE.

ICP 备案号 10220084.

Follow element14

  • X
  • Facebook
  • linkedin
  • YouTube