


|
shabaz designed a development kit for the recent Texas Instruments MSPM0 microcontroller series.
|
Required hardware and software
- EasyL1105 kit
- USB cable to connect EasyL1105 kit to PC
- a serial monitor (PuTTY, ...)
- handy: an XDS110 debugger, and an IDE that supports that. I use ccstudio 20 (it also has a built-in serial monitor)
Functionality
This program sends hello, world to the MSPM0 UART0. If you put the UART jumpers on the board, the data will arrive on your PC. Like most SDK examples, I use 9600 baud, 8, N 1.
Start an empty project
In ccstudio, you create a new one based on the MSPM0L1105 empty example. Steps are explained here: Use TI Code Composer Studio with EasyL1105 MSPM0 board . Also follow the steps there, to select the 28 pin version of the controller.
Before making any changes, build the project. This should complete successful.
If you use GCC and bootloader, start from shabaz ' example, and use make, GCC and standalone SysConfig to make the changes and build the firmware,
SysConfig
The only configuration that's required, is the UART:
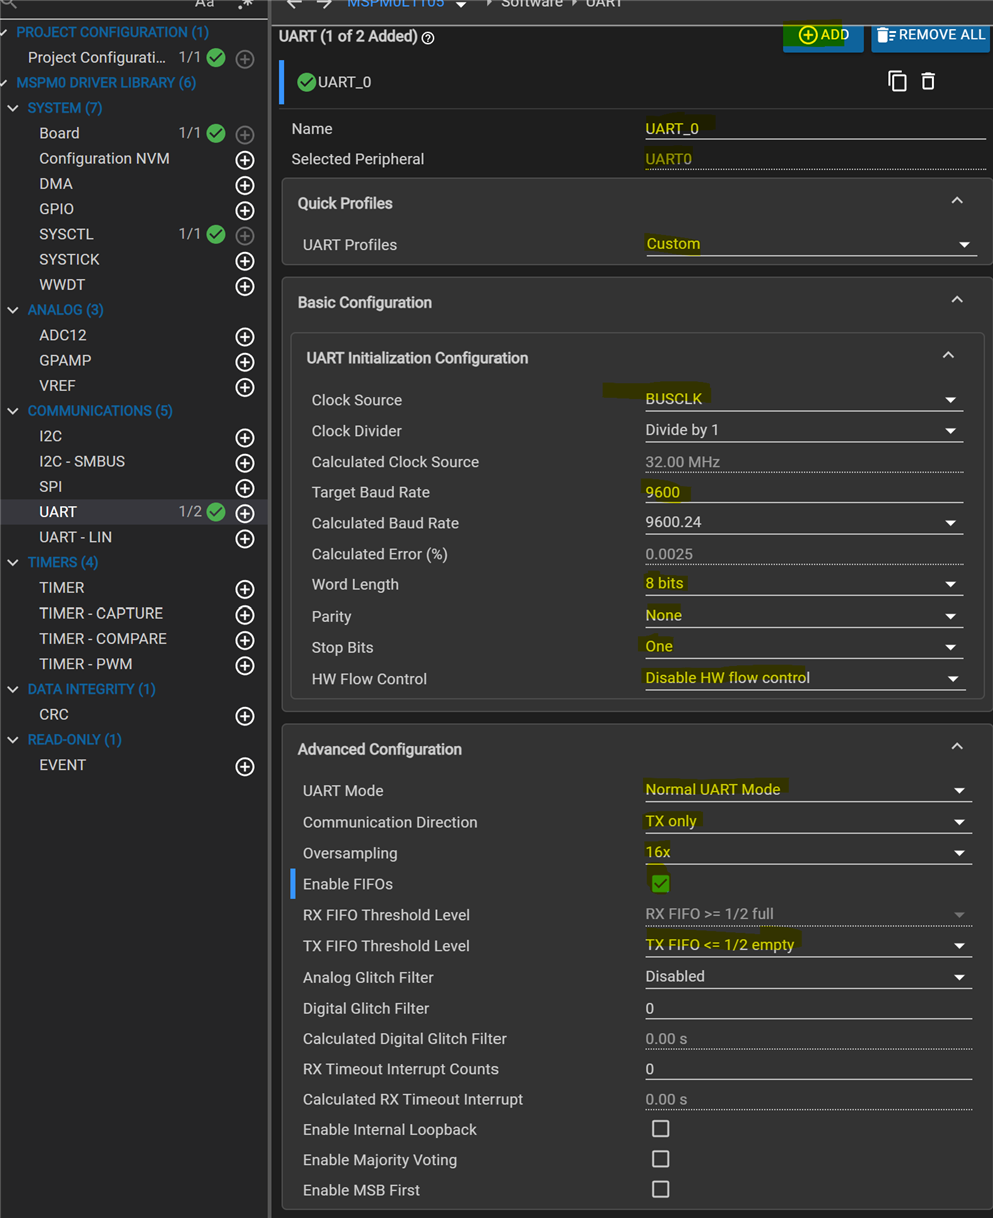

In essence: UART0, transmission only, to PA17.
Code
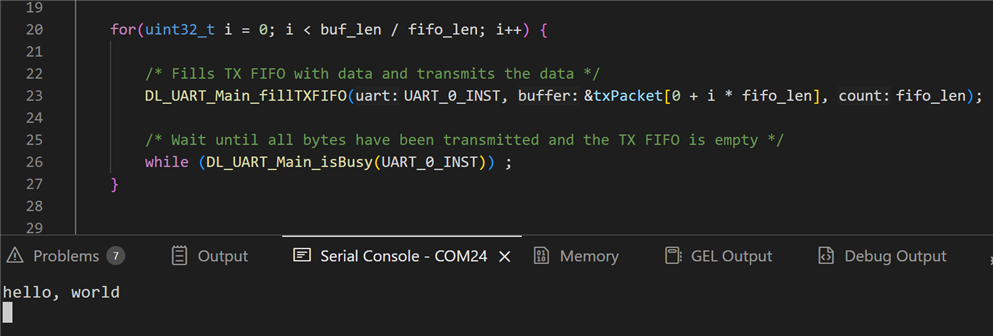
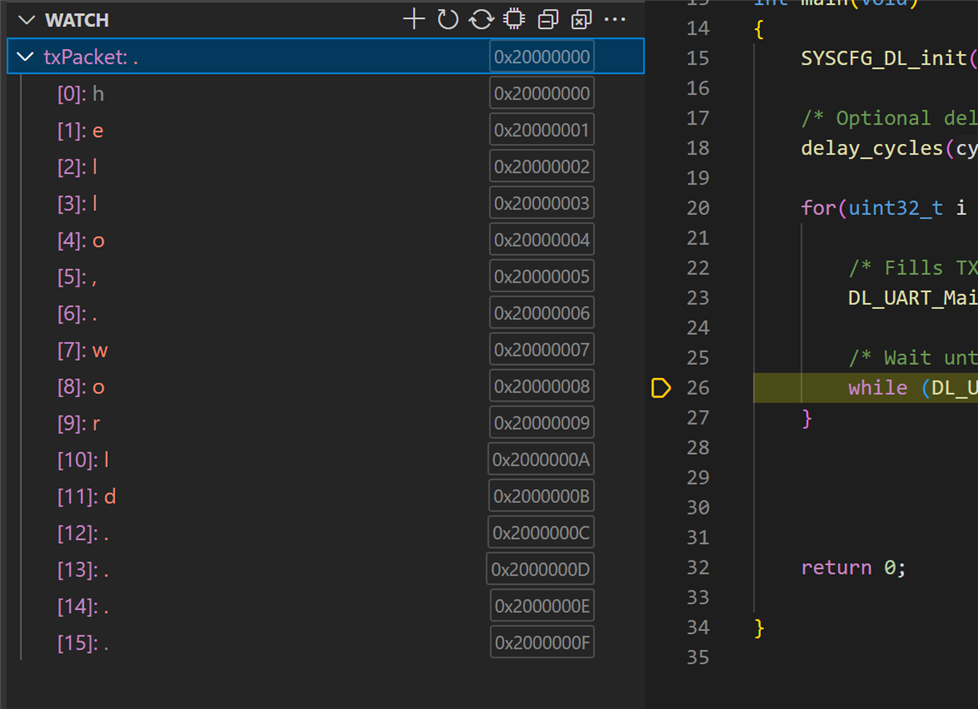
MSPM0 has 4 bytes FIFO. The string that I'm sending is 16 bytes. I let the program loop 4 times over the string, snooping a full FIFO. I wait for the next batch until the buffer is free.
#include "ti_msp_dl_config.h"

/* Delay for 5ms to ensure UART TX is idle before starting transmission */
#define UART_TX_DELAY (160000)


#define buf_len 16
#define fifo_len 4

/* Data for UART to transmit */
uint8_t txPacket[buf_len] = {"hello, world  \r\n"};

int main(void)
{
    SYSCFG_DL_init();

    /* Optional delay to ensure UART TX is idle before starting transmission */
    delay_cycles(UART_TX_DELAY);

    for(uint32_t i = 0; i < buf_len / fifo_len; i++) {

        /* Fills TX FIFO with data and transmits the data */
        DL_UART_Main_fillTXFIFO(UART_0_INST, &txPacket[0 + i * fifo_len], fifo_len);

        /* Wait until all bytes have been transmitted and the TX FIFO is empty */
        while (DL_UART_Main_isBusy(UART_0_INST)) ;
    }


    return 0;

}
Program and Test with ccstudio and XDS110
- Connect an XDS110 debugger as explained here: Cheap debugger ($6) for EasyL1105 MSPM0 board .
- Remove all headers from the EasyL1105 - including the power ones. The debugger will power the board.
- connect your terminal program to the debugger COM
- start the program. It 'll show hello, world on the terminal
Program and Test with GCC and bootloader
- mount only the power and BSL jumpers on the EasyL1105
- connect the EasyL1105 USB to your PC
- follow shabaz ' instructions to build the program and load the firmware over USB on the board: EasyL1105: A Dev Board for the TI ARM Cortex-M0+ L-Series
- disconnect the board, remove BSL jumpers and place only the UART0_TX one. Plug back in.
- connect your terminal program to the EasyL1105 COM
- reset the EasyL1105. It 'll show hello, world on the terminal
Thank you for reading.
CCS project used in this post: EasyL1105_helloworld_20250909.zip
-

Jan Cumps
-
Cancel
-
Vote Up
0
Vote Down
-
-
Sign in to reply
-
More
-
Cancel
Comment-

Jan Cumps
-
Cancel
-
Vote Up
0
Vote Down
-
-
Sign in to reply
-
More
-
Cancel
Children