The design-based approach to differentiate Spartan 6 and Spartan 7
I had been an FPGA enthusiast from the very beginning days. Here are some technical details about the Spartan-6 FPGA:
Since I'm a bit late to post this, I shall take a little bit different approach to explain the key differences. Differences related to memory, process node etc. are already covered by other bloggers, hence I'll cover some architectural differences.
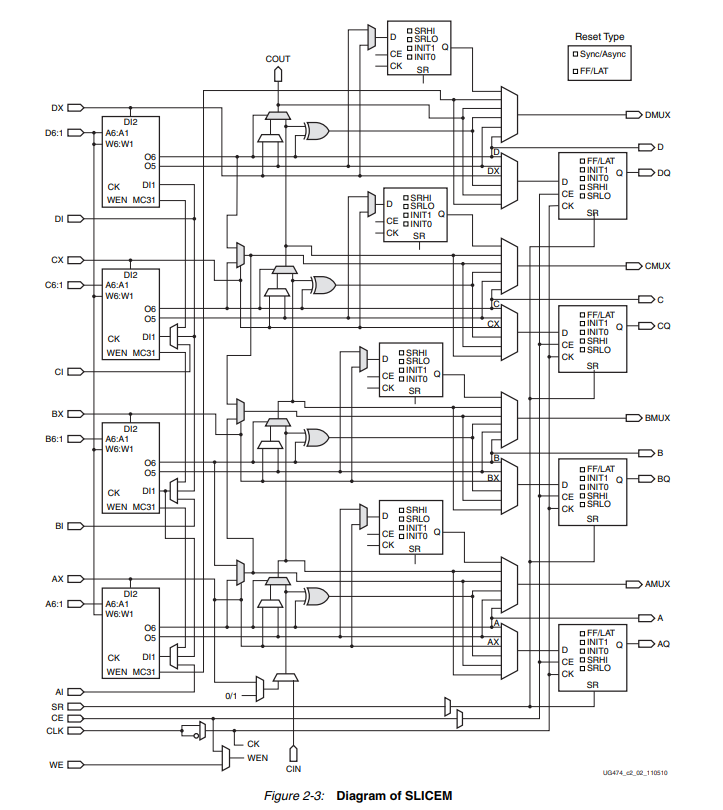
The CLB or the Configurable Logic Block is the building block of an FPGA as it does not come inbuild with any peripherals as such. As other bloggers have already mentioned the key differences in the design tools, block RAM, flip-flops, IOs, DSP slices, I will first walk you through the CLB of a Spartan-6 FPGA:
Choosing an FPGA is an important step, it can be done by looking at the CLB of an FPGA and decide accordingly for eg. if one wants to implement adders one type of CLB might render efficient use, while if one wants to implement shift registers another CLB might be efficient.
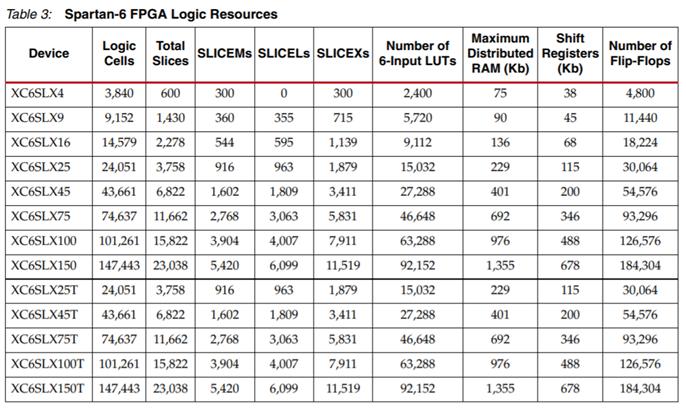
Here are slices from Xilinx Spartan 6 FPGA from the CLB user guide:

The above table illustrates the variants of Spartan-6 FPGAs, which one can choose according to the application requirements.
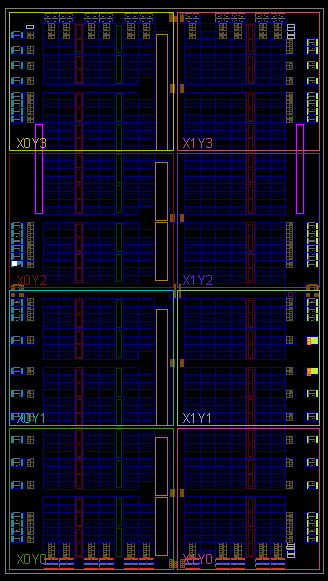
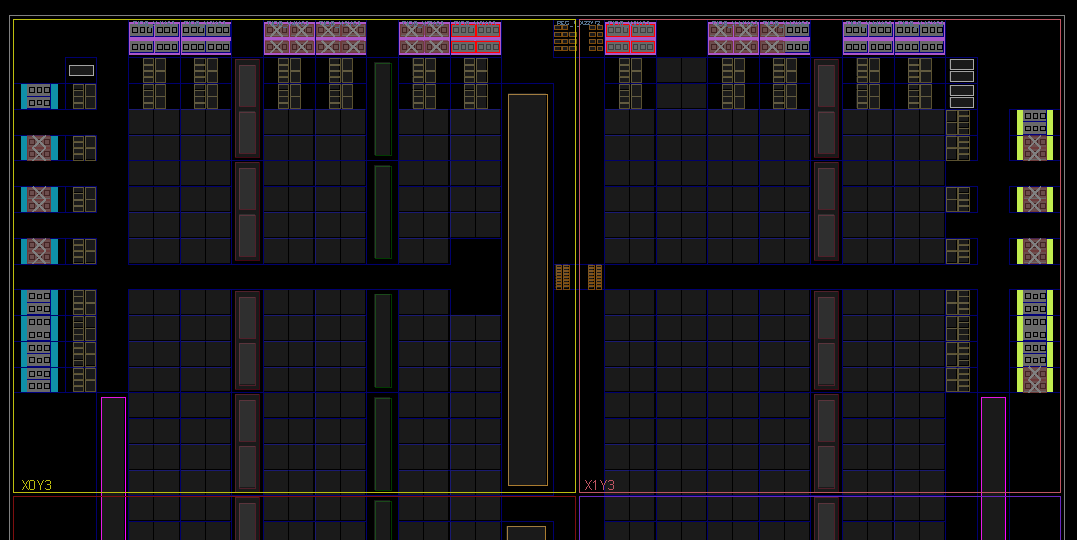
Internal Structure of Spartan-6 XC6SLX9 FPGA:
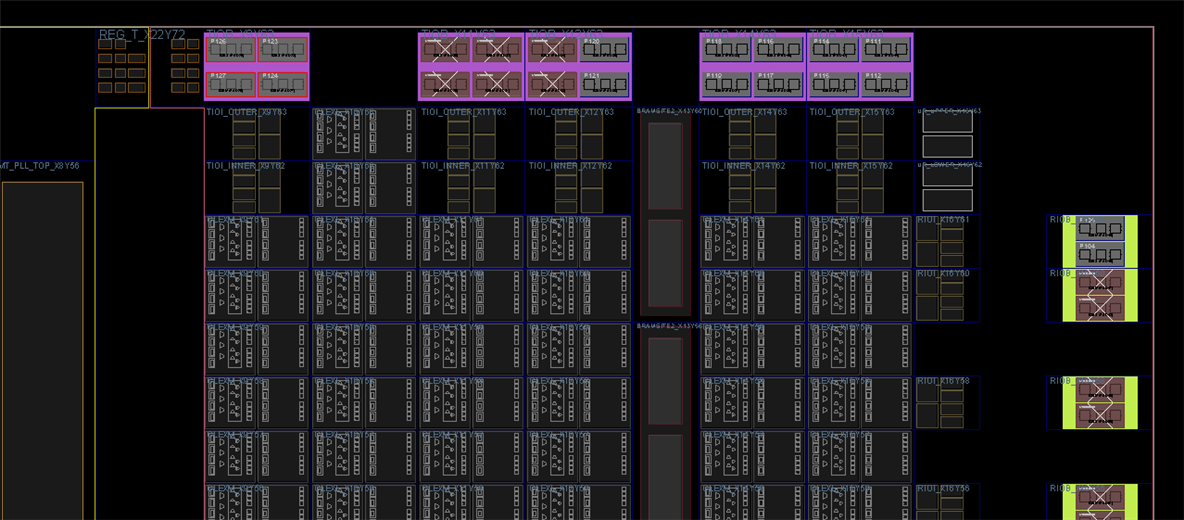
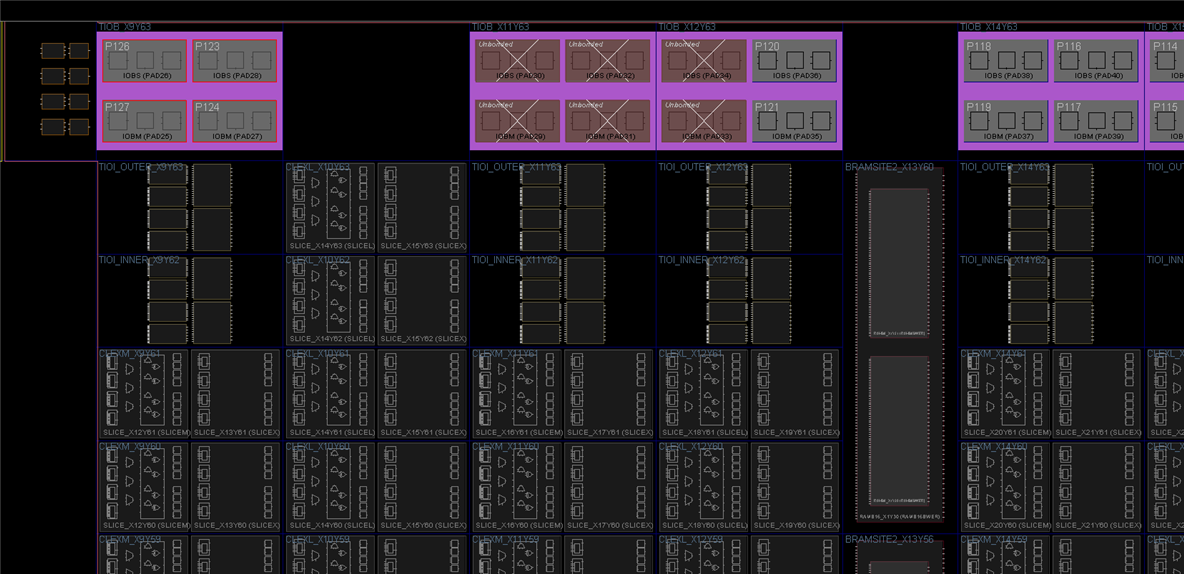
As we zoom more, we will be able to look at more detail in the FPGA, note that in the last image you will be able to see the placement of SLICEM, SLICEX and SLICEL in the FPGA.
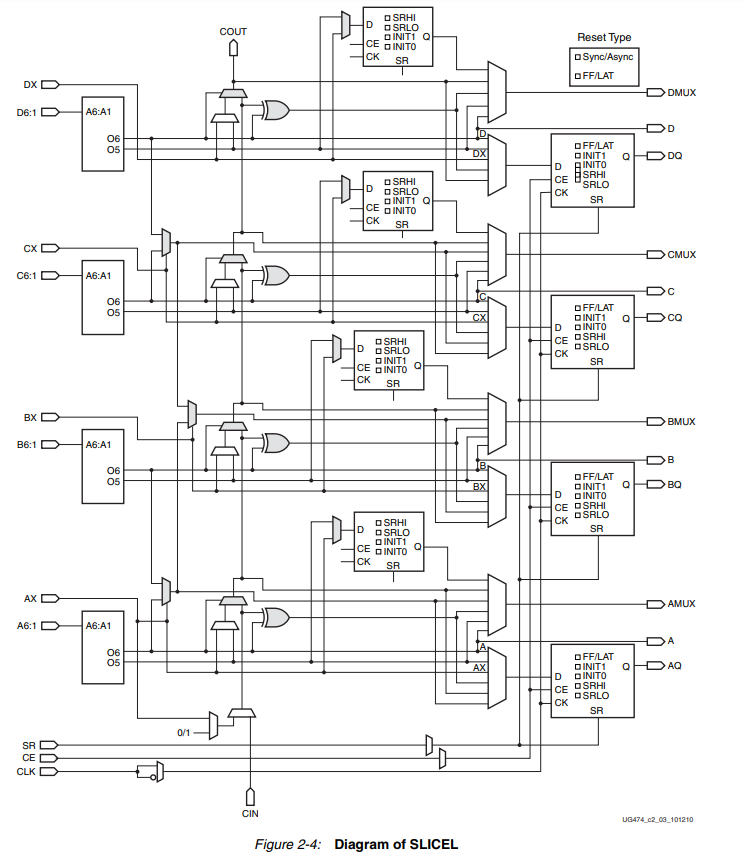
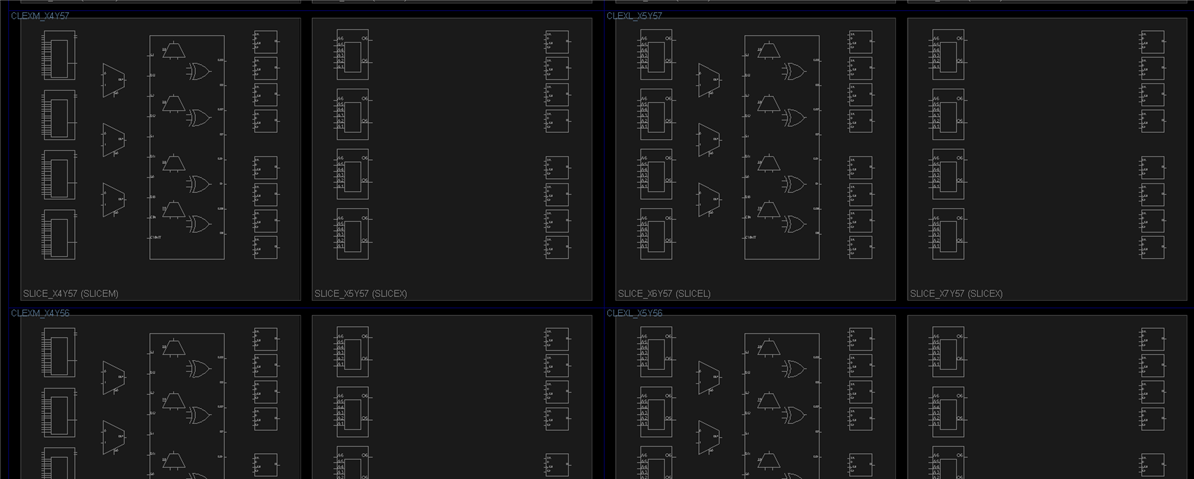
Whereas in the Spartan 7 FPGA things are a bit different as shown below:
The 7 series FPGAs have SliceM and SliceL as shown the figure below.
Next would be to explore the design flow for the two different FPGAs for which I shall link my previous blogs, which cover both Xilinx ISE used for Spartan 6 and Vivado Design Suite used for 7 series FPGAs:
1. Spartan 6 FPGA complete design flow
Do go through the linked blogs for better understanding on the design flows. In my opinion, its very similar and the GUI has improved a lot for modern times!
Vivado offers lot of advanced options and with the IP integrator, drag and drop comes with ease especially when dealing with MicroBlaze based designs. Speaking of which, you can also look at one of my courses which explains how we can integrate MicroBlaze softcore processor in our design with our own described hardware blocks using AXI interface and much more!
Here's the link to that course: Building an Embedded System on FPGA
I hope it was useful to you.
Thanks for reading!

-

Jan Cumps
-
Cancel
-
Vote Up
0
Vote Down
-
-
Sign in to reply
-
More
-
Cancel
-

yesha98
in reply to Jan Cumps
-
Cancel
-
Vote Up
0
Vote Down
-
-
Sign in to reply
-
More
-
Cancel
Comment-

yesha98
in reply to Jan Cumps
-
Cancel
-
Vote Up
0
Vote Down
-
-
Sign in to reply
-
More
-
Cancel
Children