Hi Everyone!
New with the PetaLinux 2021.1 BSP for the Ultra96-V2 is the addition of the ConnMan connection manager software application to configure and maintain the WiFi connection.
What is ConnMan? It is a Linux software daemon (connmand) for managing network connections on devices running Linux. The Linux 'connmanctl' command line software application and 'connman-gtk' GUI application interact with this daemon to configure and manage network connections.
As was mentioned in the recent PetaLinux 2021.1 BSPs Now Available for Avnet SOMs and SBCs blog, the Chromium web browser has been removed from the Ultra96-V2 Linux OS image. This was because Chromium is a very large application - hundreds of MB - and building it into the OS image takes over 12 hours - a VERY long time! It was also determined that Chromium wasn't really necessary for operation of Ultra96-V2 and wasn't used very often. So considering the long build time vs marginal user benefit it was decided to simplify the Linux OS configuration and shorten the build time by removing Chromium from the Linux OS image. By removing Chromium from the PetaLinux BSP we have been able to remove over 400 MB from the BSP file size and over 130 MB from the OS image file size. Removing Chromium also saves over 10 hours from the BSP build time! Admittedly this reduction in build time is also highly dependent on PC speed and system resources (RAM size, number of CPU cores, etc.), but you get the idea - 10 hours is A LOT of time to cut from build time!
Experienced Ultra96 users may recall that the Chromium browser was the primary way to configure the Ultra96 to connect to the user's WiFi network via the Ultra96 native WiFi access point when a mouse, keyboard, and DisplayPort display were also connected. It is still possible to use this built-in WiFi access point (AP) on the Ultra96 to configure the WiFi and this is documented in the Ultra96-V2 Getting Started Guide. However, this method is a bit cumbersome as it requires the user to first connect their PC or mobile device to the access point in order to identify the desired WLAN and enter the credentials to connect the Ultra96. One could argue it is perhaps easier and more efficient to use the new 'connmanctl' and 'connman-gtk' software applications to perform this WiFi configuration task.
WiFi Configuration Using the Linux Command Line
Perhaps the easiest way to configure the Ultra96-V2 WiFi connection to a WLAN is via the connmanctl application. This only requires the access to the Linux command line and can be done over the system UART using the Ultra96 UART/JTAG adapter . Enter the following commands to connect the Ultra96-V2 to a WIiFi network:
# connmanctl
connmanctl> enable wifi
connmanctl> disable wifi
connmanctl> enable wifi
connmanctl> scan wifi
connmanctl> services
connmanctl> agent on
connmanctl> connect wifi_<unique ID>
Passphrase? <WLAN password>
connmanctl> quit
The WiFi interface is configured to fetch an IP address from a DHCP server by default. Use the 'ifconfig' command to determine the IP address for the 'wlan0' network interface:

WiFi Configuration Using the Linux GUI
It is also possible to connect a mouse, keyboard, and DisplayPort monitor to the Ultra96-V2 and use the 'connman-gtk' Linux GUI application to configure the WiFi connection. Use the mouse to navigate to and double-click to launch the Connman Settings application.

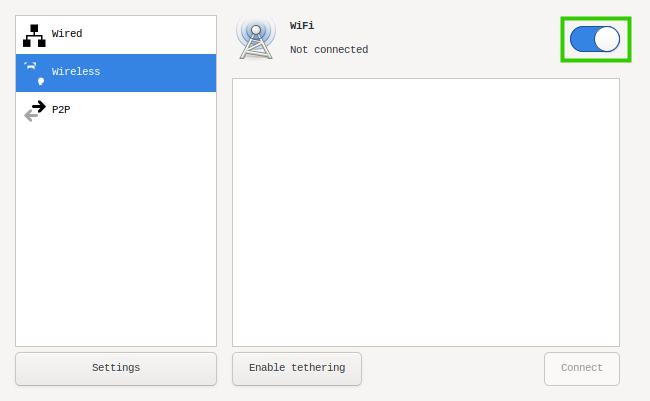
Navigate to Wireless in the side pane and click to slide the button to Enabled. It may be necessary to do this a couple of times before the list of available networks appears.

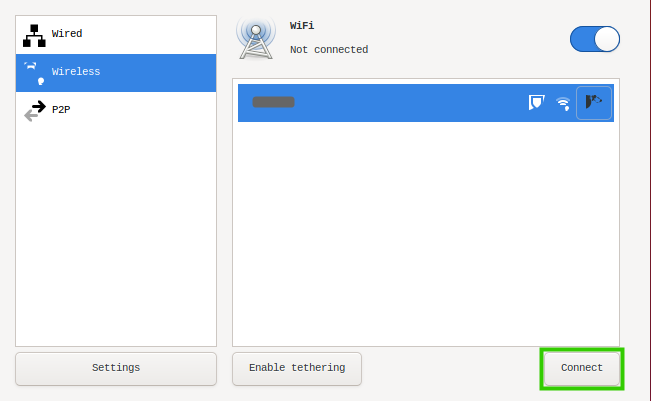
Click to select the desired network and click on Connect:

Enter the passphrase for the WLAN and click OK:
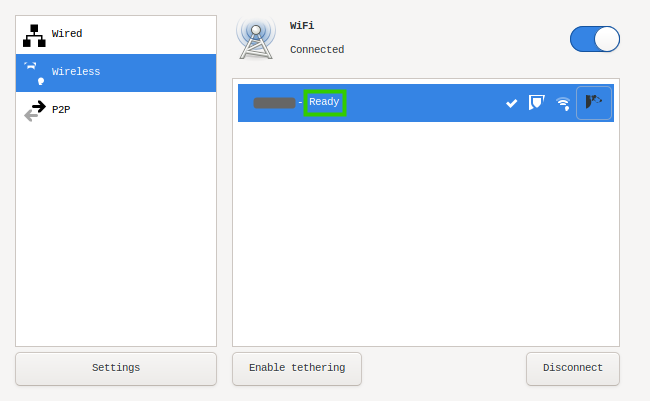
The connection status will change to Ready when the connection to the WLAN is successfully negotiated:

Click on the settings icon for the WiFi connection to determine the assigned IP address and other details:

Click to slide the button to Autoconnect if it is desired to have the board reconnect to this WLAN on the next reboot. Note the assigned IP address. The WiFi interface is configured to fetch an IP address from a DHCP server by default. Click Apply to continue:

Verifying the WiFi Connection
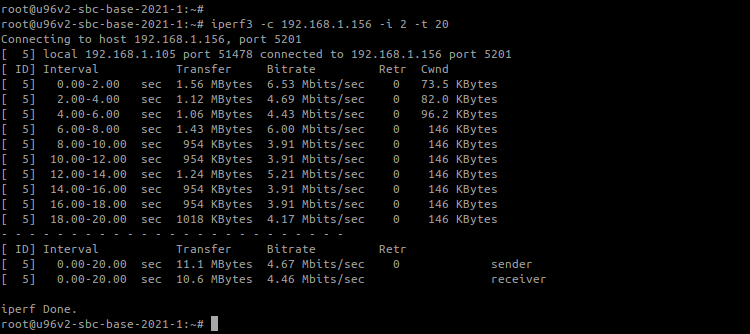
The Linux 'iperf3' application can be used to determine the WiFi connection speed of the Ultra96-V2 connected the WLAN. The 'iperf3' application requires a server and a client. In this example the server will be a Linux PC connected to the same LAN subnet (192.168.x.y1) as the Ultra96-V2 (192.168.x.y2). First we need to determine the IP address of the Linux PC ('iperf3' server):
$ hostname -I

On the Linux PC start the 'iperf3' server. The command below will run 'iperf3' in server mode, update every 2 seconds, and shutdown once the test is run:
$ iperf3 -s -i 2 -1
On the Ultra96-V2 start 'iperf3' in client mode, update every 2 seconds, test for 20 seconds, and then stop:
# iperf3 -c <server IP address> -i 2 -t 20
If you don't have iperf3 installed on a PC you can use the method described in the Go Go Speedtest®︎! Testing WiFi Internet Connection on Ultra96-V2 blog to to check WiFi connectivity to the internet.
A USB Ethernet dongle and other options can also be used if greater network connection speed is desired or required. Details in the Wired Ethernet Choices for Ultra96 blog.
Will you use WiFi or wired Ethernet to connect the Ultra96-V2 to your LAN? Was the Chromium browser an important feature you used? Will you miss it? Let us know in the comments below!
Additional Resources

