Introduction
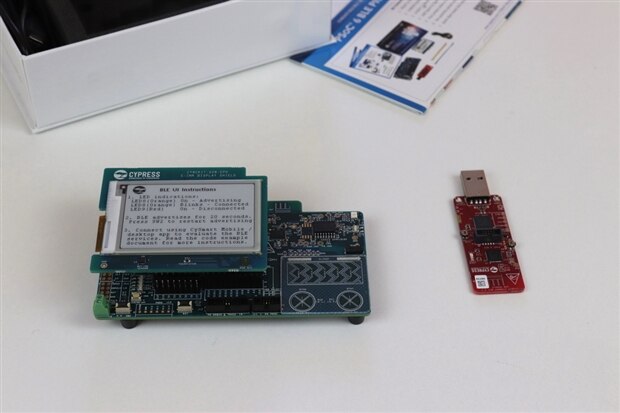
I should say that I am a fan os the Cypress PSoC family. When I discovered the existence of the PSoC4 I bought a bunch of 10 I have used in many projects in the past. Then I also explored the PSoC5 (and two of them, available for some project, are still in my lab). Then I got a PSoC6 Bt with the e-ink display, shown in the image below. A very powerful board that will be included in the near future in one of the nodes of the Super Smart Home where it is needed a punctual notification.
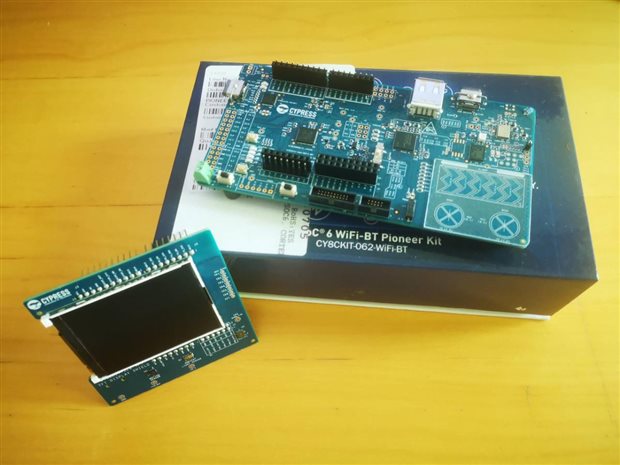
The PSoC 6 WiFi-BT Pioneer Kit contains a very high-performance multi-core processor. There are two ARM Cortex-M4F cores as well as a Cortext-M0+ core, and 288 kByte of SRAM together with 1Mbyte of Flash. This is a huge amount of computational capability, but there are many additional features on the chip too, including crypto acceleration, touch sensing, USB host and device, I2S for audio, and a ton of analog functionality – a high-speed ADC (1MSPS), a high-resolution 12-bit DAC, comparators, and op-amps –
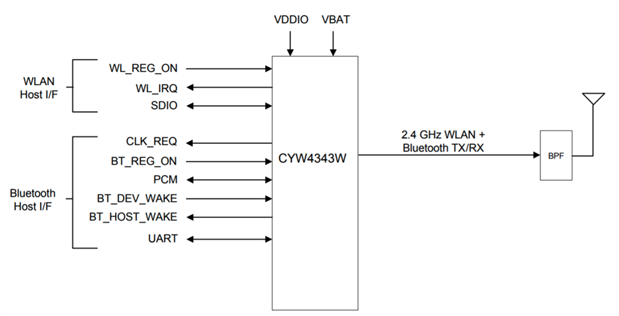
Interestingly, the board also contains a tiny combined WiFi and BLE module – the Murata 1DX – that includes a Cypress CYW4343W chip internally, along with the passive components and crystal needed for it to function. The CYW4343W chip has separate interfaces for WiFi and BLE, enabling both to be used simultaneously.
The supplied plug-on display board has a 320x240 color screen and many sensors including accelerometer and gyroscope, microphone, and light sensor.
The great thing about this PSoC 6 WiFi-BT Pioneer Kit is that as well as being usable with the usual Cypress PSoC Creator development environment, it can also be used with Mbed OS. The Mbed environment offers APIs and libraries with rich functionality and ease-of-use like an Arduino. There are multiple ways to work with Mbed, but the easiest is to use the online Mbed development environment.
How Does Mbed Work
Mbed is quite a large ecosystem consisting of several key things, but I will be making use of the optional online IDE, libraries, and APIs, as well as the Cypress PSoC6 kit which works as an excellent reference design for getting to know PSoC6 and Mbed. This OS has a very clever method of programming up the PSoC6 board.
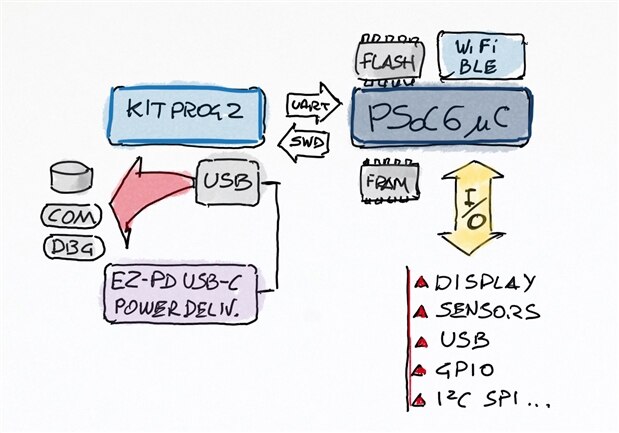
The PSoC6 board actually has a separate microcontroller termed KitProg2 which is dedicated to programming and debugging the main PSoC6 chip. When the USB connector attached to KitProg2 is connected to a PC, it will look like a mass storage device (like a USB memory key). Hexadecimal program files can be dragged from the PC desktop into the mass storage device, and KitProg2 will read it and automatically program up the PSoC6 via the ARM Serial Wire Debug (SWD) interface.
Starting with PSoC6 and Mbed
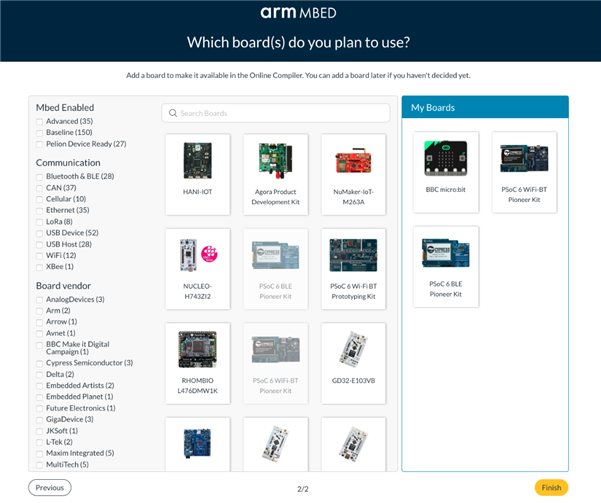
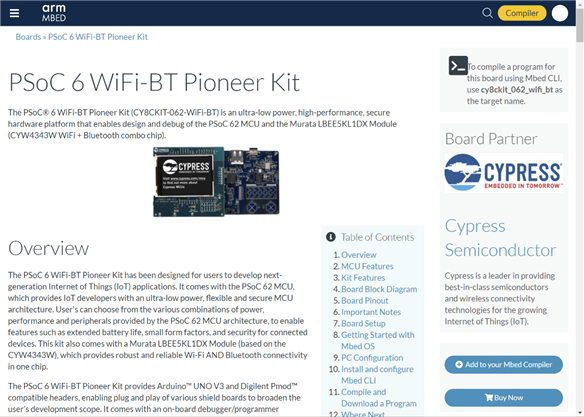
It couldn’t be easier. All you had to do is going to the Mbed website, create a free account, and then select the Cypress PSoC 6 WiFi-BT Pioneer Kit (Mbed supports many boards from many different manufacturers) and then click the blue Add to your Mbed Compiler button.
Below: The Mbed site with the list of boards supported and the boards I work with
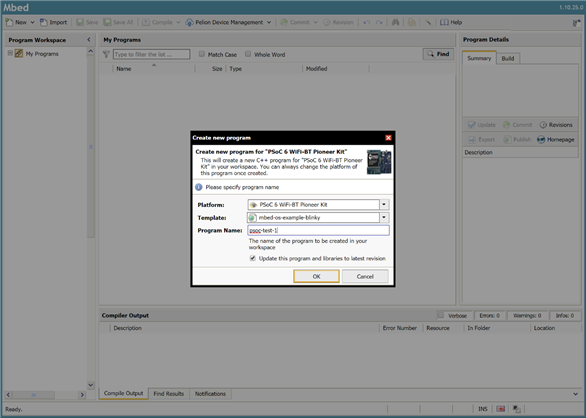
Then, click the yellow Compiler button to enter the online interactive development environment!
In the Create New Program popup that appears, select the PSoC board and give a name to your project and click OK.
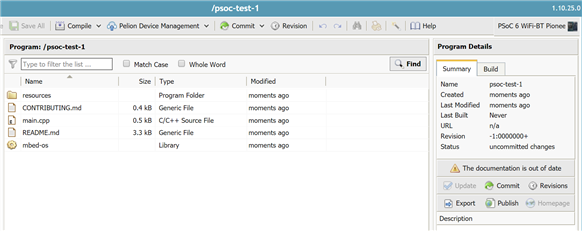
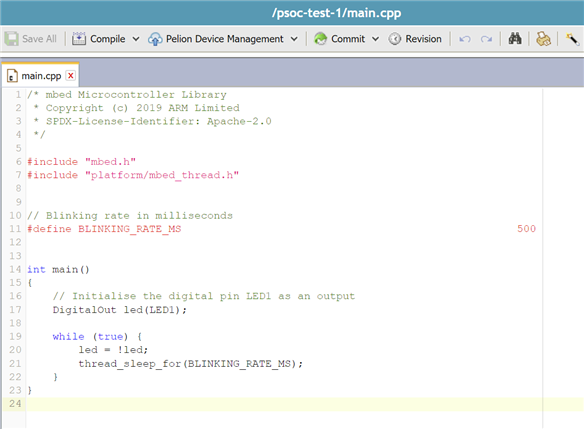
All the default files for your project skeleton will be listed. Double-click on main.cpp to see the code.
The default code is intended to flash an LED. The next step is to click on Compile at the top menu, and the code will automatically build, and the binary .hex file will automatically be downloaded to your PC.
To run the code on The PSoC6 board, simply plug the board into your PC using the USB cable (install any driver if prompted) and you’ll see a USB file system appear. The file system will contain files such as MBED.HTM. All you need to do is drag the downloaded .hex file into the PSoC 6 USB file system, and the code will automatically program itself into the board and execute it!
Conclusion
It is extremely easy to work with the PSoC6 board and Mbed, especially for those users coming from the C/C++ and Arduino IDE. To be honest, regardless of the usability and wide specific series of examples I found using the PSoC6 to connect and work with AWS with the AWS RTOS, I should say that the idea of making a complex node gateway, also working as an environmental sensors data collector with MBed OS I feel more and more comfortable.
Full Content
Already Posted (until now)
Super Smart Home #1 The project
Super Smart Home #2 The Door Opener
Super Smart Home #3 Designing the Control Center
Super Smart Home #4 Activating the Door Opener
Super Smart Home #5 Connecting the First Node to the Control Center
Super Smart Home #6 PSoC6 On the Cloud
Super Smart Home #7 From AWS IoT Core to AWS SiteWise
Super Smart Home #8 The Kitchen Node: Parts, Design and Components
Super Smart Home #9 The Kitchen Node: Circuit and Software
Super Smart Home #10 Building IoT nodes with PSoC6-WiFi-Bt and Mbed OS
Super Smart Home #11 Project Summary, Highlights, and More...
Super Smart Home #12 PSoC6 Local Node: Application Skeleton
Super Smart Home #13 PSoC6 Protection Case
Sources, Circuits, and Documentation
All the software sources, scripts, circuits schematics, and more are available as Open Source material on the SuperSmartHome GitHub repository.
The video episodes of this challenge are repurposed on the blog posts of the site we-are-borg.com
Thanks to
Element14, AWS, and Cypress, main sponsors
Elegoo for 3D printers ad printing material
Digitspace for sensors, actuators, and boards
The friends and community members Jan Cumps and shabaz always available with advice and suggestions.

Top Comments
-

shabaz
-
Cancel
-
Vote Up
+1
Vote Down
-
-
Sign in to reply
-
More
-
Cancel
-

balearicdynamics
in reply to shabaz
-
Cancel
-
Vote Up
+2
Vote Down
-
-
Sign in to reply
-
More
-
Cancel
Comment-

balearicdynamics
in reply to shabaz
-
Cancel
-
Vote Up
+2
Vote Down
-
-
Sign in to reply
-
More
-
Cancel
Children