After the last post went up, a comment from BigG let me know that I had indeed got something wrong, seemingly due to a bug in the new Arduino IDE. There actually are “bare-metal” examples in Arduino for the Nicla Vision board, so let’s take a look at some of those. While I could have delved into AI, as a complete novice, I fear that time is not on my side. Instead, I decide to tread a slightly more cautious approach, delivering on another key part of my proposal – using the infrared time-of-flight sensor and microphone to do audio sensing instead. After all, I think there may well be a few good AI-based project blogs out there already … how could I ever compete with those, seeing there are only a couple of weeks left?
Table of Contents
Bare Metal Examples
But first, a minor thing – it seems the camera on my board has decided to let go of the board and is now hanging by its ribbon. Perhaps all that was holding it on was double-sided tape! I suppose the board is best used in a case that “holds” the camera in position, lest this happen in the field with nobody around to fix it!
Being quite familiar with Arduino IDE, I decided to go back to basics and “near” bare metal rather than forcing the board to run something as complex as MicroPython. Loading up the examples, the list seems rather extensive:
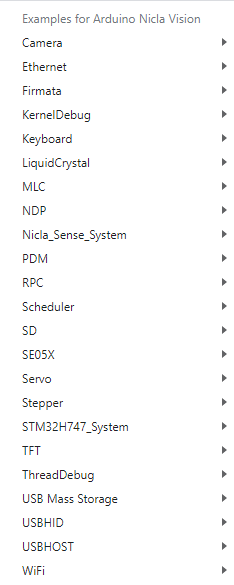
Upon closer inspection, however, all is not quite as it seems. Some examples are for Nicla Sense and not for Nicla Vision, while others seem generic Arduino (e.g. LiquidCrystal, Servo, Stepper) as the board doesn’t seem to have the level of free I/O necessary to make use of it. Some things I did expect to see (e.g. Wire) are not there!
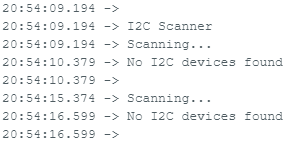
Using the I2C scanner demonstration from the Wire library manually built for this board finds no devices. I was expecting the IR time-of-flight sensor or accelerometer to turn up, but alas, it seems there is more than one I2C bus and it is not on the default one or there might need to be something done to power or enable the sensor. One thing I noted is that sometimes I need to upload twice, as the dfu uploader fails with unusual errors and the board may become bricked (this happened when I tried Wire1/Wire2 instead of Wire to see if other buses are present and defined).

Other times, uploading would brick the board, requiring entering bootloader mode by double-clicking the reset button until the LED breathes green.
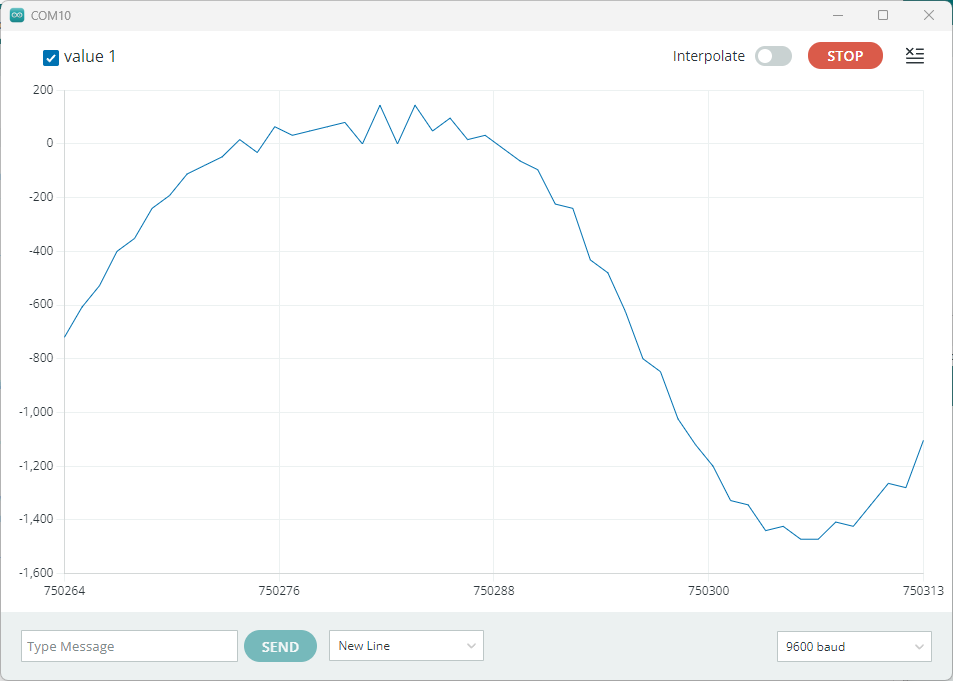
I tested a microphone example which worked quite well – the waveform of me humming a low note is pretty clean even though it’s sampling at 16kHz!
I tested a Wi-Fi example that fetches a page from a server but Wi-Fi wasn’t working just yet …

It seems the OpenMV firmware is not compatible with the Arduino examples which expect the flash to have a specific layout with Wi-Fi firmware. Luckily a sketch exists to load/update the firmware:
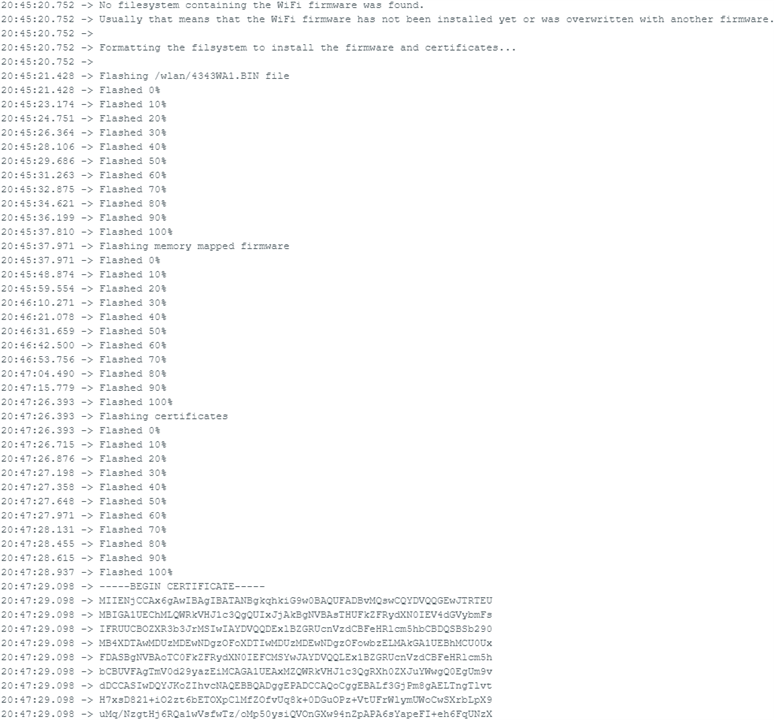
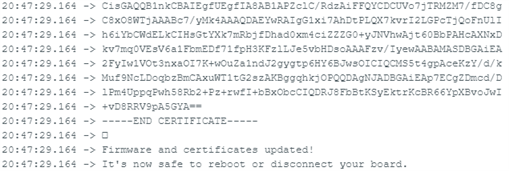
After it successfully loads, the example sketch works just fine …
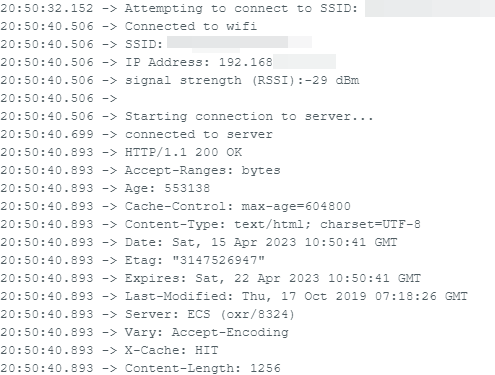
While Arduino IDE will work with the board, I’m not entirely sold on using it. There didn’t seem any example for the IR time-of-flight sensor, and traditional libraries can’t work with it if it can’t be found on an I2C bus with the Wire library. Furthermore, I would need to run ArduinoMQTT for carrying the data, but it may have unknown compatibility issues too that I haven’t looked at. I guess we’re going to have to go crawling back to OpenMV and MicroPython if we want a quick solution …
Going back to OpenMV MicroPython was pretty straightforward. The IDE detected the board and offered to flash the latest firmware – let that happen and the board is back to operating with MicroPython!
Infrared Time-of-Flight & Audio Sensing
My idea was to use the infrared time-of-flight sensor as a way of counting hive activity. If it is placed across an entrance, then the distance measurements can tell whether a bee is in the path or not – in a way similar to how a laser particulate monitor sensor measures the obstruction of a laser beam by particles in the air.
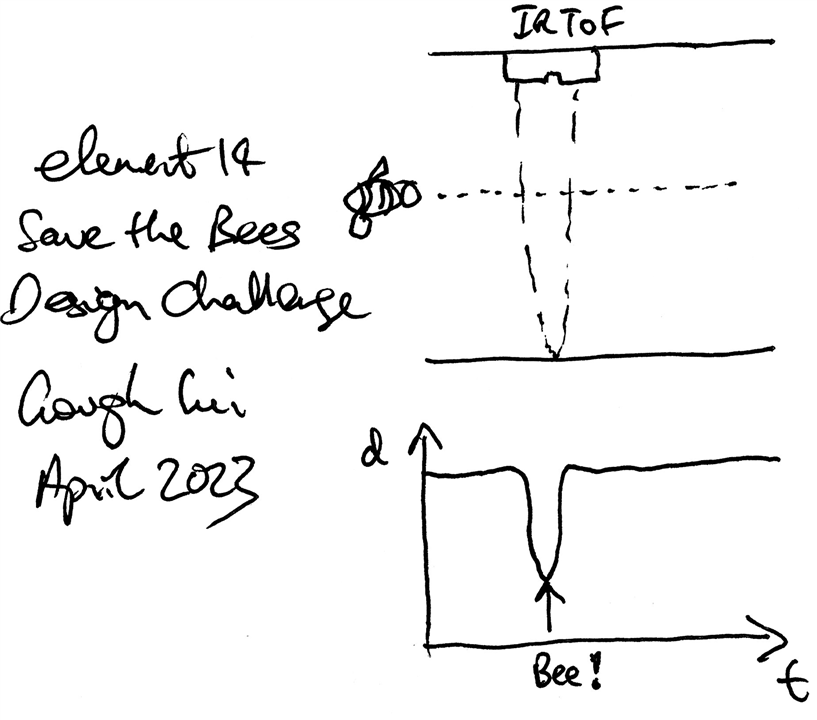
I would expect the distance to measure the “width” of the opening when no bees are in place, and less than this when bees are in the path. Counting the bees may be possible if they don’t overlap, but that is unlikely, so instead I think it is best to report it as percentage-of-time with the passage “in-use” as a proxy for hive entrance/exit activity.
Furthermore, with the presence of a microphone, we can probably just take the audio data to determine hive activity too. My crude approach, which doesn’t filter against non-bee sounds, is simply to measure the average, maximum and minimum amplitudes. This may be enough to identify hive activity but also potentially loud noises or threats.
The data would be carried by MQTT – for testing, test.mosquitto.org is being used in unencrypted mode as the example works well with it. I did try with a secure TLS-based server, but instead, I got errors:

Unlike the Arduino case, everything just “clicked” into place with the code below:
# Nicla Vision ToF + Audio MQTT Logger by Gough Lui
# April 2023 - element14 Save the Bees Design Challenge
# Free to use, based on OpenMV examples, no guarantees provided!

import time, network
from mqtt import MQTTClient
from machine import I2C
from vl53l1x import VL53L1X
import audio
from ulab import numpy as np

CHANNELS = 1
SIZE = 256//(2*CHANNELS)

raw_buf = None

audio.init(channels=CHANNELS, frequency=16000, gain_db=24, highpass=0.9883)

def audio_callback(buf):
    # NOTE: do Not call any function that allocates memory.
    global raw_buf
    if (raw_buf == None):
        raw_buf = buf

# Start audio streaming
audio.start_streaming(audio_callback)

SSID='XXXXXXXX' # Network SSID
KEY='XXXXXXXX'  # Network key

tof = VL53L1X(I2C(2))

# Init wlan module and connect to network
print("Trying to connect. Note this may take a while...")

wlan = network.WLAN(network.STA_IF)
wlan.deinit()
wlan.active(True)
wlan.connect(SSID, KEY, timeout=30000)

# We should have a valid IP now via DHCP
print("WiFi Connected ", wlan.ifconfig())

client = MQTTClient(client_id="XXXXXXXX", server="test.mosquitto.org", port=1883)
client.connect()

print("MQTT CONNECTED")

begint = time.time()
beepres = 0
beeabs = 0
aamp = []

while (True):
    if time.time() < begint + 60 :
      dist = tof.read()
      if dist < 20 :
        beepres = beepres + 1
      else :
        beeabs = beeabs + 1
      if (raw_buf != None):
        pcm_buf = np.frombuffer(raw_buf, dtype=np.int16)
        raw_buf = None
        aamp.append(max(pcm_buf) - min(pcm_buf))
    else :
      client.publish("XXXXXXXX/XXXXXXXX", str(beepres/(beepres+beeabs))+","+
      str(sum(aamp)/len(aamp))+","+str(max(aamp))+","+str(min(aamp)))
      beepres = 0
      beeabs = 0
      aamp = []
      begint = time.time()
The reported data is fraction of time path is in use, average amplitude, maximum, minimum of 256 samples.
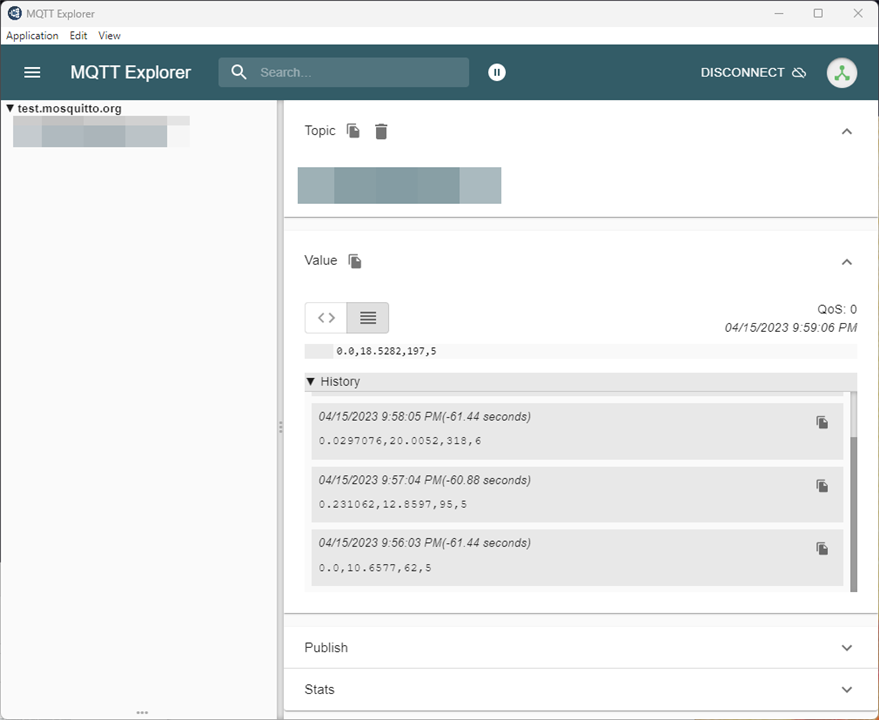
Perhaps it would make sense to have a larger sample window, or a better approach will be to update statistics on a per-sample basis, but at least it works!
Data Dump
My LoRaWAN sensing nodes have been running non-stop since the previous posting about them – below are the new data results dumped from the boards.
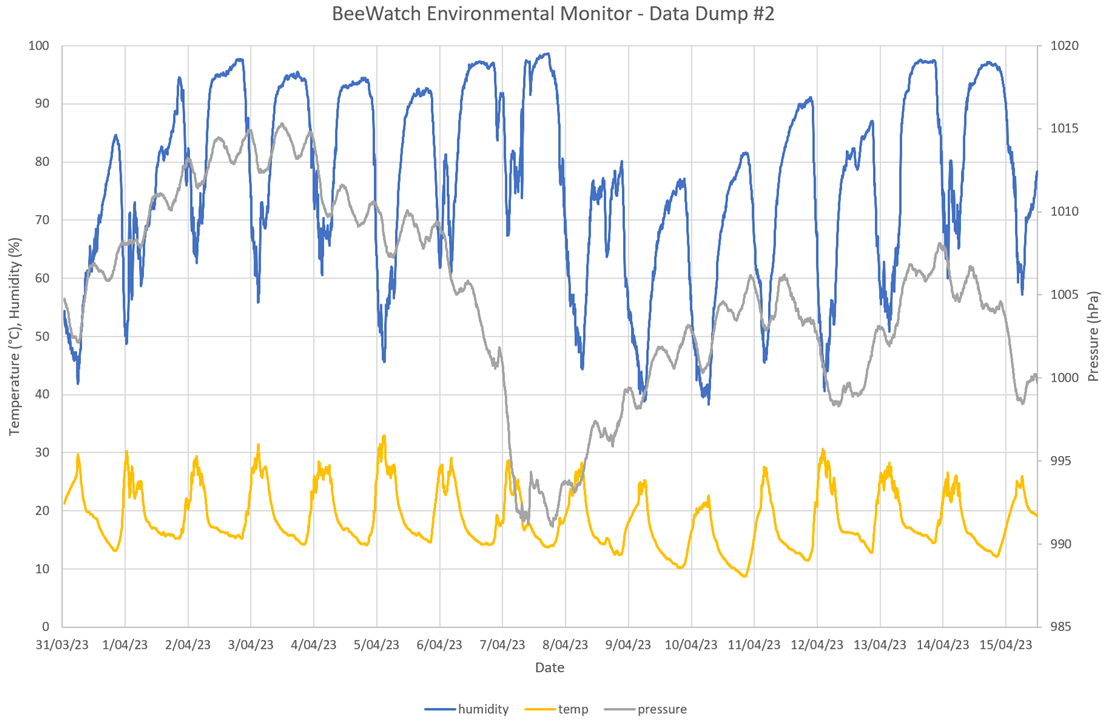
We’ve had some rather rainy days – just look at how high the humidity is getting!
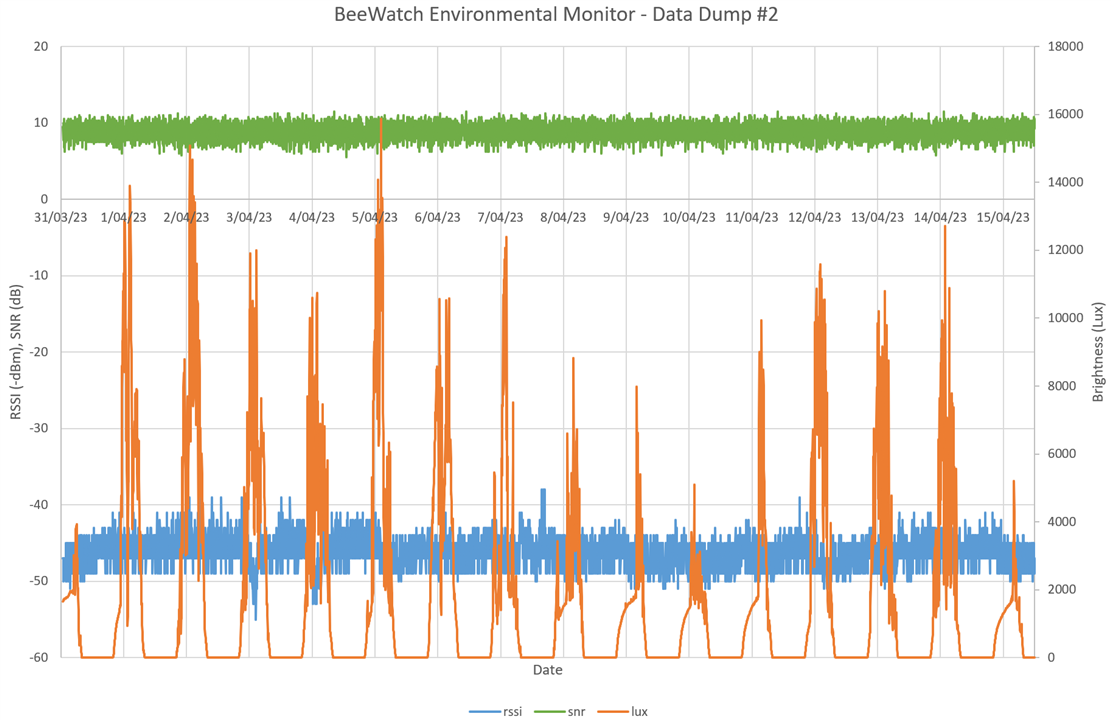
Signal strengths are good, and the daily sun is visible.
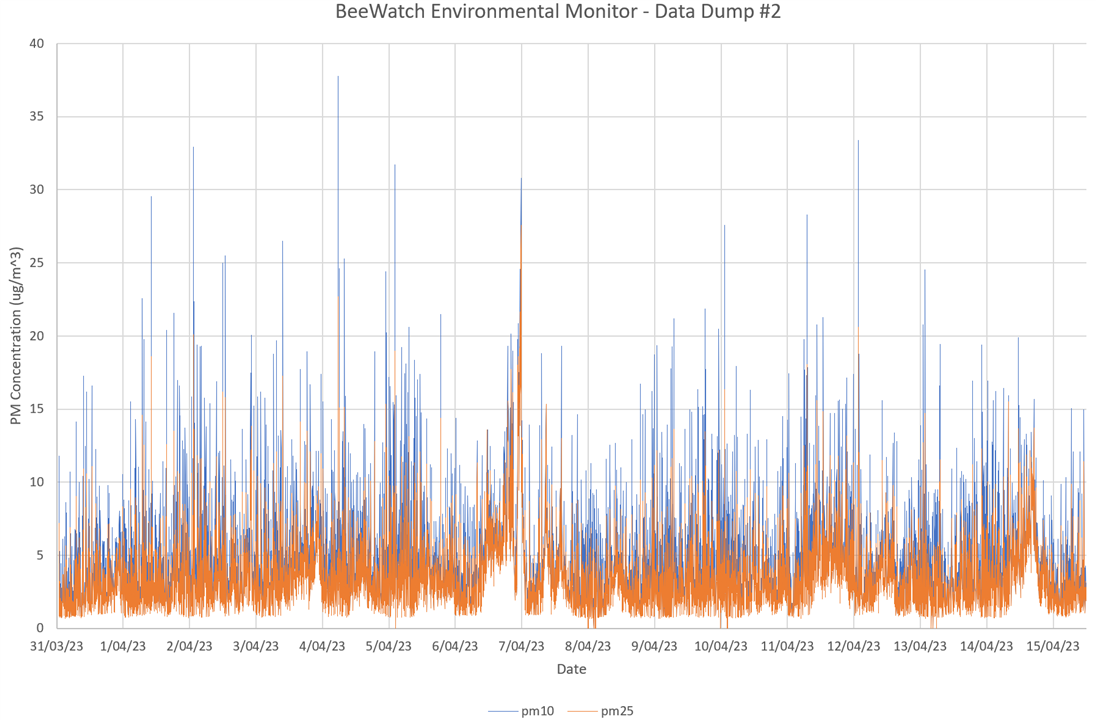
There’s been a few days with air quality that is noticeably worse – perhaps people are using wood-fired heaters nearby.
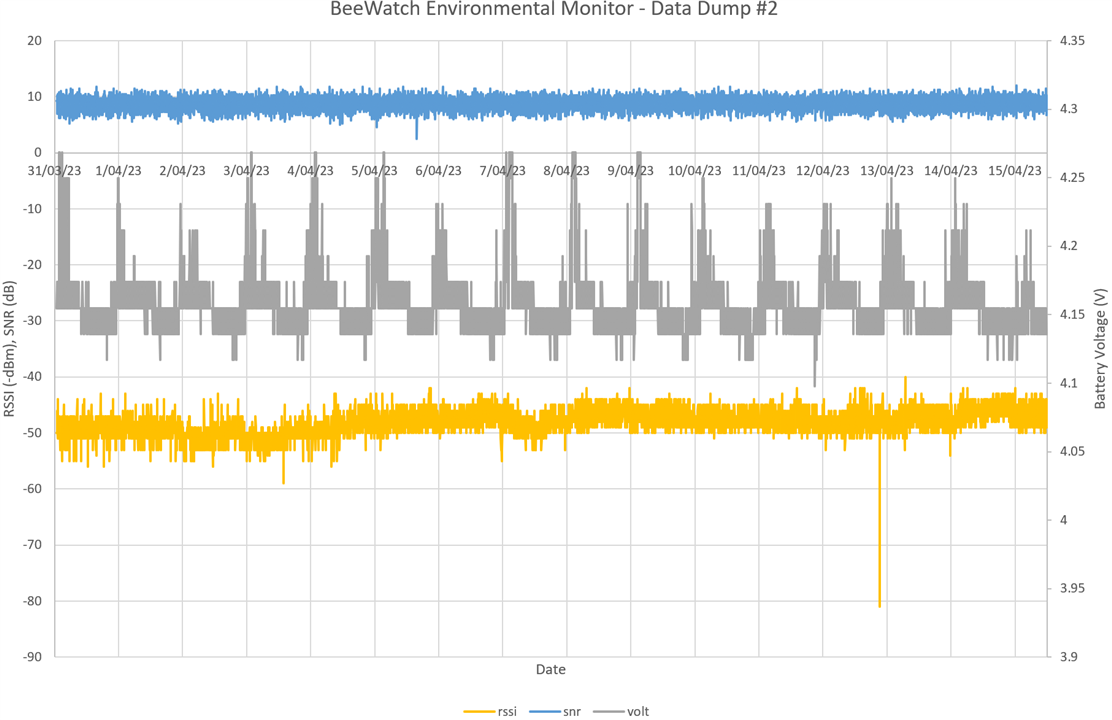
Battery status remains good for the particulate monitor system – it’s truly self-sustaining and signals are good except for one outlier. I didn’t expect my breadboards to live very long outside … but they’ve defied my expectations!
Thought Experiment: JPEGs over LoRaWAN?
With a board like the Nicla Vision and the MKR WAN 1310, it’s natural to think about the possibility of sending an image over LoRaWAN. However, it is important to remember that LoRa isn’t optimised for speed, but is more oriented at low-rate and long-range. Likewise, the acceptable usage policy for The Things Network free-tier is 30-seconds a day of transmit time. Using more than this is possible using private LoRaWAN or even direct LoRa communications, but this may impede access for other legitimate users – remember, the airwaves are shared!
As a result, I decided to do some computations to see just how much we can get out of the limits using this airtime calculator:
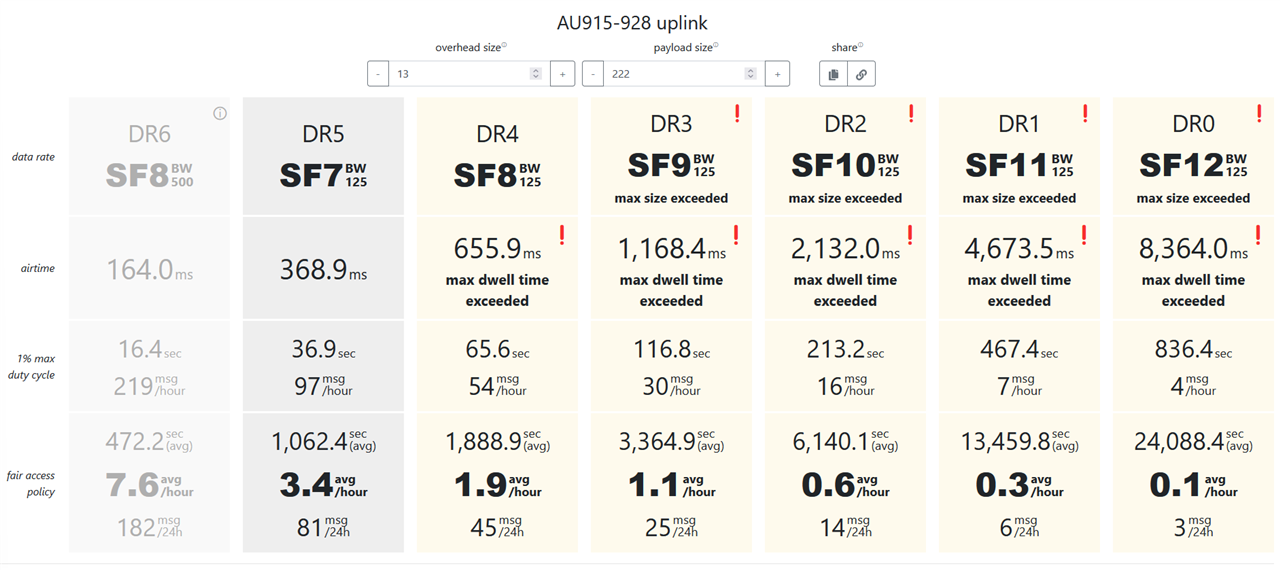
The largest frame we can send contains 222 bytes – this means the least overhead of headers if we can exploit the maximum size. In terms of data rate, DR5 is the fastest for the LoRaWAN standard, which means 81 messages per day maximum for the 30-second airtime rule. As a result, we can send just 17,982 bytes per day assuming we have the best coverage. But there is a catch – all the packets have to be received correctly without acknowledgement – if we have to use acknowledged uplinks, then we are limited to 10 packets per day or 2,220 bytes.

The above is a 16,137 byte image – not particularly big or clear. Therefore, this is probably not a particularly fruitful endeavour.
But let’s say we’re using LoRa directly, and we’re not caring too much about airtime considerations, assuming that regional regulations do not place limits on duty cycle or channel occupancy, then what can we achieve? We can use the LoRa data rate calculator to find out.
While SF7 is the fastest that is used on LoRaWAN, many of the later chipsets also support SF6 and some even SF5, at the cost of robustness. The widest bandwidth of 500kHz provides faster throughput, but again, at the cost of robustness and requiring higher signal to noise ratio. A code-rate of 1 provides the least error protection, maximising throughput.
*drumroll*
The maximum (on air) data rate under this situation is 37.5kbit/s although I suspect actual throughput is less because of framing overheads. At SF7, this drops to 21.875kbit/s. A decent quality image may require 256kB which would take a minimum of 55 seconds at SF6 or 94 seconds at SF7 while occupying the channel continuously.
In the end, this makes dial-up look fast and the use of LoRa or LoRaWAN to carry something as big as an image is possible, but hardly ideal or all that practical.
Conclusion
In the end, while trying to go back to my Arduino IDE “bare metal” preference and explore the examples, I realised that some things were not quite so polished. I had occasional hiccups with uploads and bricked boards, encountered examples which weren’t appropriate for the board and didn’t find anything that would run the infrared time-of-flight sensor or I2C properly. As a result, I went crawling back to MicroPython.
Surprisingly, the OpenMV examples were much more complete and MicroPython proved easy to work with. Dare I say, I did like the experience except for the fact that the libraries available are more limited or are alternatives with a syntax that may differ from what I am used to on the desktop. While I didn’t manage to get encrypted MQTT working, at least I did get the IR ToF sensor working along with the microphone, as I had originally proposed.
The LoRaWAN boards have been running very well and the data dump shows it. Finally, a short thought experiment seems to confirm what I’ve long understood – LoRa and LoRaWAN is best used for low-rate applications. Sending images over LoRa or LoRaWAN just doesn’t seem ideal or practical.
Not focusing on AI is perhaps my acknowledgement that time is fast running out for the Save the Bees challenge and that there are a few others who seem to have done some good work in that area. Perhaps it’s too late for me to catch-up, given that it’s not something I’m familiar with.
[[BeeWatch Blog Index]]
- Blog 1: README.TXT
- Blog 2: Unboxing the Kit
- Blog 3: LoRa vs. LoRaWAN & Getting Started with MKR WAN 1310
- Blog 4: LoRaWAN Gateway Set-Up & MKR WAN 1310 Quirks
- Blog 5: Power, State Saving, Using Sensors & Battery
- Blog 6: Particulate Monitoring & Solar Power Input
- Blog 7: Powered by the Sun & Initial Data
- Blog 8: Getting Started with Nicla Vision
- Blog 9: Nicla Vision IR ToF & Audio Sensing, Data Dump
- Blog 10: Nicla Vision Power, Saving B’s & Dashboard Woes
- Blog 11: Summary Conclusion

