element14 Community
element14 Community
    Register Log In
  • Site
  • Search
  • Log In Register
  • About Us
  • Community Hub
    Community Hub
    • What's New on element14
    • Feedback and Support
    • Benefits of Membership
    • Personal Blogs
    • Members Area
    • Achievement Levels
  • Learn
    Learn
    • Ask an Expert
    • eBooks
    • element14 presents
    • Learning Center
    • Tech Spotlight
    • STEM Academy
    • Webinars, Training and Events
    • Learning Groups
  • Technologies
    Technologies
    • 3D Printing
    • FPGA
    • Industrial Automation
    • Internet of Things
    • Power & Energy
    • Sensors
    • Technology Groups
  • Challenges & Projects
    Challenges & Projects
    • Design Challenges
    • element14 presents Projects
    • Project14
    • Arduino Projects
    • Raspberry Pi Projects
    • Project Groups
  • Products
    Products
    • Arduino
    • Avnet Boards Community
    • Dev Tools
    • Manufacturers
    • Multicomp Pro
    • Product Groups
    • Raspberry Pi
    • RoadTests & Reviews
  • Store
    Store
    • Visit Your Store
    • Choose another store...
      • Europe
      •  Austria (German)
      •  Belgium (Dutch, French)
      •  Bulgaria (Bulgarian)
      •  Czech Republic (Czech)
      •  Denmark (Danish)
      •  Estonia (Estonian)
      •  Finland (Finnish)
      •  France (French)
      •  Germany (German)
      •  Hungary (Hungarian)
      •  Ireland
      •  Israel
      •  Italy (Italian)
      •  Latvia (Latvian)
      •  
      •  Lithuania (Lithuanian)
      •  Netherlands (Dutch)
      •  Norway (Norwegian)
      •  Poland (Polish)
      •  Portugal (Portuguese)
      •  Romania (Romanian)
      •  Russia (Russian)
      •  Slovakia (Slovak)
      •  Slovenia (Slovenian)
      •  Spain (Spanish)
      •  Sweden (Swedish)
      •  Switzerland(German, French)
      •  Turkey (Turkish)
      •  United Kingdom
      • Asia Pacific
      •  Australia
      •  China
      •  Hong Kong
      •  India
      •  Korea (Korean)
      •  Malaysia
      •  New Zealand
      •  Philippines
      •  Singapore
      •  Taiwan
      •  Thailand (Thai)
      • Americas
      •  Brazil (Portuguese)
      •  Canada
      •  Mexico (Spanish)
      •  United States
      Can't find the country/region you're looking for? Visit our export site or find a local distributor.
  • Translate
  • Profile
  • Settings
1 Meter of Pi
  • Challenges & Projects
  • Design Challenges
  • 1 Meter of Pi
  • More
  • Cancel
1 Meter of Pi
Blog Gr0G - 06 - Building the box
  • Blog
  • Forum
  • Documents
  • Polls
  • Files
  • Events
  • Mentions
  • Sub-Groups
  • Tags
  • More
  • Cancel
  • New
  • Share
  • More
  • Cancel
Group Actions
  • Group RSS
  • More
  • Cancel
Engagement
  • Author Author: amgalbu
  • Date Created: 2 Nov 2020 9:59 AM Date Created
  • Views 1195 views
  • Likes 6 likes
  • Comments 6 comments
  • 1meterofpi
  • gr0g
  • 1meter of pi
Related
Recommended

Gr0G - 06 - Building the box

amgalbu
amgalbu
2 Nov 2020

Here is a list of the posts in this challenge

Gr0G - 01 - Introduction

Gr0G - 02 - Why aeroponics?

Gr0G - 03 - High-pressure system design

Gr0G - 04 - Mechanical design

Gr0G - 05 - Electrical design

Gr0G - 06 - Building the box

Gr0G - 07 - Playing with the Gertbot

Gr0G - 08 - Installing LEDs

Gr0G - 09 - The control board

Gr0G - 10 - Software design

Gr0G - 11 - Building the box (2)

Gr0G - 12 - Building the high-pressure system

Gr0G - 13 - Building the high-pressure system (2)

Gr0G - 14 - Piping

Gr0G - 15 - Improvements

Gr0G - 16 - Remote UI

Gr0G - 17 - Remote UI (2)

Gr0G - 18 - Conclusions


Source code available at https://github.com/ambrogio-galbusera/gr0g, https://github.com/ambrogio-galbusera/gr0g-ble-android and https://github.com/ambrogio-galbusera/gr0g-ble


In this post we will finally start building the frame of Gr0G box


Building the top and bottom panels


Parts list

To build the top and bottom panels, you need

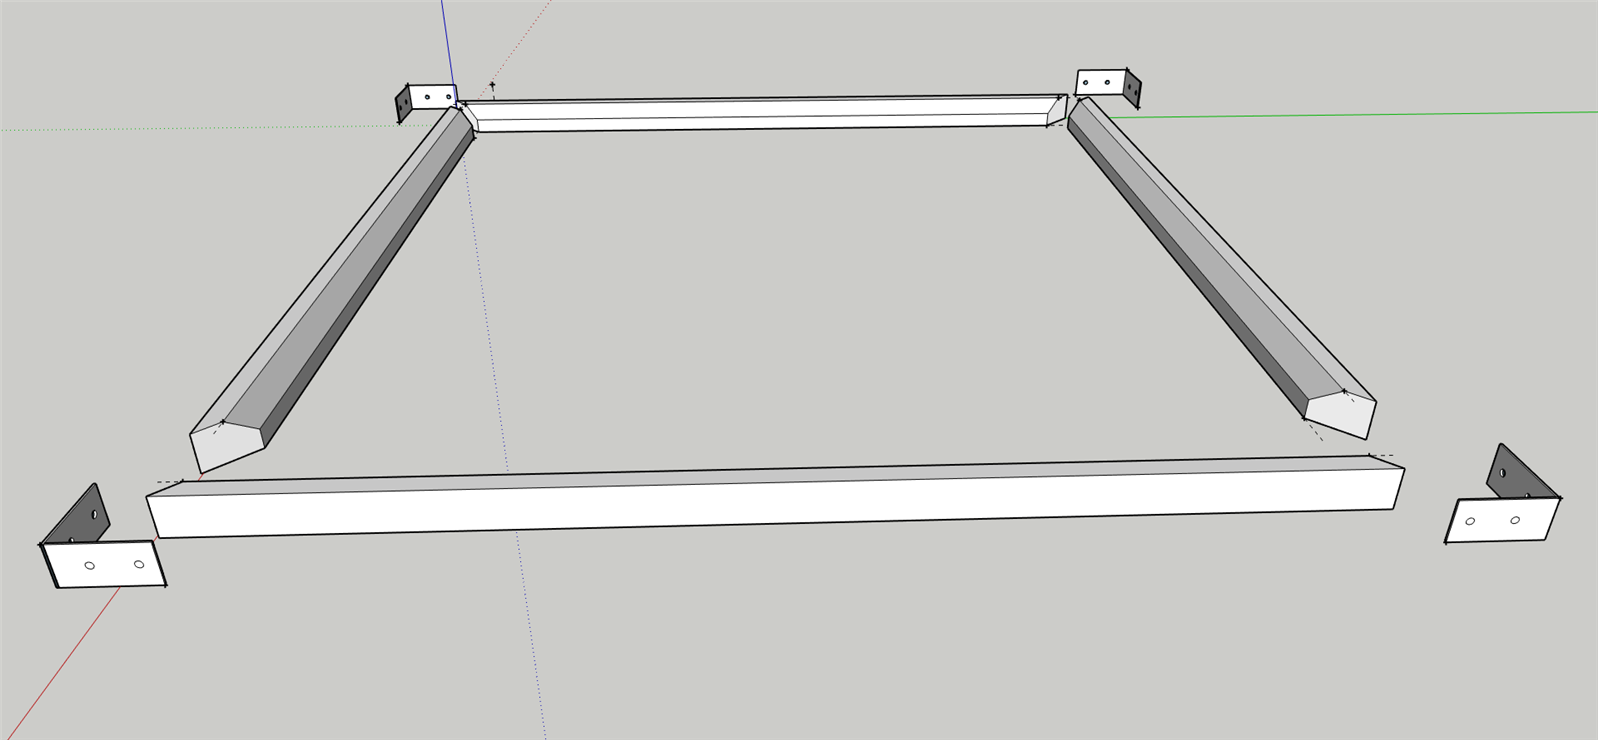
  • 8 pieces of bar with LED housing 46 cm in length with 45 degrees cut on both sides (when cutting, keep the LED housing facing upside)
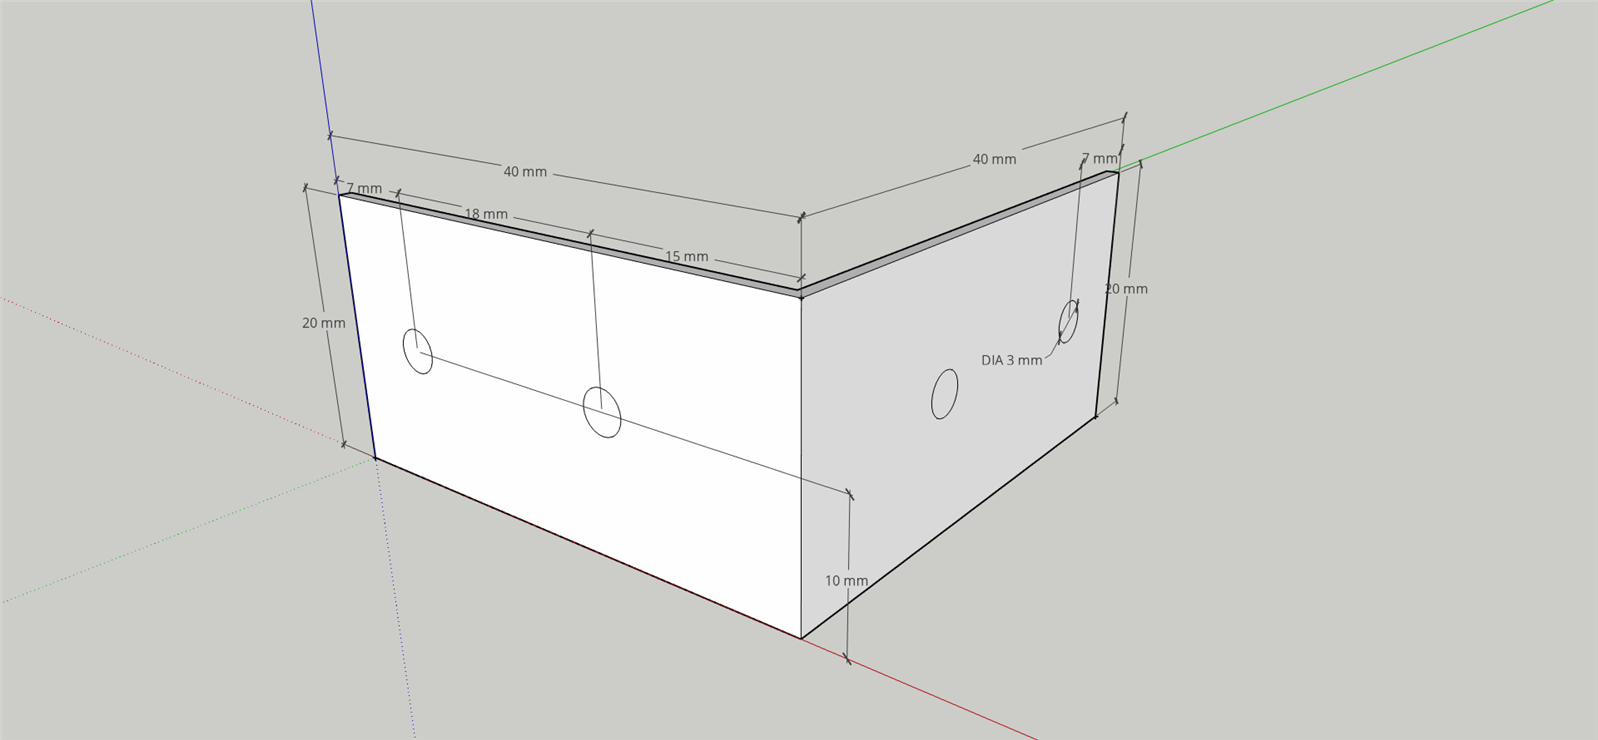
  • 8 clamps. I got my clamps from an L-shaped 40 mm x 40 mm x 1.5 mm aluminum bar. I cut 8 pieces of 20 mm in height
  • Rivets (16, at least). I used 3 mm rivets, so I drilled the parts with a 3.3 mm bit
  • a 46 cm x 46 cm plexiglass
  • 8 M4 x 20 mm screws with bolts


How to proceed

  • Drill two holes for each side of the clamps (4 holes per clamp, in total). Try to stay on the middle of the clamp (see picture) because the section of the bar with the LED housing is irregular and you will get a better result if stay 10 mm from the border

image

  • Mate the clamp with the aluminum bars and fix the parts with 2 rivets per side

image

imageimage

image

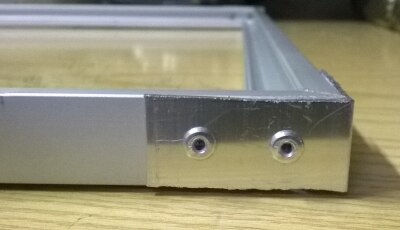
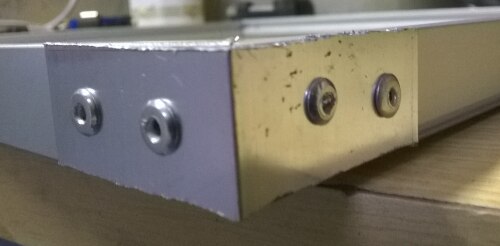
  • With a 4 mm bit, drill 2 holes for each edge of the frame, close to the corner in order not to interfer with the LED strip we will install later. Drill the holes close the inner edge of the aluminum bar or you will not have enough room for the bolt
  • Screw the screws and bolts

imageimage


Building the four lateral panel


Parts list

To build the four lateral panels, you need

  • 4 pieces of bar with LED housing 50 cm in length
  • 4 pieces of L-shaped 30 mm x 20 mm x 1 mm aluminum bar 50 cm in length (referred as bar "A")

image

  • 4 pieces of L-shaped 20 mm x 20 mm x 1 mm aluminum bar 50 cm in length (referred as bar "B")

image

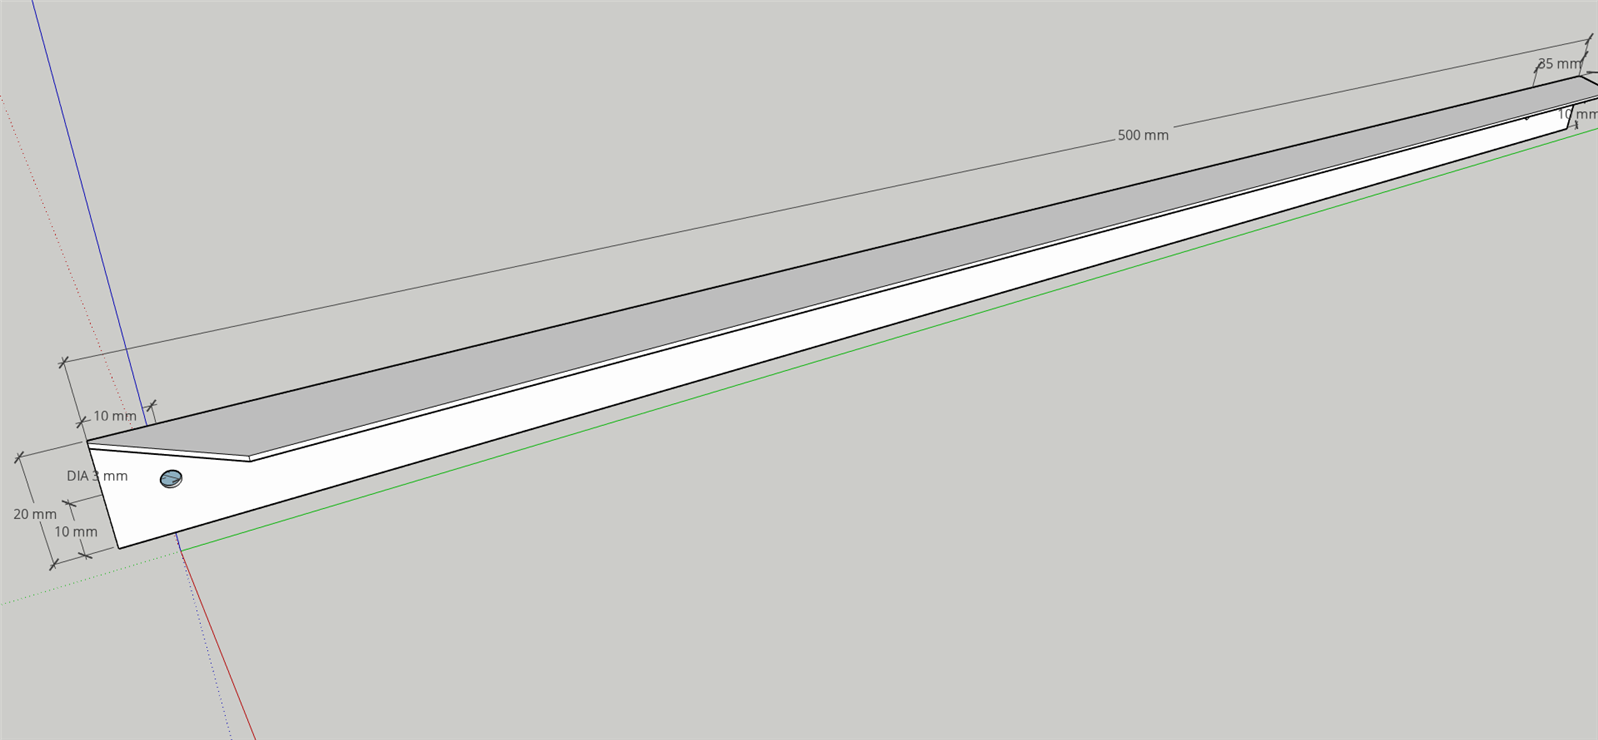
  • 4 pieces of 30 mm x 1 mm aluminum bar 50 cm in length (referred as bar "C")
  • Rivets. I used 3mm rivets, so I drilled the parts with a 3.3 mm bit
  • 4 50 cm x 50 cm plexiglass
  • 16 M4 x 20 mm screws with bolts


How to proceed

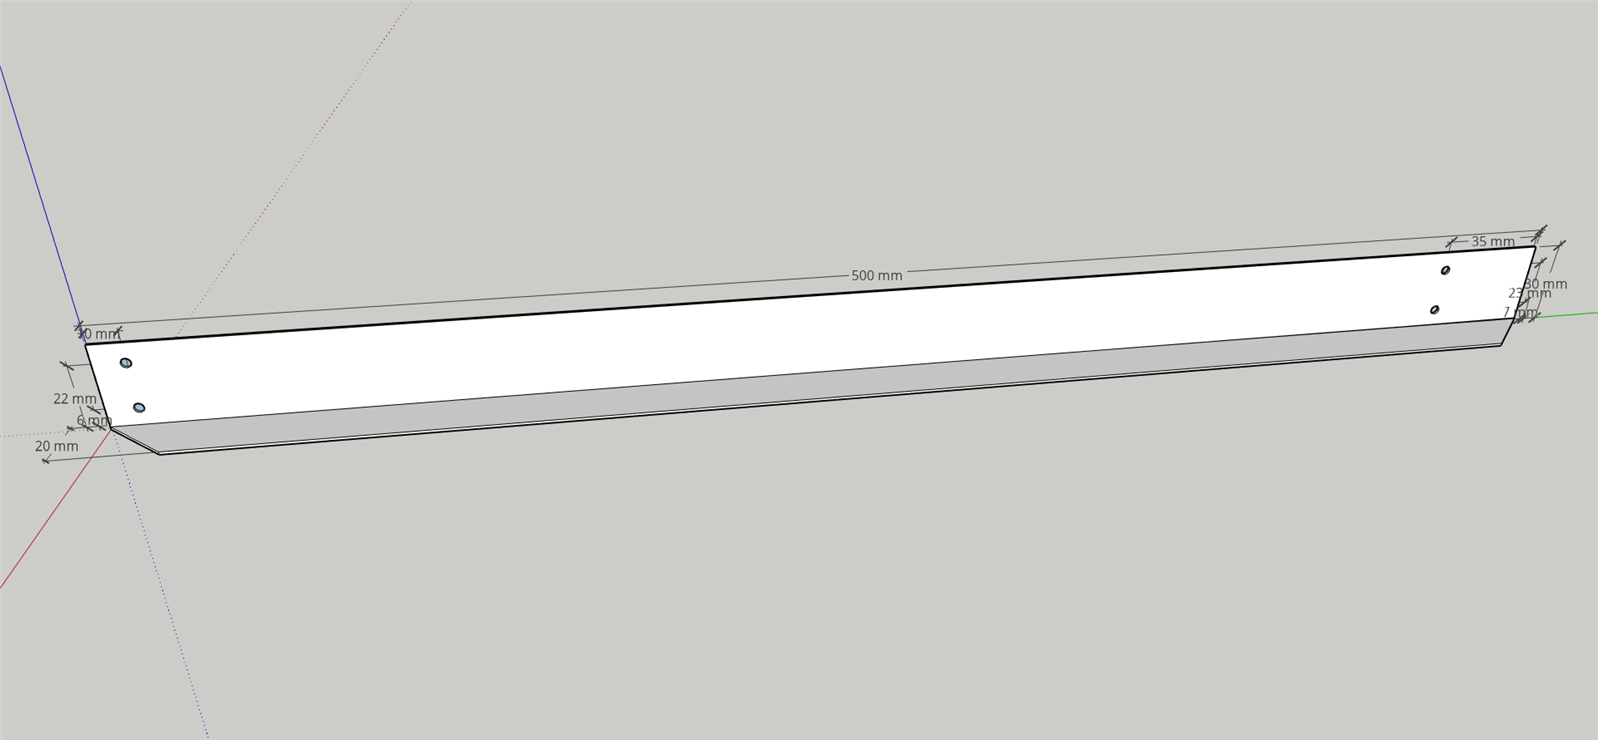
  1. Drill holes in bar "A" as shown in picture
  2. Mate the bar "A" with the LED aluminum bars and fix the parts with 2 rivets
  3. Drill holes in bar "B" as shown in picture
  4. Mate the bar "B" with the LED aluminum bars and fix the parts with 1 rivet
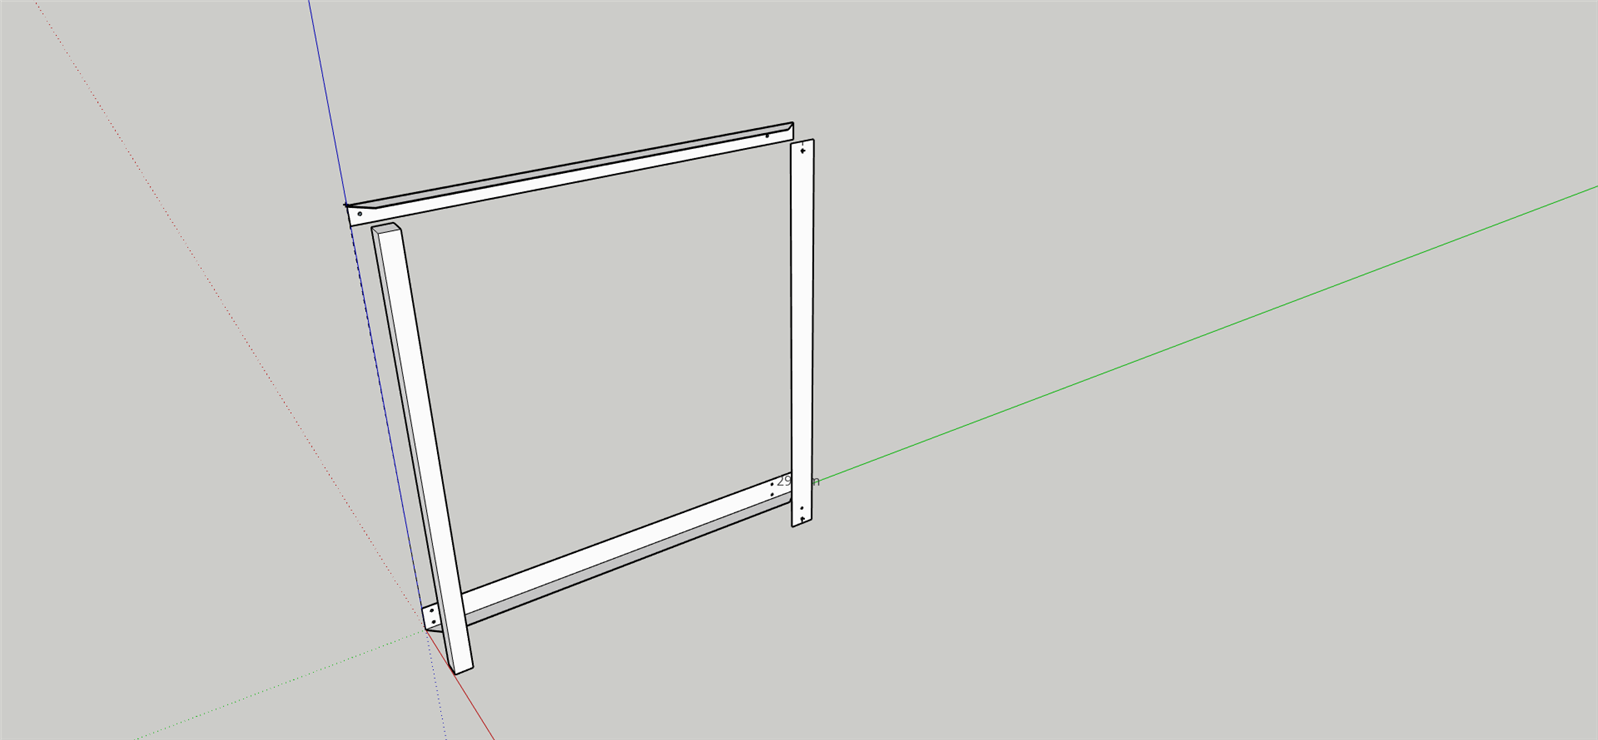
  5. Mate bar "C" with bar "A" leaving 20 mm from the edge of bar "A"
  6. Mate bar "C" with bar "B" leaving 20 mm from the edge of bar "B"
  7. Put the plexiglass in place and, with a 4 mm bit, drill 2 holes in bar "A" and two holes in bar "B"
  8. Screw the screws and bolts

image


You don't have permission to edit metadata of this video.
Edit media
x
image
Upload Preview
image

Joining panels

Parts list

To join the panels, you need

  • 10 joints with a maximum height of 20 mm
  • 30 countersunk head screws and bolts

How to proceed

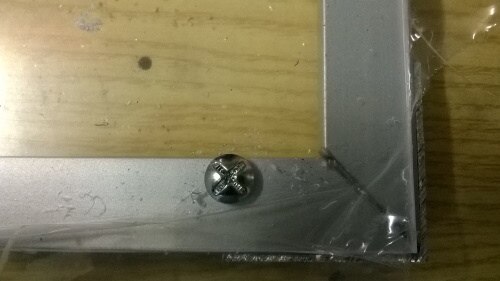
  • Take the bottom panel
  • Place the joint on the bar with LED housing, drill an hole for the screw and fix
  • Place one of the side panels with the plexiglass facing upside. Place the joint as shown, drill two holes for the screws and fix

imageimage

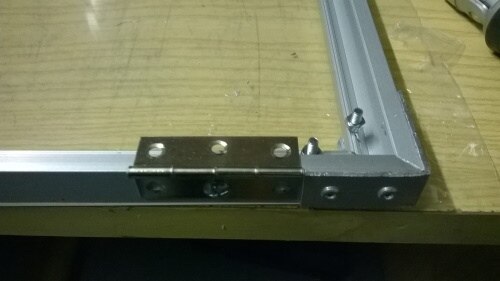
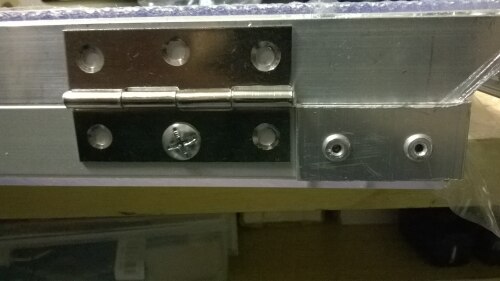
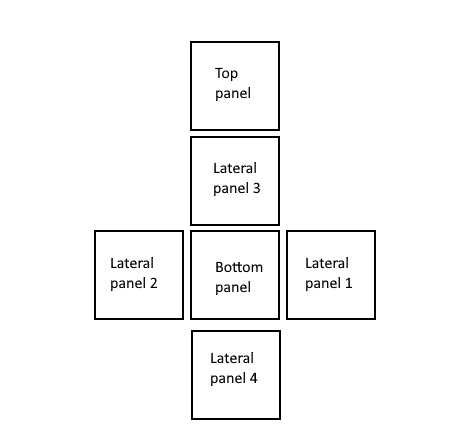
Refer to the assembly plan below for the location of the joints
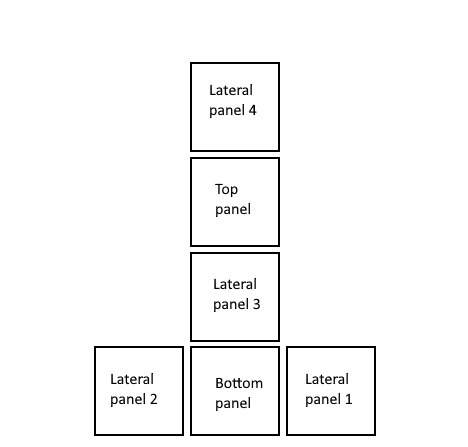
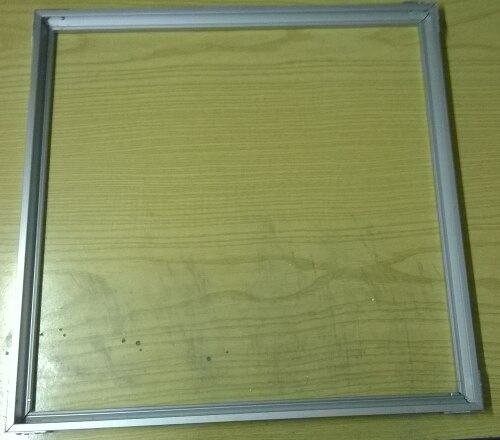
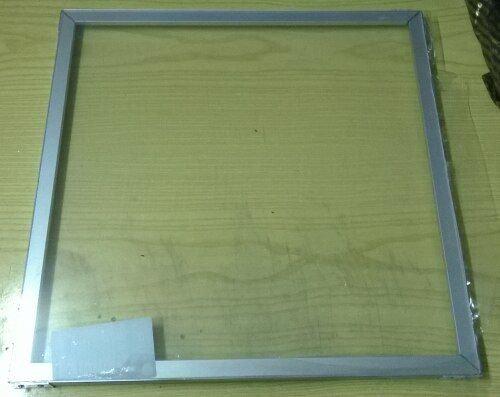
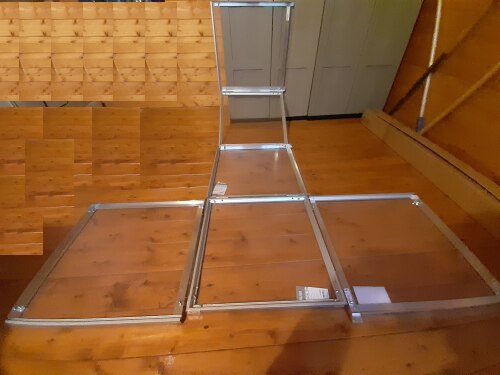
image


Final result

This the Gr0G assembled and unfolded

image


UPDATE

while building the Gr0G box, I realized that a front door make access and inspection much easier. So I changed the layout as follow

image

Attachments:
Assembly.skp.zip
BarA.skp.zip
Clamp.skp.zip
Top.skp.zip
BarB.skp.zip
  • Sign in to reply

Top Comments

  • dubbie
    dubbie over 4 years ago +2
    Looks to be a clever assembly process. I picked up some good tips. I must get my hand riveter out and try this sometime. Dubbie
  • aspork42
    aspork42 over 4 years ago +1
    Nice build!
  • balearicdynamics
    balearicdynamics over 4 years ago +1
    Great!!! What a neat build Enrico
  • DAB
    DAB over 4 years ago

    Good job and nice design.


    DAB

    • Cancel
    • Vote Up 0 Vote Down
    • Sign in to reply
    • More
    • Cancel
  • balearicdynamics
    balearicdynamics over 4 years ago

    Great!!!


    What a neat build image

    Enrico

    • Cancel
    • Vote Up +1 Vote Down
    • Sign in to reply
    • More
    • Cancel
  • amgalbu
    amgalbu over 4 years ago in reply to dubbie

    Hello dubbie

    I also got my hand riveter out after some time. Working with aluminium and rivets is really funny!

    • Cancel
    • Vote Up 0 Vote Down
    • Sign in to reply
    • More
    • Cancel
  • amgalbu
    amgalbu over 4 years ago in reply to aspork42

    Thank you!

    • Cancel
    • Vote Up 0 Vote Down
    • Sign in to reply
    • More
    • Cancel
  • dubbie
    dubbie over 4 years ago

    Looks to be a clever assembly process. I picked up some good tips. I must get my hand riveter out and try this sometime.


    Dubbie

    • Cancel
    • Vote Up +2 Vote Down
    • Sign in to reply
    • More
    • Cancel
>
element14 Community

element14 is the first online community specifically for engineers. Connect with your peers and get expert answers to your questions.

  • Members
  • Learn
  • Technologies
  • Challenges & Projects
  • Products
  • Store
  • About Us
  • Feedback & Support
  • FAQs
  • Terms of Use
  • Privacy Policy
  • Legal and Copyright Notices
  • Sitemap
  • Cookies

An Avnet Company © 2025 Premier Farnell Limited. All Rights Reserved.

Premier Farnell Ltd, registered in England and Wales (no 00876412), registered office: Farnell House, Forge Lane, Leeds LS12 2NE.

ICP 备案号 10220084.

Follow element14

  • X
  • Facebook
  • linkedin
  • YouTube