


Recycled filament
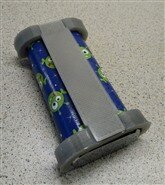
I had intended to use some recycled filament from a Kickstarter. However, as with many Kickstarters it has been delayed. So Instead I ordered some filament from a dutch firm, Refil. They get their filament from 2 different places. The first is from bottles, these are a material called "PET" and comes in a transparent but coloured materials. The second is ideal for my chassis, it is black (dark grey) ABS which comes from old car dashboards, it seems fitting that an old car should become part of a new car.
Software
I've used different CAD packages over the years but recently I've been doing a lot with OpenSCAD. This is different from a lot of CAD packages in that the only way you can create objects is via scripting.
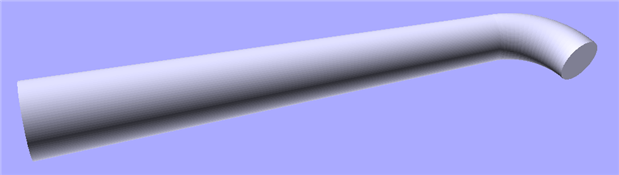
Here's a simple example of a cylinder joined to a circle which has been extruded around a 70degree corner.
module Exhaust() {
    union()
    {
    translate([1.81,4.66, 0])
        rotate([-20,-90,0])
            cylinder(r1=1.5,r2=2.5,h=30, $fn=100);

    rotate_extrude(convexity = 10, angle=70, $fn=100)
        translate([5, 0, 0])
            circle(r = 1.5, $fn = 100);
    }
}
I find it is good for 3D printing as you can tune the parameters as you build different models. As it's a coding language naturally parts that are repeated in arrays or circles are easy to reproduce. It's less good at producing organic items such as trees although you could use "fractal" algorithms for that kind of thing.
I have been working around a bug where the "difference" function causes things to disappear on one of my Win10 machines. Something to do with Java and incompatible video drivers apparently.
Parts
One technique I used on several of the parts was to print out a couple of layers and then cancel the print to give a floppy template. This allowed me to cross check the dimensions and ensure things would fit together.
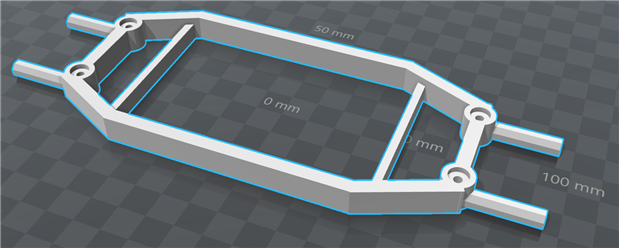
Chassis
The chassis serves several purposes: it's there to strengthen the middle section that was weakened by the cutting down; it provides mounting for the battery and Edison, and it provides an attachment point for the bumpers. This has gone through many iterations, the initial models were massively over engineered with 10mm thick struts and would have taken many many hours to print. So it's been slimmed down and simplified. The other key design feature was making it short enough to fit on my 210mm printer bed. After watching a video by Vicki Somma, I realised that the buffers that held the bumpers in place would be better as octagons so that when I print the sockets on the mating parts they won't have a big span to cross. The design changes cut the predicted print time from 4hrs to 2hrs 20minutes and also the amount of filament used is reduced.
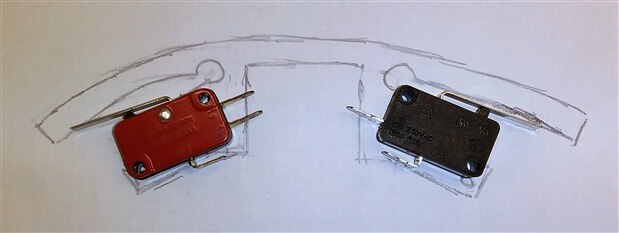
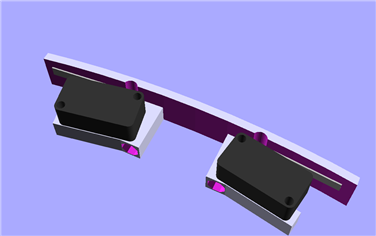
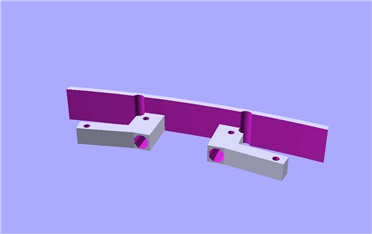
Bumpers
I had initially thought about attaching the bumpers with rods and springs but I realised that I can use the springy properties of the PET plastic and just attach them directly to lugs on the chassis. Here's my sketch and models of how these might be built.
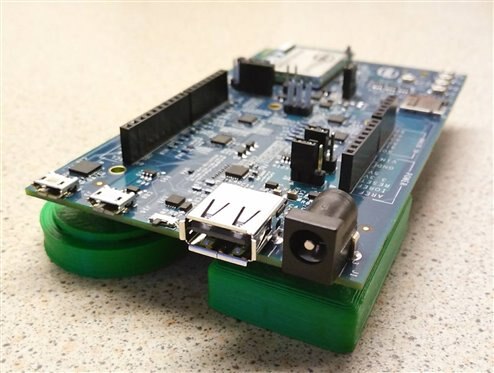
Edison Support
The Edison needs attaching to the car so I wanted something that looked like it was part of a car. I created a part with a fuel tank, exhaust, battery and a belt driven pulley. To reduce the material used in the print (and hence reduce print time) I added some hollowing out below the parts. I printed the part in draft-mode using some green ABS that I had available. I've a selection of self-tapping screws harvested from various old computer parts over the years so I'll use those to attach the Edison to the support.

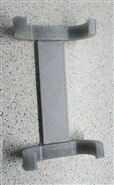
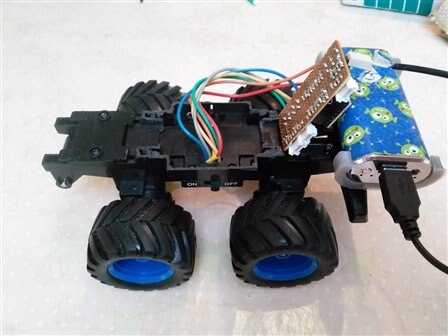
Battery Clip
My initial model for the battery clip was all in one part. I realised that this would mean that the clips would be quite tall. This has two issues, firstly a long print time and secondly, it was a risky print as the vertical parts might move during the print and cause failures. So I redesigned it in 3 parts connected with a dovetail joint. This meant that the clip parts could be printed on their sides and hence would be a lot shorter and more stable. Initially, the material seemed to bond well to the bed but there were a couple of failures where it broke off. So I fined tuned the temperature settings and sizes and re-printed, I also added a brim although I'm not sure that was strictly necessary.


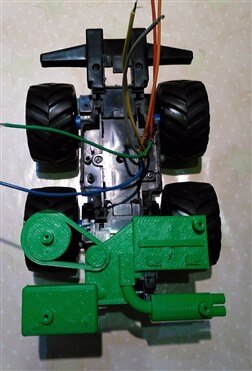
Drivers Seat
The seat is there to hold the Furby driver in place, it will also hold the motor driver board in place. Key design features will be that it will straddle the chassis and need space for routing the cables. As the photo below shows the driver board will likely be mounted vertically on the back of the chair.
Car Body
I've not started designing the car body yet but the plan is to use a green recycled PET for that. Hopefully, it will be possible to print a thin walled model so the electronics can be seen through the plastic.
Reference
OpenSCAD - The Programmers Solid 3D CAD Modeller
Refil - The makers of recycled filament
Embedding Nuts into 3D Printed Tap Handles
Previous Posts
[Upcycle It] Interactive Race Car Driver - Plan of action
[Upcycle It] Interactive Race Car Driver - Software
[Upcycle It] Interactive Race Car Driver - Lights
[Upcycle It] Interactive Race Car Driver - Detailed Plan
[Upcycle It] Interactive Race Car Driver - Edison
[Upcycle It] Interactive Race Car Driver - Drive Motor Testing
[Upcycle It] Interactive Race Car Driver - Car modification
[Upcycle It] Interactive Race Car Driver - Furby Hacking
[Upcycle It] Interactive Race Car Driver - Powering Motors
[Upcycle It] Interactive Race Car Driver - Bumper switches and wiring loom
Top Comments