element14 Community
element14 Community
    Register Log In
  • Site
  • Search
  • Log In Register
  • Members
    Members
    • Benefits of Membership
    • Achievement Levels
    • Members Area
    • Personal Blogs
    • Feedback and Support
    • What's New on element14
  • Learn
    Learn
    • Learning Center
    • eBooks
    • STEM Academy
    • Webinars, Training and Events
    • More
  • Technologies
    Technologies
    • 3D Printing
    • FPGA
    • Industrial Automation
    • Internet of Things
    • Power & Energy
    • Sensors
    • More
  • Challenges & Projects
    Challenges & Projects
    • Design Challenges
    • element14 presents
    • Project14
    • Arduino Projects
    • Raspberry Pi Projects
    • More
  • Products
    Products
    • Arduino
    • Dev Tools
    • Manufacturers
    • Raspberry Pi
    • RoadTests & Reviews
    • Avnet Boards Community
    • More
  • Store
    Store
    • Visit Your Store
    • Choose Another Store
      • Europe
      •  Austria (German)
      •  Belgium (Dutch, French)
      •  Bulgaria (Bulgarian)
      •  Czech Republic (Czech)
      •  Denmark (Danish)
      •  Estonia (Estonian)
      •  Finland (Finnish)
      •  France (French)
      •  Germany (German)
      •  Hungary (Hungarian)
      •  Ireland
      •  Israel
      •  Italy (Italian)
      •  Latvia (Latvian)
      •  
      •  Lithuania (Lithuanian)
      •  Netherlands (Dutch)
      •  Norway (Norwegian)
      •  Poland (Polish)
      •  Portugal (Portuguese)
      •  Romania (Romanian)
      •  Russia (Russian)
      •  Slovakia (Slovak)
      •  Slovenia (Slovenian)
      •  Spain (Spanish)
      •  Sweden (Swedish)
      •  Switzerland(German, French)
      •  Turkey (Turkish)
      •  United Kingdom
      • Asia Pacific
      •  Australia
      •  China
      •  Hong Kong
      •  India
      •  Korea (Korean)
      •  Malaysia
      •  New Zealand
      •  Philippines
      •  Singapore
      •  Taiwan
      •  Thailand (Thai)
      • Americas
      •  Brazil (Portuguese)
      •  Canada
      •  Mexico (Spanish)
      •  United States
      Can't find the country/region you're looking for? Visit our export site or find a local distributor.
  • Translate
  • Profile
Bluetooth Unleashed Design Challenge
  • Challenges & Projects
  • Design Challenges
  • Bluetooth Unleashed Design Challenge
  • More
  • Cancel
Bluetooth Unleashed Design Challenge
Blog BT_Sentry : Notifications
  • Blog
  • Forum
  • Documents
  • Events
  • Mentions
  • Sub-Groups
  • Tags
  • More
  • Cancel
  • New
Blog Post Actions
  • Subscribe by email
  • More
  • Cancel
  • Share
  • Subscribe by email
  • More
  • Cancel
Group Actions
  • Group RSS
  • More
  • Cancel
Engagement
  • Author Author: mcb1
  • Date Created: 11 Jul 2018 6:32 AM Date Created
  • Views 409 views
  • Likes 6 likes
  • Comments 13 comments
  • bluetooth
  • forget-me-not
  • openhab
  • receiver
  • esp8266
  • holiday_of_lights
  • mac
  • rfm6
Related
Recommended

BT_Sentry : Notifications

mcb1
mcb1
11 Jul 2018

This is the 10th of my Blogs for the Bluetooth Unleashed Design Challenge


The other posts are here :-

BT_Sentry Introduction
BT_Sentry : Zero Emission Detection
BT_Sentry : Data Transmission
BT_Sentry : Sentry Power
BT_Sentry : Raspberry Pi
BT_Sentry : Bluetooth Options
BT_Sentry : Software
BT_Sentry : Bluetooth Sniffing 
BT_Sentry : OpenHAB


Concept

The idea is to detect the bluetooth transmitted from the vehicle and signal other Home Automation functions.

If the vehicle is known then it can open the garage door, and inform the home owner that xx is home.


Hardware

The detection point needs to be at the start of the driveway, and because there is no power source, this will need to be low power with solar charging.

The PSOC range seems a very good fit, but because of the timeline and my need to upskill, the inital design will be Arduino based and some form of RF transmitter/transceiver.


Adding a vehicle detection loop or beam is necessary to ensure those vehicles without bluetooth will also trigger the system.


Notifications

During the plan, I eluded to providing notifications.


In my application I wrote :-

If the system doesn't recognise the vehicle, it can :-

  • trigger a survelliance camera to record video and take snapshots.
  • turn on the outside lights
  • inform the houseowner that they have visitors
  • Send a notification to a smartphone

This system also can record when someone visited and for how long, which may prove useful if they have been up to no good.


For informing the houseowner, I've been doing some thinking about something that is suitable, and easily conveys what is required.


I intially had a plan to use another RaspberryPi and touchscreen to bring up a message.

While this was a possibility, the location within the house needed to be a comprimise, and would not always be useful.

(A bit like the cordless phone that lives on the charger ... and you aren't near the charger)


As I thought more, I looked at our Internet of Holidays Suppliment Internet of Holiday Lights RoadTest Plus (suppliment)

In that Jan Cumps and fvan created a "I'm home" style indication using MQTT.


You can read about it here

[Christmas Wreath of Things] Internet of Holiday Lights: part 10 - Secret IoT Team Up

[Christmas Tree] Internet of Holiday Lights - Special Feature


It became an open invitation, but I suspect things have moved on, and no-one is subscribing.

Internet of Holiday Lights: Join the secret IoT Service - open for all


MQTT and a small micro just might solve my issue.


It was interesting to read the design principles for MQTT.

https://github.com/mqtt/mqtt.github.io/wiki/Design-Principles


ESP8266 or ESP12

This approach using MQTT would suit having multiple indicators around the house, and could even be portable if you wanted.

By using an ESP device, the need for an ethernet connection disappears.


Hence I searched for ESP8266 and MQTT.

https://techtutorialsx.com/2017/04/09/esp8266-connecting-to-mqtt-broker/

https://www.esp8266.com/viewtopic.php?f=29&t=8746


The ESP8266 requires the PubSubClient library which can be downloaded from here :-

https://github.com/knolleary/pubsubclient/archive/master.zip


We've seen a few examples of NodeRED and MQTT, but it seemed an overkill to have to install it just to send a message.

https://randomnerdtutorials.com/esp8266-and-node-red-with-mqtt/


In the meantime I've had a play with ESP8266 and neopixels.

I found this very good post https://www.hackster.io/thearduinoguy/esp8266-neopixel-ring-clock-a9cc74


With a bit of tweaking and a 12 neopixel ring, it makes a very useful object.


/* Sketch to run a ESP3266 driven by time.
    This displays on a 12 x neopixel ring
    The colors of the 'hands' are:
    RED = Hours
    GREEN = Minutes
    BLUE = Seconds
    
    credit to https://www.hackster.io/thearduinoguy/esp8266-neopixel-ring-clock-a9cc74   
    TimeClient.h can be obtained from https://github.com/squix78/esp8266-weather-station
    Extract the TimeClient.h and TimeClient.cpp files and add them into the sketch folder (hence the "TimeClient.h")

    Mark Beckett
 */


#include <Adafruit_NeoPixel.h>
#include <ESP8266WiFi.h>
#include "TimeClient.h"

#define PIN D5
int ledsInString = 12;
long lastUpdate = millis();
long lastSecond = millis();

String hours, minutes, seconds;
int currentSecond, currentMinute, currentHour;


char ssid[] = "your SSID";  //  your network SSID (name)
char pass[] = "your password";       // your network password or simply "" if there is none

const float UTC_OFFSET = 12;
TimeClient timeClient(UTC_OFFSET);

Adafruit_NeoPixel strip = Adafruit_NeoPixel(ledsInString, PIN);

void setup()
{
  Serial.begin(115200);
  Serial.println();
  Serial.println();

  strip.begin();
  strip.setBrightness(128);
  strip.show();

  // We start by connecting to a WiFi network
  Serial.print("Connecting to ");
  Serial.println(ssid);
  WiFi.begin(ssid, pass);

  while (WiFi.status() != WL_CONNECTED) {
    delay(500);
    Serial.print(".");
  }
  Serial.println("");

  Serial.println("WiFi connected");
  Serial.println("IP address: ");
  Serial.println(WiFi.localIP());
  timeClient.updateTime();
  updateTime() ;
  lastUpdate = millis();
  lastSecond = millis();
}

void loop()
{
  if ((millis() - lastUpdate) > 1800000) updateTime();

  if ((millis() - lastSecond) > 1000)
  {

    strip.setPixelColor((currentHour * 1), 0, 0, 0);
    strip.setPixelColor((currentMinute / 5), 0, 0, 0);
    strip.setPixelColor((currentSecond / 5), 0, 0, 0);

    strip.show();
    lastSecond = millis();
    currentSecond++;
    if (currentSecond > 59)
    { currentSecond = 0;
      currentMinute++;
      if (currentMinute > 59) {
        currentMinute = 1;
        currentHour++;
        if (currentHour > 12) currentHour = 0;
      }
    }
    String currentTime = String(currentHour) + ':' + String(currentMinute) + ':' + String(currentSecond);
    Serial.println(currentTime);

    strip.setPixelColor((currentHour * 1), 255, 0, 0);
    strip.setPixelColor((currentMinute / 5), 0, 255, 0);
    strip.setPixelColor((currentSecond / 5), 0, 0, 255);
    strip.show();
  }
}

void updateTime() 
{
  hours = timeClient.getHours();
  minutes = timeClient.getMinutes();
  seconds = timeClient.getSeconds();
  currentHour = hours.toInt();
  if (currentHour >= 12) currentHour = currentHour - 12;
  currentMinute = minutes.toInt();
  currentSecond = seconds.toInt();
  lastUpdate = millis();
}


Contrary to popular belief, you can drive the neopixels directly from the 3v3 GPIO of the ESP8266.

I did have to download the latest library from Adafruit.

https://github.com/adafruit/Adafruit_NeoPixel


I swapped the order that the pixels are driven so the second hand has priority and overrides the minutes or hours.

The time is currently 17:35 and 0 seconds.


I guess at some stage a different colour when they illuminate the same pixel might be nice, but in the meantime it works.


You don't have permission to edit metadata of this video.
Edit media
x
Upload Preview


The ultimate clock would be the 60 ring neopixel and it's very tempting to do some online shopping ....


My intention is to change the display to all green or all red to warn of impending visitors.

in the meantime the clock display gives some assurance that it's connected and working.


MQTT Server

Luckily you can run your own server on the Raspberry Pi, which means any messages can be kept within the home network.


I found this article which explained the process and how to do some testing.

https://diyprojects.io/mqtt-mosquitto-communicating-connected-objects-iot/


I also found this which IMO was much easier to run and install.

It even included a very simple test using the localhost rather than the internet.

https://www.raspberrypi.org/forums/viewtopic.php?t=125532


So now that I seem to have a local Mosquitto running, I'm ready to do some coding on the ESP device.


Smartphone

My quest to send a SMS to a smartphone has been less than ideal.


We don't run our phones with data, or even WiFi on. We'll turn it on as required, and then turn it off again.


There are many reasons, but battery useage is one aspect, and besides I have a phone to ring people, although texting is the other option.

The last thing I need is beeping, burping and all the other noises whenever someone liked a post on FB, or the temperature changed, or some other trivial event.


Hence my quest was for a means of sending an SMS to a phone or phones.


While there are plenty of free services around, it seems the New Zealand Telcos have blocked any messages that originate outside New Zealand.

I guess it reduces spam, but I suspect it is more to ensure their own service has to be used.

Telecom runs eTXT, and while the monthly charge might be reasonable, the setup fee is a rip-off.


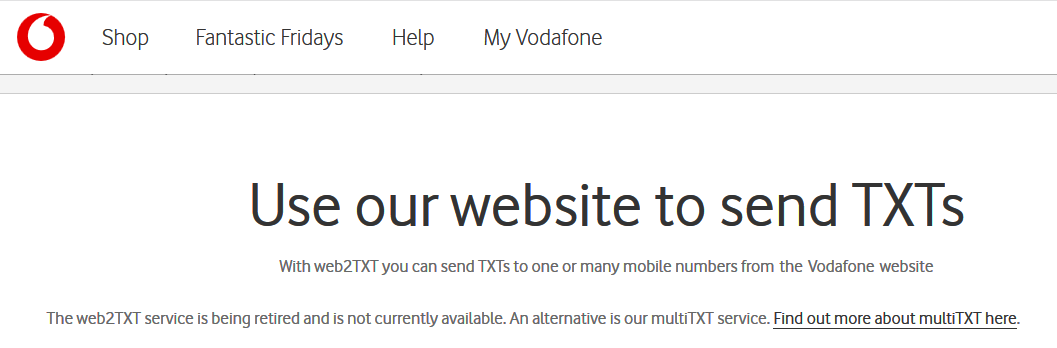
Vodfone had a great affordable service, but clearly that had to change.


And clearly it did. Again the monthly fee bordering on reasonable, but the setup fee is a rip-off.


I did find one service in New Zealand, signed up  and tried it out.

All that effort to find out that it relied on advertising revenue, and it hadn't had any, so it couldn't/wouldn't send the SMS.

GREAT ... worse than that, there is no way to unregister.!


While I have no issues with the per text charging, for this project these prices are just not sustainable.


I could purchase a mobile, get a SIM card and send them without all this cost.

I do have a TStick that is designed for data, and I'm wondering if you can use it to send texts?.


Regardless of that, I've decided that I will not be doing this aspect of my proposal.

Image result for minion sad


It does not mean that it wouldn't suit someone else.

I looked at had different methods, apps or ways to send the SMS on some of the sites, and they all seem t be different.

You could even scrap the page to gather the information and use one of those free services.


If I posted details it could be misleading, and I can't prove it works.

Hence I'll raise it during the summary.


Mark

Anonymous

Top Comments

  • mcb1
    mcb1 over 4 years ago in reply to ntewinkel +2

    then noticed I have 16 pixels on the one I have

    Funny you should say that ...

    I was playing with the other suggestion about the sketch self adjusting for numbers of pixels, and it wasn't going right.…

  • ntewinkel
    ntewinkel over 4 years ago in reply to mcb1 +2

    >the sketch self adjusting for numbers of pixels

    That's cool... and confusing

    I think we'll just have to go with your idea of 60 neopixels.

    I was thinking one way to deal with the doubled up second…

  • mcb1
    mcb1 over 4 years ago in reply to ntewinkel +2

    Did you just solder them right onto the little bits that stick out at the top?

    Yes. I decided sideways to make it easier and less vertical, howver either would work.


    Top tip.

    Cut the strip to length, tin…

  • aspork42
    aspork42 over 4 years ago

    too bad about the texting

    Great update otherwise!

    • Cancel
    • Vote Up +1 Vote Down
    • Reply
    • More
    • Cancel
  • ntewinkel
    ntewinkel over 4 years ago in reply to mcb1

    >>Did you just solder them right onto the little bits that stick out at the top?

    >Yes. I decided sideways to make it easier and less vertical, howver either would work.

    That sounds like a great solution - I'll give that a shot. Thanks for the idea, for some reason I never thought to even do it that way


    >While the Witty is a great board, I think it's also wasteful.

    I agree.

    I think it might be best for general learning and experimenting, and maybe for the kind of setup where you have a main board with this thing plugged onto it. No need to worry about soldering anything or even having to hook up anything - just use the onboard LDR and RGB and you can try all kinds of things.

    For my basic sensors I really just need one GPIO pin, so the extra onboard bits don't bother me much (yet).


    I'm using a Wemos D1-mini for the pump monitor, and it came with the headers not connected, so I simply soldered the light sensor (and pull-up resistor, I think) directly to the board - and the result is that the whole thing is super tiny. It also has the convenient micro-usb so I can simply power it with a small cell phone charger cube, and the programming is just as simple as the Witty.

    I like that a bit better than the Witty for the purpose, so I've bought a few extra. I actually bought one or two, then forgot and bought a few more a week or so later haha. Oh well, I still have several similar spin-off sensors to build.


    But on the other hand, I imagine the Witty's RGB light could be put to good use as a status indicator - red if no WiFi or send failed? green if all ok? blue when sending?


    >I've tried the solder to this hole trick, and there is no way the pin soldered, or was a good mechanical joint.

    It might be easier to solder a wire directly to the regulator's tab, although I guess a pin would be more convenient to hook up to.


    Cheers,

    -Nico

    • Cancel
    • Vote Up +1 Vote Down
    • Reply
    • More
    • Cancel
  • shabaz
    shabaz over 4 years ago in reply to ntewinkel

    Hi Nico,


    I too had the same problem a while back, before these RGB LEDs were low-cost. I used just bi-color LEDs (red/green, or orange if both are lit), and in the end decided to illuminate 3 or 5 LEDs for the hour indication, and a single or 3 LEDs for the minute indication. When they overlapped, it was still possible to see the hour indication behind the minutes, because the hour indication had more LEDs lit. The seconds was just a single LED.

    It wasn't a great solution, I guess it looked ok-ish! : ( I couldn't think of a better solution at the time.

    • Cancel
    • Vote Up +2 Vote Down
    • Reply
    • More
    • Cancel
  • mcb1
    mcb1 over 4 years ago in reply to ntewinkel

    Did you just solder them right onto the little bits that stick out at the top?

    Yes. I decided sideways to make it easier and less vertical, howver either would work.


    Top tip.

    Cut the strip to length, tin one connector, and then offer it up and solder the one pin.

    Once you're happy you lined it up, or adjusted it, solder the other end, then the remaining.


    While the Witty is a great board, I think it's also wasteful.

    3 GPIO are stolen for the RGB, and then another is the onboard LED.

    There is no access to the 3v3, even though they have a huge regulator, and if you have the comms board, you have no access to pins.


    There is an option here that could be useful.

    Witty Cloud Module Adapter Board


    I've tried the solder to this hole trick, and there is no way the pin soldered, or was a good mechanical joint.


    Cheers

    Mark

    • Cancel
    • Vote Up +2 Vote Down
    • Reply
    • More
    • Cancel
  • ntewinkel
    ntewinkel over 4 years ago in reply to mcb1

    >the sketch self adjusting for numbers of pixels

    That's cool... and confusing

    I think we'll just have to go with your idea of 60 neopixels.

    I was thinking one way to deal with the doubled up second/minute/hour hand would be to blink between the colours when they are sharing a spot. The seconds especially could be set to blink on for a bit every second, leaving the other colour (or off) for the other part of the second.

    But we're already digressing from your original plan of it being an alert!


    >I needed to have access to the pins while it was plugged into the serial, so soldered some extras on.


    That's what I'm running into as well, which is why I immediately noticed your setup!

    Did you just solder them right onto the little bits that stick out at the top?


    >>For the text messaging

    >I noted that some providers overseas do that, but not ours ...


    Dagnabbit. There's some variation on the theme here too - I think Rogers (my previous provider) offers it as an add-on plan. We're with Bell now and they include it


    I was going to suggest Twilio, which I tried from a Raspberry Pi a while back, using a free trial. Sending to Canada costs less than a penny per sms, but I checked New Zealand and it looks like 10 cents each there

    So yes maybe your idea of a simple cell plan that has relatively inexpensive sms would work - I actually still have one of those modules here (it was for a project that was cut almost immediately after I purchased the parts).

    I think the Adafruit Fona does that: http://canada.newark.com/adafruit/1963/silicon-manufacturer/dp/26Y8531?st=fona

    Yes, that's yet another project on my list - a text messaging cat detector (I wonder if the Fona can send pictures?) to help the local homeless-kitty charity.


    -Nico

    • Cancel
    • Vote Up +2 Vote Down
    • Reply
    • More
    • Cancel
>
element14 Community

element14 is the first online community specifically for engineers. Connect with your peers and get expert answers to your questions.

  • Members
  • Learn
  • Technologies
  • Challenges & Projects
  • Products
  • Store
  • About Us
  • Feedback & Support
  • FAQs
  • Terms of Use
  • Privacy Policy
  • Legal and Copyright Notices
  • Sitemap
  • Cookies

An Avnet Company © 2022 Premier Farnell Limited. All Rights Reserved.

Premier Farnell Ltd, registered in England and Wales (no 00876412), registered office: Farnell House, Forge Lane, Leeds LS12 2NE.

ICP 备案号 10220084.

Follow element14

  • Facebook
  • Twitter
  • linkedin
  • YouTube