


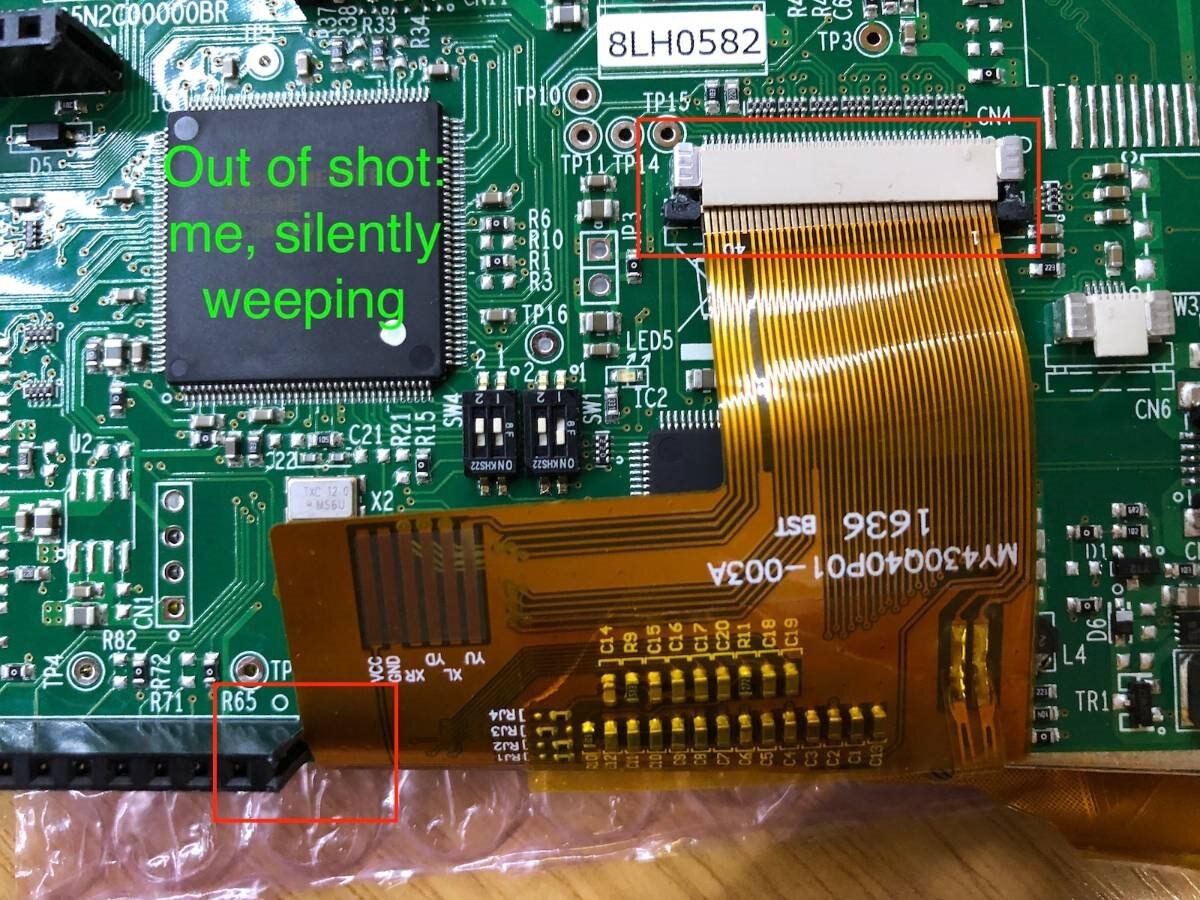
I need to solder on some headers to the board and this requires that the LCD is removed. It has two connections: one for the LCD itself and one for the touch panel:

In close-up, sorry for the picture quality:
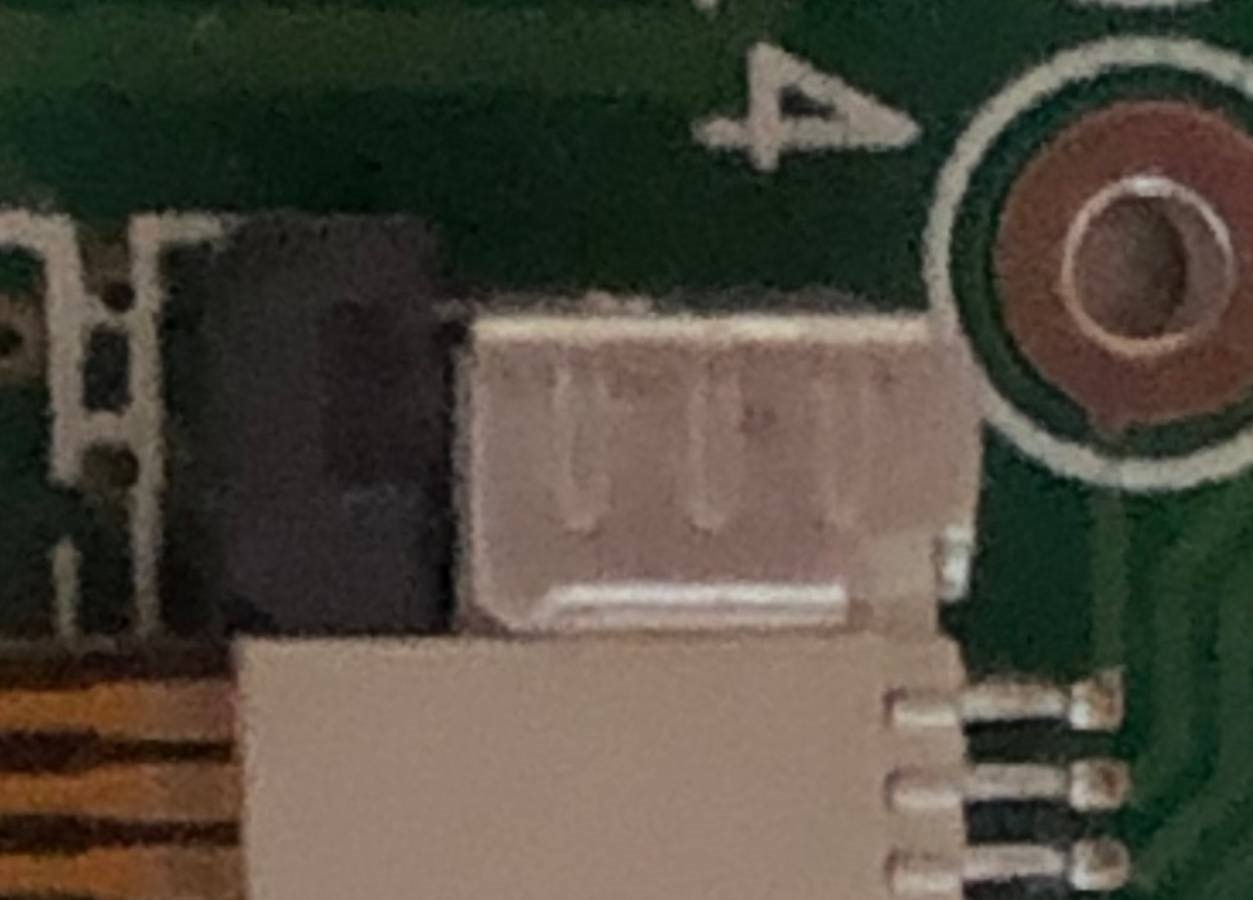
I’m not sure how these disconnect as I’ve not seen them before. They appear to be solid, i.e. there’s no give in them so squeezing to unhook doesn’t seem right. There’s no information on how to do this so I assume they just pull/push out (without straining the flex PCB of course.)
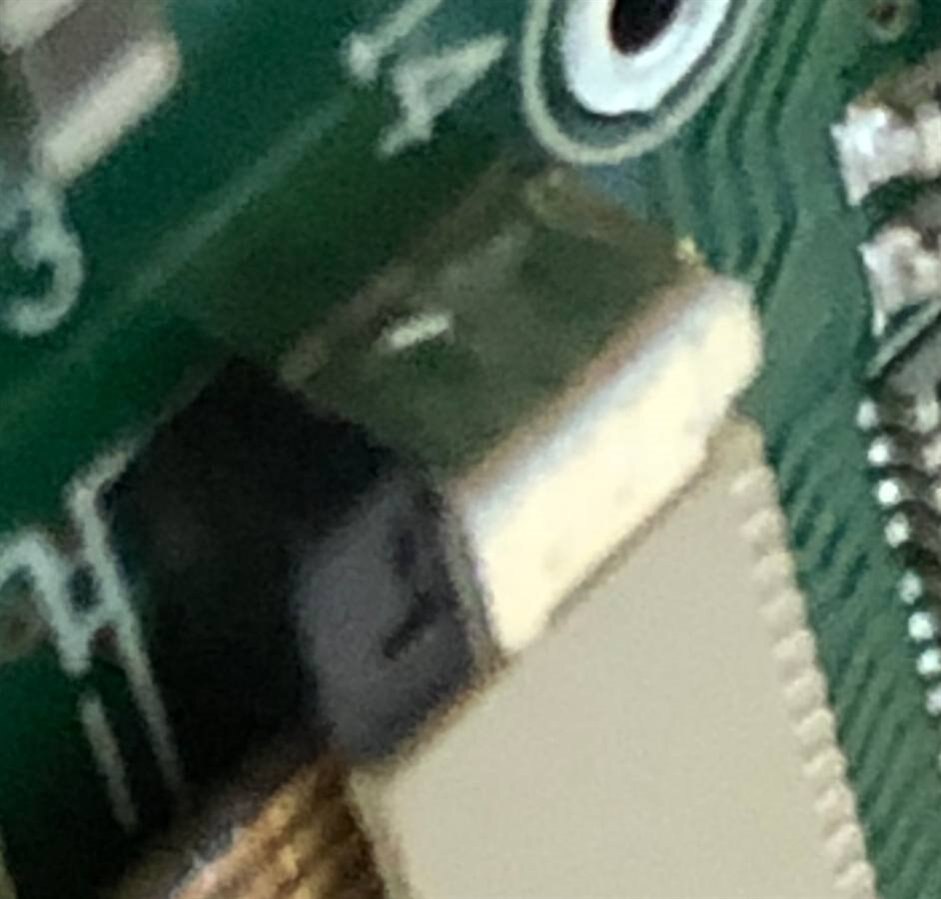
Touch connector out, but a bit of a disaster really:
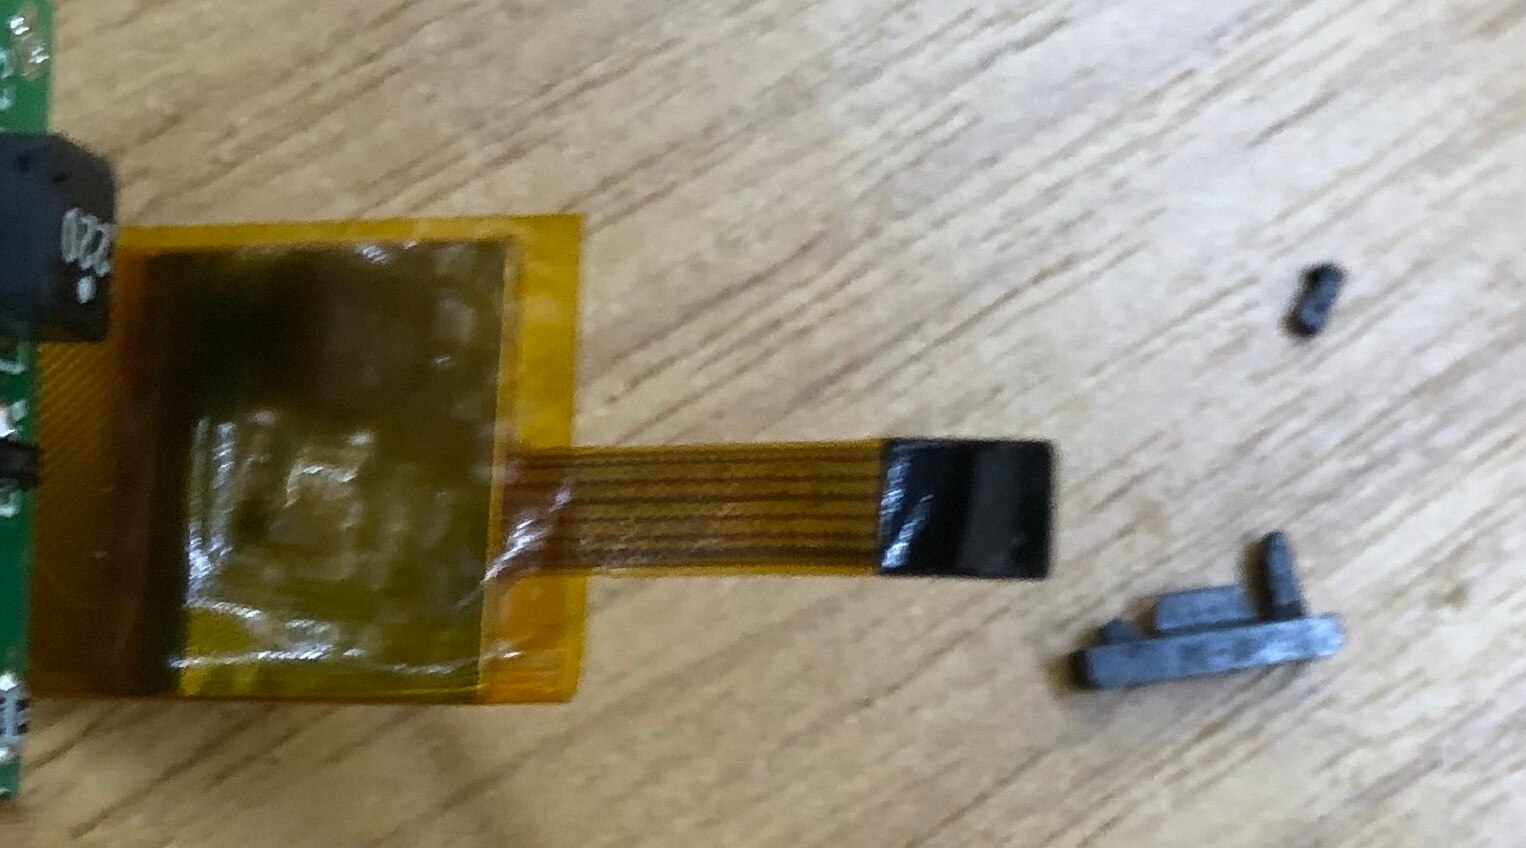
I was able to push it out from the opposite side to the connection but even though I was as gentle/careful as possible, it didn’t survive: it was extremely stiff. The connector itself has left the board and lost one of its arms. Looking closely at it, the arms don’t have little hooks so they don’t squeeze to disconnect and I assume it’s just extremely fragile given its size. The bottom of the connector end of the flex PCB is black plastic so when it comes to re-inserting it I shall try a tiny dab of glue to stick the connector back on.
Looking at Jan Cump’s board post LCD removal (which I did do before trying this!) it’s clear that the ‘black’ connector should stay on the board. Jan has confirmed they do just push out, but they are in solid and don’t want to slide.
Carefully does it, and the LCD connector is out:
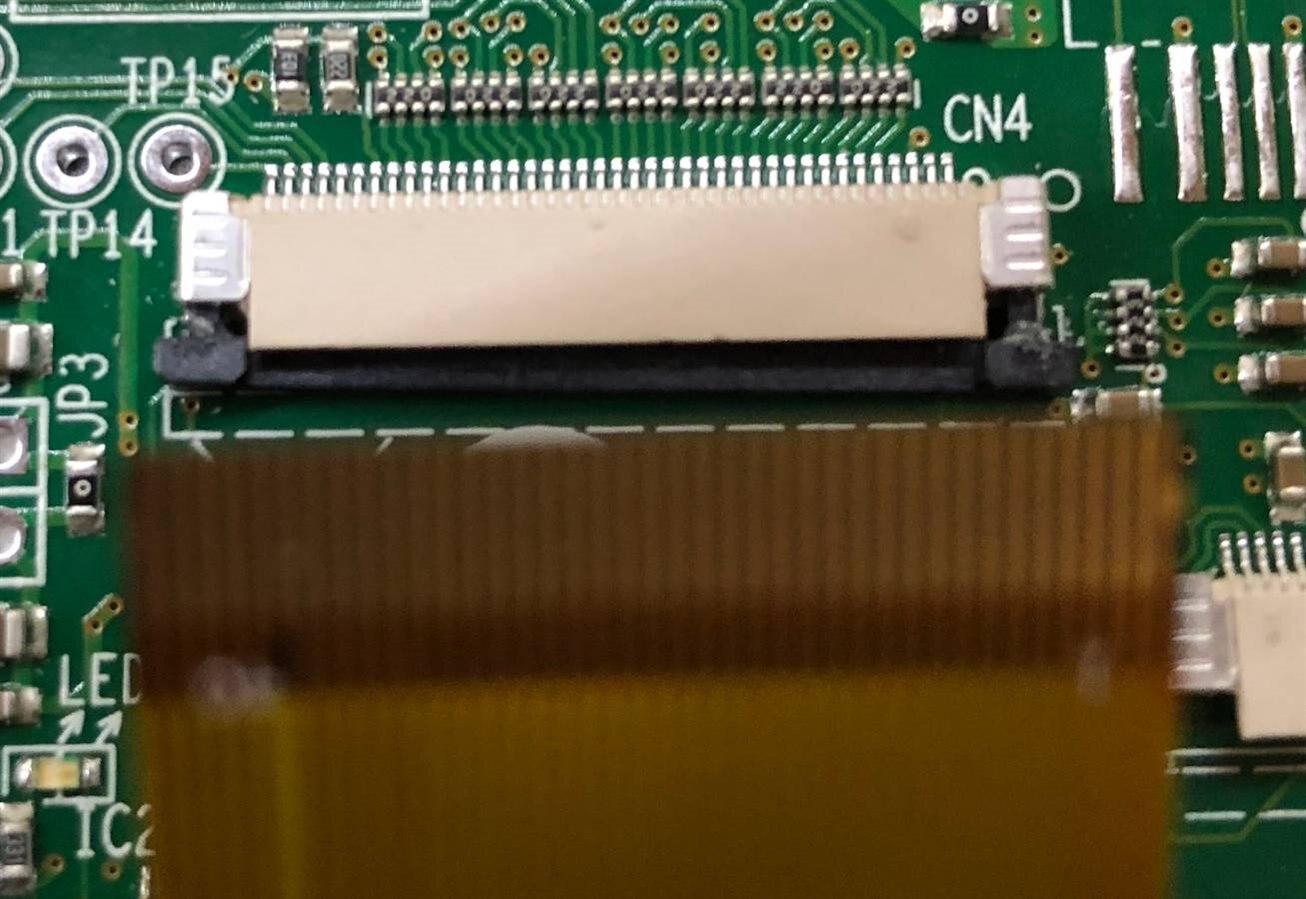
The LCD is held in place with 3M tape which needs to be separated from the PCB. Again, extreme care is needed - the LCD is in a metal bezel and it’s as easy to start pulling it out of the bezel as it is separating it from the PCB. Of course, rather than sticking it with pads at the edges, they’ve stuck it with pads in the middle of the board where (a) you can’t actually see very well; and (b) it’s a long way to get a separator in when you don’t know what might be in the way or potentially damaged. I should be glad they didn't use all 5.
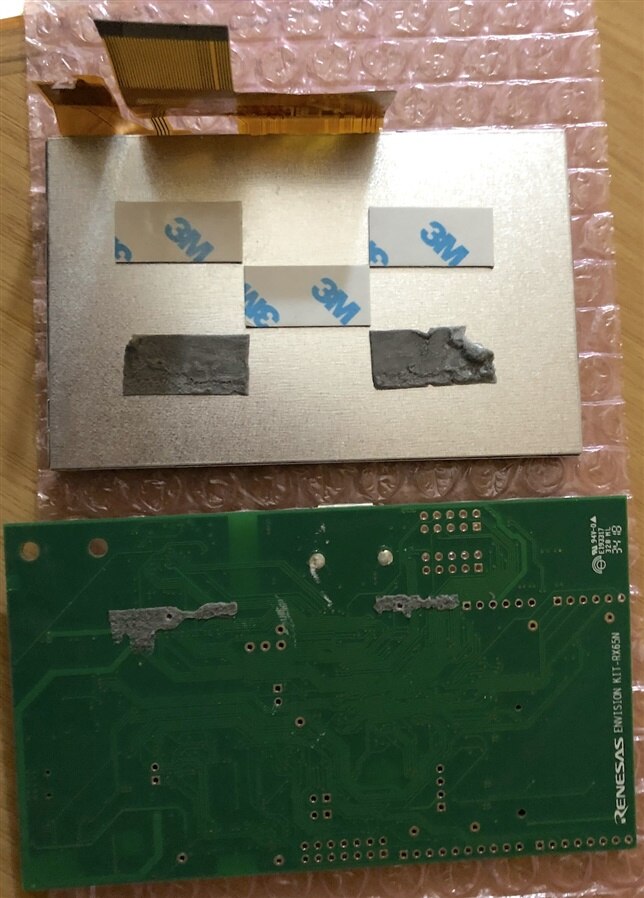
With the LCD out, the headers can be soldered in, I’ve only put in place what I actually need rather than populate them all. These need to be fairly flush with the bottom of the PCB as there isn’t a lot of space between the board and the bottom of the LCD itself. The pins have been cut short and covered with Kapton tape to prevent any shorts. I’m going to see how I get on with NOT sticking the LCD back in place but instead holding it in place with some Kapton tape.
So, the connectors are to be reconnected - of course, one of the headers needs trimming because it’s too close to the LCD flex PCB which means the connector can’t go in straight. I also thought I’d try not gluing the Touch connector at all but rely on just the one arm that is still attached: these are extremely stiff so I think it should hold.
And the result? Well, given the broken connector for the Touch flex PCB; given in-situ trimming of a header right by a tiny trace; and given that the 3m adhesive has pulled off some of the board surface exposing copper in traces:
I have to admit to being amazed (I haven’t got anything to test the touch panel with yet though.) That felt like it was a lot harder than it needed to be given that the LCD has to come off to populate user fit parts. I feel exhausted!
Summary Thoughts
Well, it appears to work still so it could be worse. I’ve kept the screen detached so that I don’t have to work that bit loose again. If it does need to come off again then I know how: fingernails and firm force. I do think this should have been easier though. It’s an evaluation board, not a production implementation, so they could have used headers and found a better way of attaching the LCD down or, preferably, hinged in some way. Size of the thing isn’t such an issue after all. So what with user parts that are obsolete and not obtainable, and a LCD removal process prone to damage, I think this aspect of the board really lets it down.
Further Entries
I will update this entry to provide links to further instalments as I create them:
Part Three: Development Software
Part Four A: Smart Configuration
Part Four C: Segger emWin Introduction
Part Four D: Removing the LCD (this post)
Part Four E: Analog to Digital Conversion
Part Five: Static Setup of the GUI
Part Six: Getting the Display Working
Part Seven: USB/Serial Interface
Also, worth reading Jan Crump's road test as he's taking a more technical approach.