


This our final blog for the Design for A Cause Challenge 2021. A summary of what these twelve weeks of work have been.

Tracking System for Classroom Ventilation Routines
A STEM project for classrooms
the VenTTracker project - Blog#13 - Project wrap-up and Lessons learned
The problem:
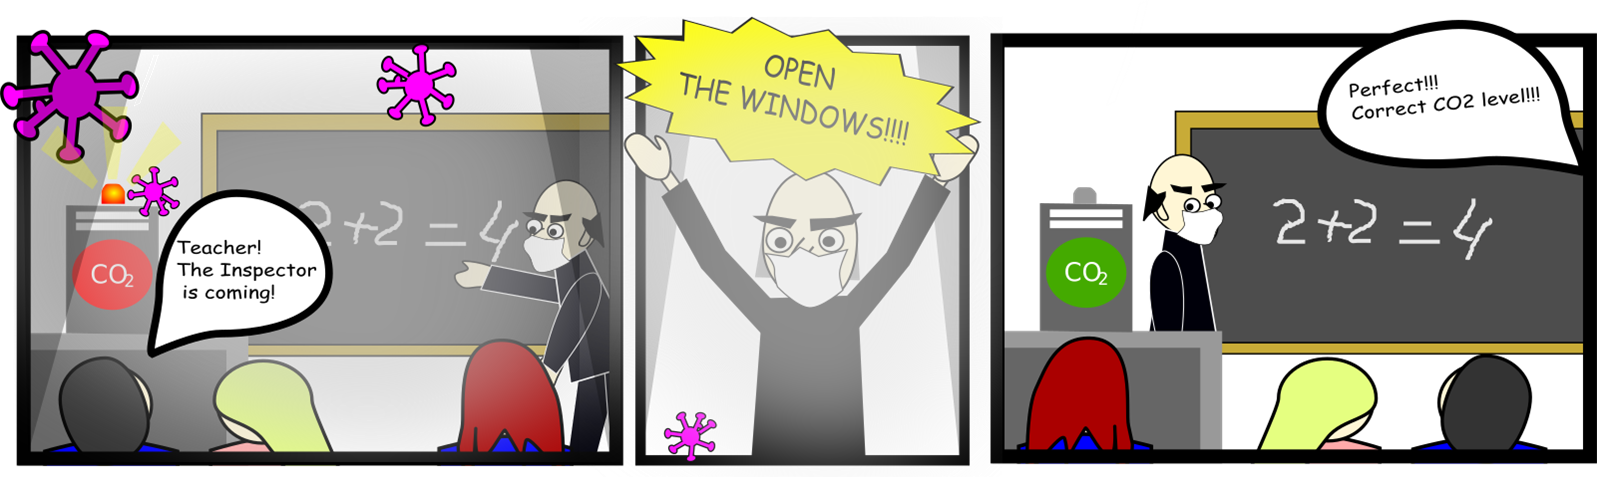
The problems that the project aims to solve:
- How to involve students and teachers in the ventilation routines of their classrooms?
- How to monitor the ventilation routine quality?
VenTTracker #01 - Intro and motivation.
Our solution:
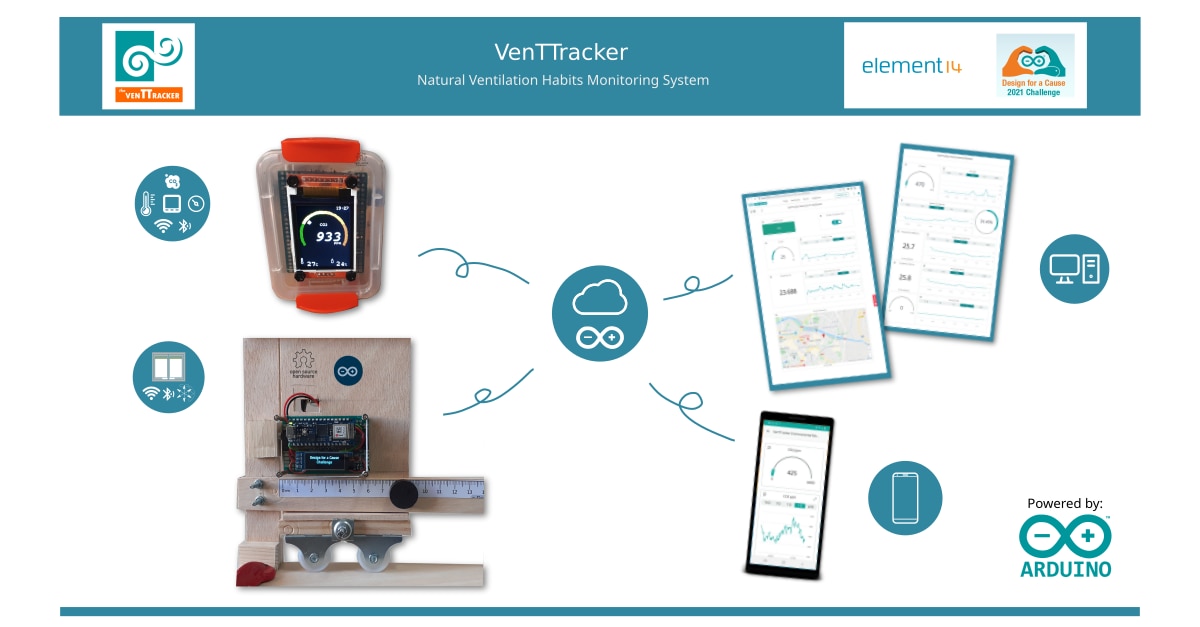
Natural Ventilation Habits Monitoring System
Our system is made up of three main elements:
- IOT device that can be placed on windows, shutters, blinds and doors to be able to keep track of whether they are open or not and in what position they are: Fully open, semi-open, closed ... The system will use several of these devices.
- IOT device for measuring changes in gas concentrations and other environmental data within the classroom. Multiple meters can be used to collect data at different points in the classroom at the same time.
- Monitoring dashboard to provide information both in real time and in history in order to evaluate the efficiency of natural ventilation and to be able to develop ventilation routines in the classroom that are also energy efficient.


What we have done
It has been a long journey with 14 blogs published week by week and this is what we have done:
- Tracking System for Classroom Ventilation Routines
-
the VenTTracker project - Blog#13 - Project wrap-up and Lessons learned
- The problem:
- Our solution:
-
What we have done
- We studied strategies to detect the degree of opening of a window.
- We designed Quadrature Encoders with Magnetic Reed Switch Sensors
- We designed a window opening degree sensor for pivoting windows
- We learned by playing to estimate speed and position with the accelerometer.
- We built a mockup for sliding window simulations.
- We built a window sensor device prototype including the bill of materials and schematics.
- Then we attached the window sensor to our sliding window simulation mockup.
- We programmed a device to measure distances using the accelerometer with our window sensor.
- Then we showed how to update the Arduino Nano 33 IoT for WiFi connections
- We connected our window sensor with the arduino iot cloud. Then created the monitoring dashboard.
- We built an auxiliary device connected to the cloud to measure CO2 concentrations and other environmental data.
- Then we made our sensor smart with ML to classify anomalies using a k-nearest neighbor (k-NN) classifier.
- And finally we redesigned and remade our broken environmental sensor
- Lessons learned
- Thanks
- The project on social media
- Github Project Repository
We studied strategies to detect the degree of opening of a window.
We first analyze the different types of windows and look for solutions to obtain the current position of the window.
VenTTracker #02 - Analyzing window types.
We designed Quadrature Encoders with Magnetic Reed Switch Sensors
VenTTracker #03 - Analyzing window types II
We designed and tested various types of linear encoders until we got a solution that worked for us.
Caution: Better watch the video without sound, we shouldn't have added background music, it's too loud.
We improved our linear encoder by software. Later we designed and tested another accelerometer-based solution for sliding windows and shutters.
We designed a window opening degree sensor for pivoting windows
and then we looked for another solution for pivoting windows and doors based on the accelerometer of the Arduino Nano 33 IoT.
We learned by playing to estimate speed and position with the accelerometer.
VenTTracker #04 - Playing with the IMU
To better understand the IMU and the displays that we were going to use during the project,
we developed a small game of mazes handled with the accelerometer and we tested the connection of the Arduino Nano 33 IoT with two different displays.
We made a Maze game with a TFT SPI color display
First with the TFT SPI color screen that we then use for our environment monitor.
And a Maze game with an OLED I2C monochrome display
And then with the OLED I2C monochrome display that we would use for the demos of our window sensor.
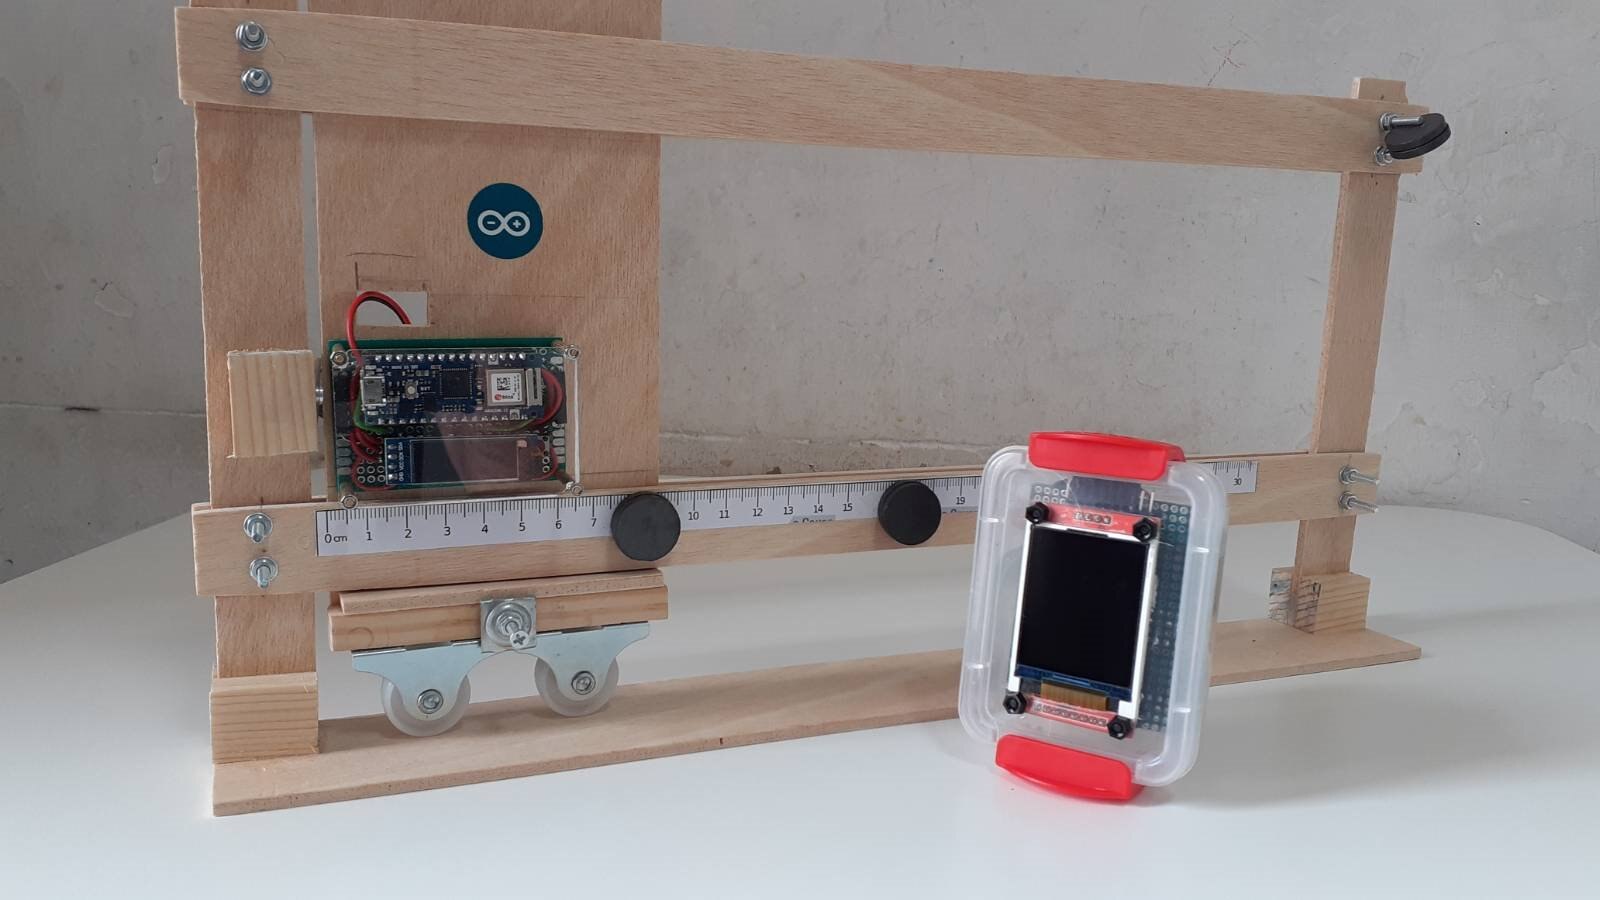
We built a mockup for sliding window simulations.
VenTTracker #05 - Sliding Window Mock-up
We designed a window mockup to demonstrate how our window sensor works.
And then we build it out of plywood.
We built a window sensor device prototype including the bill of materials and schematics.
VenTTracker #06 - Window Sensor Prototype
We built our first prototype of a window sensor that we would gradually improve.
And we tested that everything worked correctly.
Then we attached the window sensor to our sliding window simulation mockup.
VenTTracker #07 - Adjusting the window sensor
We mounted our prototype window sensor on our sliding window mockup,
and checked that everything worked, still without a cloud connection.
We programmed a device to measure distances using the accelerometer with our window sensor.
VenTTracker #08 - Trying to make a measuring device with the accelerometer
We followed a different strategy to obtain the degree of opening of the window using the accelerometer without using the magnetic linear encoder that we had implemented.
And after several days of work we achieved acceptable results for the precision we required.
Then we showed how to update the Arduino Nano 33 IoT for WiFi connections
VenTTracker #09 - Checking and updating WiFiNINA Firmware
It was time to start launching data to the cloud so that we could monitor the windows remotely.
We started by doing a small tutorial on how to prepare the Arduino Nano 33 IoT board for this task.
We thought that it would be helpful for many colleagues in this challenge and we separated the tutorial in another blog.
We connected our window sensor with the arduino iot cloud. Then created the monitoring dashboard.
VenTTracker #10 - Ventilation Monitor on Arduino IoT Cloud
And we connected our prototype to the Arduino IoT Cloud
and created our first dashboard that we would later integrate with our environmental sensor.
We built an auxiliary device connected to the cloud to measure CO2 concentrations and other environmental data.
VenTTracker #11 - Wireless Environmental Monitor on Arduino Nano 33 IoT
Then we made our sensor smart with ML to classify anomalies using a k-nearest neighbor (k-NN) classifier.
VenTTracker #12 - Window Anomaly Detection. Edge Impulse & Arduino Nano 33 IoT
Thanks to Edge Impulse we were able to make our device intelligent and to be able to detect anomalies in the movements of the window so that it could warn of the need for its maintenance.
We took hundreds of samples in all conditions: labeled "normal" and "anomaly"
And we tested our model already by sending data to the cloud.
And finally we redesigned and remade our broken environmental sensor
Unfortunately the combo module stopped working three days after it was turned on. Probably some of the children at home touched it, we don't know. We couldn't get it back because it shorted the I2C communication lines.
So we decided to try two cheap I2C 3V3 modules.
VenTTracker #14 (aka #11 bis) - Environmental Monitor Revisited - Version 2
Lessons learned
- Although blogging each week is a time-consuming task, we've found it allows you to get your planning done right.
- The key has been to ask ourselves each week how to show progress and that has set us the objectives to meet during the week.
- We had spares for every component or a plan B, except for the Sparkfun environmental combo, which was the only thing that broke. Fortunately we were able to replace it with two other modules.
- We have learned a lot by participating in the forums and reading all the blogs of the other challengers.
Thanks
Thanks to the entire element14 community for the support and to Arduino for sponsoring this challenge.
We also want to thank Edge Impulse for their enthusiasm for our project.
Thanks to everyone who has taken the time to read one of our blogs.
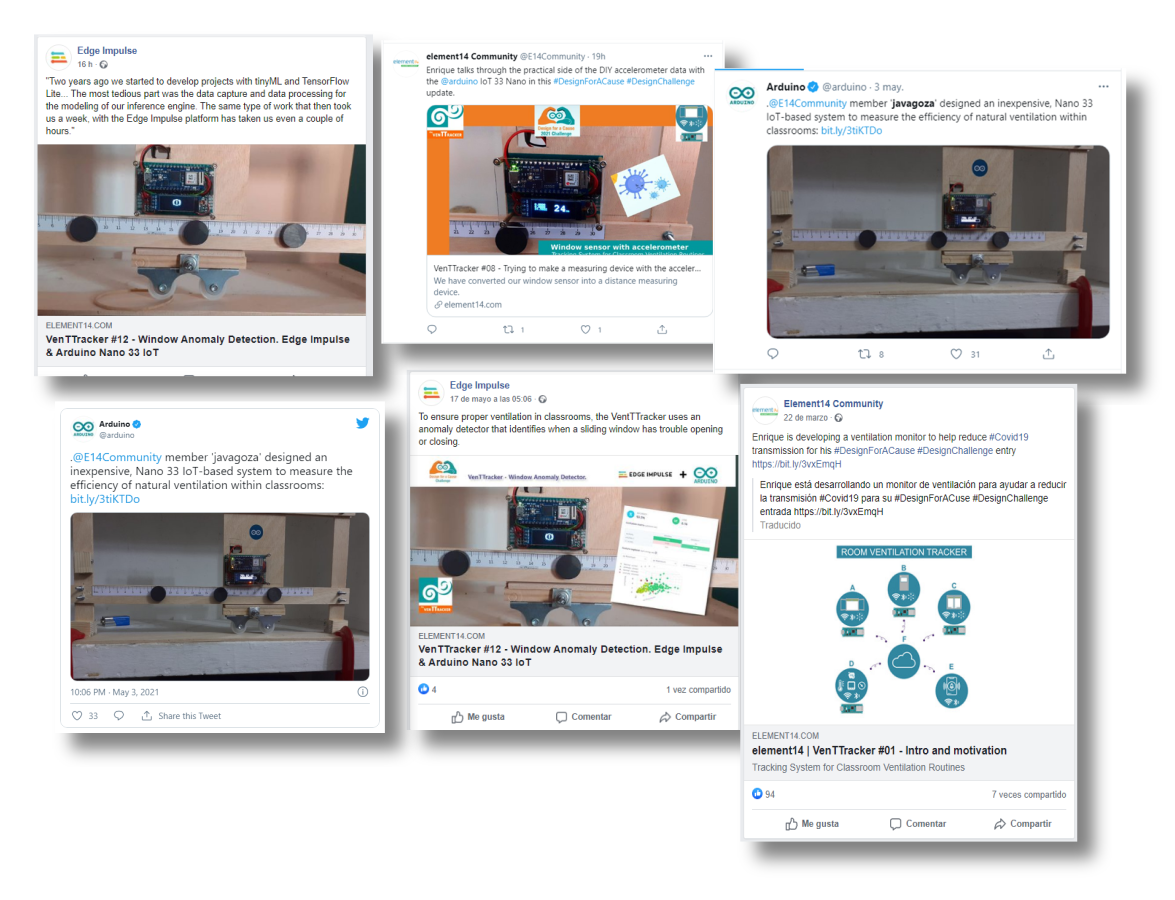
The project on social media
We do not usually follow social networks but friends have been sending us screenshots.
It seems that the project is interesting and useful for more people.
During the 12 weeks that we have been publishing the blogs have received more than 35,000 visits!
Github Project Repository
In the github repository we will continue to improve the software, optimize it and refactor it to make it more modular and more efficient.
https://github.com/javagoza/venttracker.git
| Previous VenTTracker Blog | Next VenTTracker Blog |
|---|---|
| VenTTracker #14 (aka #11 bis) - Environmental Monitor Revisited - Version 2 | The end |
Top Comments