Hi everyone ! Hope all are well and safe. This is the weekly update for the Space Vegetables Project. The Vegetables are growing well. The beans - i hope - don't grow any more in height, because they already are reaching into the top...
In the first Blog-1, I had just started with the Enviro HaT but I did not have any idea of how to interface the Automation HaT or both the HaT's connected togetherwith Pico Hat. During the last days, I had plugged in the Automation HaT, and insta...
Project R.A.G. - Mission Briefing
1. Introduction
2. Idea
Growing food in space
Veggie
Plant Habitat-02
Growing food on Mars
My Idea
3. Plan
4. Next Step
5. Summary
1. IntroductionHi! This will be my first blog fo...
Unboxing: The kit arrived in a nice package. The package includes the following items:Raspberry Pi 4 B 2GBPIM486 ENVIRO HatPIM487 Automation Hat MiniPIM300 PICO Hat Hacker {gallery}1 Meter of Pi ki...
When submitting this project, one of the requirements I've set was to have a script to post to twitter (at least twice a day) a photo of the hydroponics vegetables progress with some environmental status.Here I'm going to explain how .&...
The whole Mushrooms' Paradise blog
Introduction
Step 1. Create a still air box
Step 2. Inject jars with mycelium
Step 3. Move jars to a dark clean chamber and wait
Introduction
This is the last part of creating mushroom c...
Hi all !Hope everyone is safe. This is the first post about the software side of Space Vegetables. Here everything will be explained and how to install and configure. Everything installed and used in this post is installed in the Raspberry ...
The whole Mushrooms' Paradise blog
Introduction
Step 1. Modification of the jars
Step 2. Preparation of the medium mix
Step 3. Filling jars with the medium
Step 4. Jars' sterilization process
Introduction
This post is n...
Hello everyone ! Hope everyone is safe and sound. Yesterday was the first week that the project went live and things are still pretty much in the beginning.Since my TDS sensor hasn't arrive yet, I'm following the schedule in the manual of the nu...
Alright, as time goes on I am finding I need to get planting sooner then later. So let's get this enclosure all setup here so we can start running tubes and cables and get things running.When it comes to the enclosure I went simple, as si...
The attached jpeg, ‘Ref 1101 Construction’ is a sketch illustrating the main pieces of power and control equipment and where they are likely to be positioned.A – Main Control CabinetB – Compressed Air Power PackC – Compressed Air Service ModuleD – Sp...
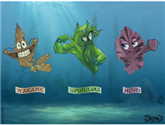
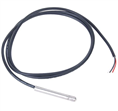
BLOG# 5 -Edible Algae System - (Growing Spirulina in space)Temperature Sensor - DS18B20This is my 5th blog post in a series of blog post for the Design Challenge 1 Meter of Piversion 1.3<<< PREVIOUS BLOGNEXT BLOG >>>Blog# 4 EA...
Hacking the HATs1) IntroGot the challenger kit in the mail: RPi4 2GB, Enviro HAT (PIM486), Automation HAT mini (PIM487), Pico HAT Hacker (PIM300)Raspberry Pi 4 2GBInstalled "Raspberry Pi OS" on an empty SD cardLuckily I had a micro HDMI adapter to co...
Hi everyone ! Hope you all be safe.This weekend, Sunday to be more specific, was the time to transplant the seedlings to the hydroponics and start the process.At the time I didn't realize, but, boy, what a work... PreparationBefore mo...
How are the most important areas of control to be included in the modular vertical farm construction to create the right Environment and provide climate control?Probably the most important areas of control within the main structure are:Lighting, Temp...
I received the Kit for 1m Pi challenge. The Kit has in-total 4 thingsRaspberryPi 4B- 2GB versionPimoroni Automation-HaTPimoroni Enviro-HaTPimoroni Pico-HaT hacker The first part for me was to get familiar with Enviro HaT. It contains sensors suc...
While working on the greenhouse and waiting for the kit to arrive, I've started working on the seedlings. The next photo is from seven days in the coconut coir with just water- This is the first tray of seedlings . The beans are starti...