If your a fan of Stephen Hawking's then this blog post is for you !! As part of this blog post, we am going to setup eSpeak on the Intel Edison and have it read out today's weather condition via a speaker connected to the USB port of Ed...
Back again! In this post I will discuss my progress combining the typewriter and the Edison together. In case you missed them, here are my previous posts:Post 3Post 2Post 1 In my last post, I mentioned that my LED testing board revealed a proble...
<< PreviousProject IndexNext>> Connectivity alternatives My initial idea was to connect Edison directly to the smoke detector. But I've read a post by Peter Scargill mentioned early by mcb1In this post Peter was talking about A...
<< PreviousBlog IndexNext >>The blog of this week is completely about hardware. PCBs arrivedLast week the PCBs arrived. As a student 30 years ago I made my own PCBs with rub-down symbols and black tape on transparencies. The tr...
Here is a quick and easy way to get your Intel Edison connected to the Internet !! using the simple python program below to connect to IFTTT. If you have been living under a rock and not heard about IFTTT, here is a quick intro from Wikipedia -...
Goals for my 5th BLOG entry of the Upcycle It Challenge: Due April 27th.LCD - DONEWeb interface to turn on/off relay and LED - Move to BLOG #6 (due date 4/30)Inputs to select what is displayed on the LCD with regular updates (once a minute) - Move to...
It took longer than I expect to get it but it might be because I am halfway across the world. Anyway, it's still plenty of time to get it going. No problems at all installing the configuration tool and flashing the firmware following the Int...
Software Exploration continues. I am afraid this week my post is not going to offer to many things, as I do not have to report really much progress myself. The reason being that I am still trying to make my Nokia 5110 LCD with Graphics capabilit...
The upcycle concept is being applied in every stage of the project. This time was a desk lamp that became the centre light mounting. We cut the cone part so the light will be completely exposed. The flexible gooseneck will be very handy for load...
Hi guys, So planned out things... So started with the Amp and the Speakers. The Amplifier board is based on PAM8403, which says its a Class D Amplifier with a 3W + 3W Output.The speakers were from Radioshack, Each 4Ω. Started to solder...
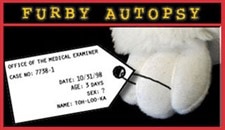
I'm not quite sure when I bought the Furby but I do remember the Furby Autopsy website inspiring the purchase. So that suggests it was perhaps after 1998.When I recently checked there are some others that have also done some investigations includ...
<< PreviousProject IndexNext>> Questions about risk managementIn the comments to my last week blog postmcb1 and DAB brought to my attention importance of exception handling. The following questions needs to be answered:What happens...
I finally received my package a couple of days back on Thursday, after the package made couple of trips from Chicago to Los Angeles and back again. A big thanks to rscasny for helping me out, and quickly re-sending package. As part of tod...
<< PreviousBlog IndexNext >>This week I played a lot with the Edison software tools. In my fourth blog I described my first steps using the Arduino SDK. As I was not completely happy with that, I switched to XDK, Node.js and Node-RED. I ...
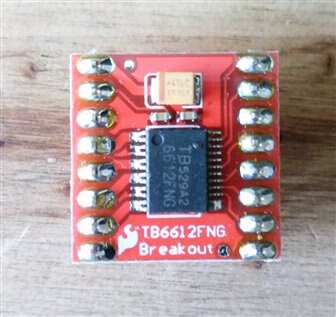
After discounting the transistor based H-Bridges in the original car, I started experimenting with the TB6612FNG module. Despite its small size, it should be able to easily to take the few hundred mA needed for the motors.My first experiments with th...
Getting Familiar with Intel Edison Hello,These days I have installed everything connected with Intel Edison: Drivers,Linux DistributionI have updated the software I also installed Intel XDK developer platform and run some examples that...
Hello again! In this post I will discuss my progress regarding the key-detection feature of the Hermes 3000 Upcycled Typewriter project. If you missed my first two posts you can view them here:Post 1Post 2 In my last post I showed how I attached...
The DesignSince one of my goals is to force myself to use Node-Red, I have to work inside the parameters of Node-Red. While I am at it, I want to make something practical, so I am going to write this as being more module so that I could isolate the E...
Software experiences. Last time I had stopped saying that my next task would be to make my LCD display, a Nokia 5110 work with the Edison.Using that display in a number of Arduino projects, I was quite happy with the U8Glib library that could cover a...
Now that we have pretty much disassembled the clock, we’re working on rewiring it so each system in the clock functions before reassembly. We had a few problems with publishing this blog due to some unexpected delays(and lack of communication due to ...
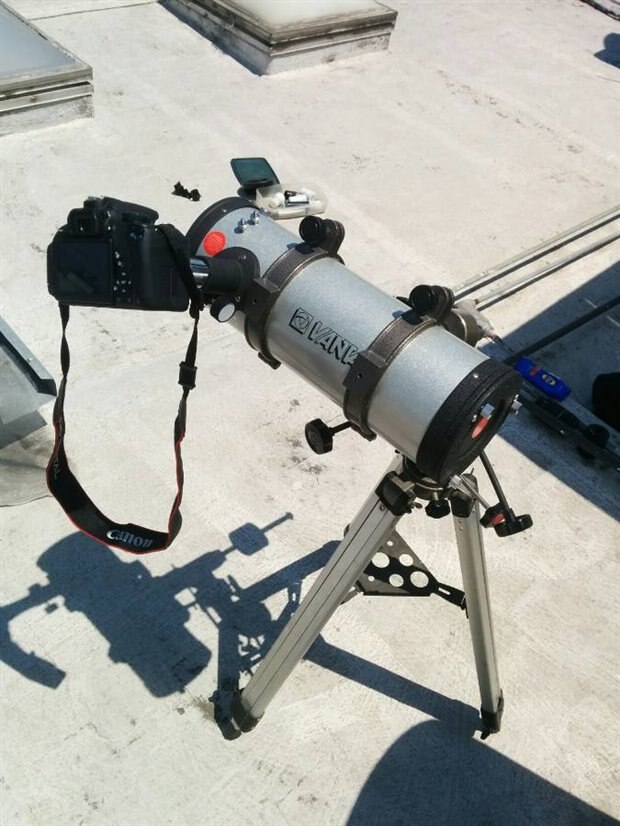
Hi there, one of the latest adquisitions for the project was the T ring fro the camera. This is the first time that I try it and it works super cool. Some of the expected changes are:- There is no more autofocus from the camera, it is...
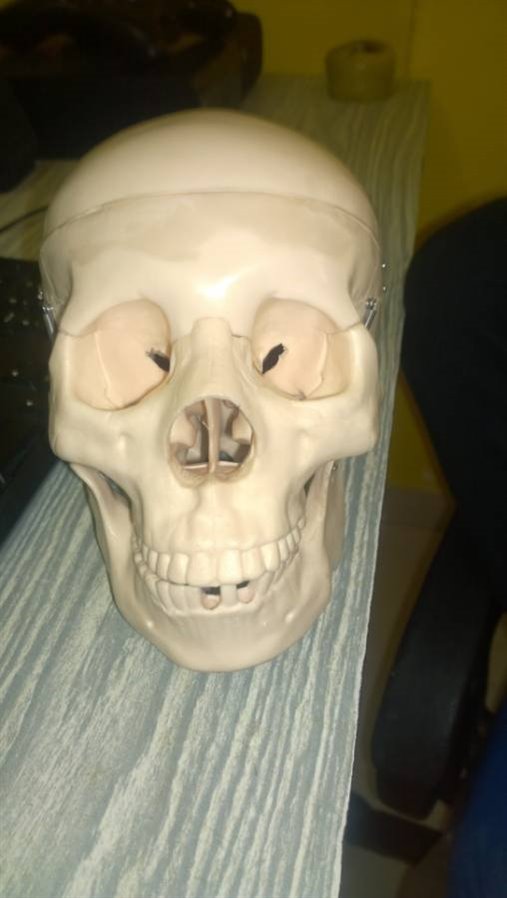
Hi guys, Say hello to funeka, the skull. After salvaging the parts and before ruining the skull i took a close look of the skull and started to clearly plan out things.The jaw were attached using a set of springs. those were really har...
<< PreviousProject IndexNext>> Alarms Monitor and design decisions Alarms monitor is the one of the main components. It listens to alarms, sends notifications and commands. It relies on MQTT broker for communication. MQTT proto...


