element14 Community
element14 Community
    Register Log In
  • Site
  • Search
  • Log In Register
  • About Us
  • Community Hub
    Community Hub
    • What's New on element14
    • Feedback and Support
    • Benefits of Membership
    • Personal Blogs
    • Members Area
    • Achievement Levels
  • Learn
    Learn
    • Ask an Expert
    • eBooks
    • element14 presents
    • Learning Center
    • Tech Spotlight
    • STEM Academy
    • Webinars, Training and Events
    • Learning Groups
  • Technologies
    Technologies
    • 3D Printing
    • FPGA
    • Industrial Automation
    • Internet of Things
    • Power & Energy
    • Sensors
    • Technology Groups
  • Challenges & Projects
    Challenges & Projects
    • Design Challenges
    • element14 presents Projects
    • Project14
    • Arduino Projects
    • Raspberry Pi Projects
    • Project Groups
  • Products
    Products
    • Arduino
    • Avnet Boards Community
    • Dev Tools
    • Manufacturers
    • Multicomp Pro
    • Product Groups
    • Raspberry Pi
    • RoadTests & Reviews
  • Store
    Store
    • Visit Your Store
    • Choose another store...
      • Europe
      •  Austria (German)
      •  Belgium (Dutch, French)
      •  Bulgaria (Bulgarian)
      •  Czech Republic (Czech)
      •  Denmark (Danish)
      •  Estonia (Estonian)
      •  Finland (Finnish)
      •  France (French)
      •  Germany (German)
      •  Hungary (Hungarian)
      •  Ireland
      •  Israel
      •  Italy (Italian)
      •  Latvia (Latvian)
      •  
      •  Lithuania (Lithuanian)
      •  Netherlands (Dutch)
      •  Norway (Norwegian)
      •  Poland (Polish)
      •  Portugal (Portuguese)
      •  Romania (Romanian)
      •  Russia (Russian)
      •  Slovakia (Slovak)
      •  Slovenia (Slovenian)
      •  Spain (Spanish)
      •  Sweden (Swedish)
      •  Switzerland(German, French)
      •  Turkey (Turkish)
      •  United Kingdom
      • Asia Pacific
      •  Australia
      •  China
      •  Hong Kong
      •  India
      •  Korea (Korean)
      •  Malaysia
      •  New Zealand
      •  Philippines
      •  Singapore
      •  Taiwan
      •  Thailand (Thai)
      • Americas
      •  Brazil (Portuguese)
      •  Canada
      •  Mexico (Spanish)
      •  United States
      Can't find the country/region you're looking for? Visit our export site or find a local distributor.
  • Translate
  • Profile
  • Settings
FPGA
  • Technologies
  • More
FPGA
Blog Learning Xilinx Zynq: FPGA based PWM generator with scroll wheel control
  • Blog
  • Forum
  • Documents
  • Quiz
  • Events
  • Polls
  • Files
  • Members
  • Mentions
  • Sub-Groups
  • Tags
  • More
  • Cancel
  • New
Join FPGA to participate - click to join for free!
  • Share
  • More
  • Cancel
Group Actions
  • Group RSS
  • More
  • Cancel
Engagement
  • Author Author: Jan Cumps
  • Date Created: 9 Jul 2021 2:32 PM Date Created
  • Views 8186 views
  • Likes 15 likes
  • Comments 6 comments
  • summer_of_fpgas
  • diytestinstrumentationch
  • fpga_projects
  • summer_of_fpga
Related
Recommended

Learning Xilinx Zynq: FPGA based PWM generator with scroll wheel control

Jan Cumps
Jan Cumps
9 Jul 2021
image

DIY Test Instrumentation        Submit an EntrySubmit an Entry


Monthly Themes  | Monthly Poll  |  Back to homepage image


This DIY instrument is a PWM generator with dead band support.

It has 2 complementary outputs and supports dead time. It can safely drive a (GaN) half bridge.


You don't have permission to edit metadata of this video.
Edit media
x
image
Upload Preview
image


Specifications


  • PWM with fixed frequency: 1.5625 MHz
  • Duty cycle: 6 bits (64 steps)
  • Dead band: 0 - 150 ns, 4 bits (16 steps of 10 ns)
  • Duty cycle variable, controlled with scroll wheel
  • Dead band programmable from a browser
  • Duty cycle display on a progress bar in a browser


image


Design


This DIY instrument is the outcome of a blog series I wrote while I was learning Vivado and the Xilinq Zynq FPGA.

These are the FPGA modules, and a link to the post where I started the design:

  • VHDL PWM with dead band
  • VHDL quadrature decoder to read the scroll wheel
  • Vivado design with memory mapped registers to exchange data between Linux and FPGA fabric


image


It's the first time I use a hierarchical block diagram. The decoder and PWM components are in the dark blue block in the image above (click to enlarge).

Here is the detail:

image

VHDL PWM source

Thank you: http://www.xess.com/

Latest source on github: https://gist.github.com/jancumps/36f21e89bfb8e44f3dba7bf014ffd198

--*********************************************************************
-- Module for generating repetitive pulses.
--*********************************************************************


library IEEE;
use IEEE.std_logic_1164.all;


package PulsePckg is


  constant HI   : std_logic := '1';
  constant LO   : std_logic := '0';
  constant ONE  : std_logic := '1';


end package;


--*********************************************************************
-- PWM module.
--*********************************************************************


library IEEE;
use IEEE.MATH_REAL.all;
use IEEE.std_logic_1164.all;
use IEEE.numeric_std.all;
use WORK.PulsePckg.all;


entity Pwm is
  port (
    n_reset_i : in  std_logic;          -- async reset
    clk_i  : in  std_logic;             -- Input clock.
    duty_i : in  std_logic_vector (5 downto 0);      -- Duty-cycle input.
    band_i : in  std_logic_vector (3 downto 0);      -- number of clock-ticks to keep both signals low before rising edge
    pwmA_o  : out std_logic;            -- PWM output.
    pwmB_o  : out std_logic             -- PWM output inverse.
    );
end entity;


architecture arch of Pwm is
  signal timer_r       : natural range 0 to 2**duty_i'length-1;
begin


  clocked: process(clk_i, n_reset_i)
  begin
    pwmA_o   <= LO;
    pwmB_o   <= LO;
    
    -- async reset
    if n_reset_i = '0' then
        timer_r <= 0;
        
    elsif rising_edge(clk_i) then
      -- timer
      timer_r <= timer_r + 1;
      -- output a
      if timer_r < unsigned(duty_i) and timer_r >= unsigned(band_i)  then
        pwmA_o <= HI;
      end if;
      -- output b
      if timer_r >= to_integer(unsigned(band_i)) + to_integer(unsigned(duty_i)) then
        pwmB_o <= HI;
      end if;
    end if; -- rising_edge
  end process clocked;
  
  
end architecture;


VHDL Quadrature Decoder source

thank you: https://www.hackmeister.dk/2010/07/using-a-quadrature-encoder-as-input-to-fpga/

Latest source on github: https://gist.github.com/jancumps/0f89b68d961d969665e60b653de94e8a

library IEEE;
use IEEE.STD_LOGIC_1164.ALL;
use IEEE.NUMERIC_STD.ALL;


entity quadrature_decoder is
    Port ( QuadA : in  STD_LOGIC;
           QuadB : in  STD_LOGIC;
           Clk : in  STD_LOGIC;
           nReset : in STD_LOGIC;
           Position : out  unsigned (5 downto 0));
end quadrature_decoder;


architecture Behavioral of quadrature_decoder is


signal QuadA_Delayed: std_logic_vector(2 downto 0) := (others=>'0');
signal QuadB_Delayed: std_logic_vector(2 downto 0) := (others=>'0');


signal Count_Enable: STD_LOGIC;
signal Count_Direction: STD_LOGIC;


-- signal Count: unsigned(5 downto 0) := "000000";
signal Count: unsigned(Position'length-1 downto 0) := (others=>'0');


begin


process (Clk, nReset)
begin
   if (nReset = '0') then
      Count <= (others=>'0');
      QuadA_Delayed <= (others=>'0');
      QuadB_Delayed <= (others=>'0');
   elsif rising_edge(Clk) then
      QuadA_Delayed <= (QuadA_Delayed(1), QuadA_Delayed(0), QuadA);
      QuadB_Delayed <= (QuadB_Delayed(1), QuadB_Delayed(0), QuadB);
      if Count_Enable='1' then
         if Count_Direction='1' then
            Count <= Count + 1;
            Position <= Count;
         else
            Count <= Count - 1;
            Position <= Count;
         end if;
      end if;
   end if;
end process;


Count_Enable <= QuadA_Delayed(1) xor QuadA_Delayed(2) xor QuadB_Delayed(1)
            xor QuadB_Delayed(2);
Count_Direction <= QuadA_Delayed(1) xor QuadB_Delayed(2);


end Behavioral;


PYNQ and Jupyter Notebook integration


The quadrature decoder output is directly routed to the PWM module, without software interference.

Additionally, this value is memory mapped to the Linux part of the ZYNQ 7. It can be read out in a user space program.

For this project, I show it in a browser on a Jupyter notebook:

image

The same notebook is used to load the Vivado design into the FPGA and to set the dead band.

The Vivado project with all sources, and the Jupyter notebook, are attached to this post.


Hardware


image

image


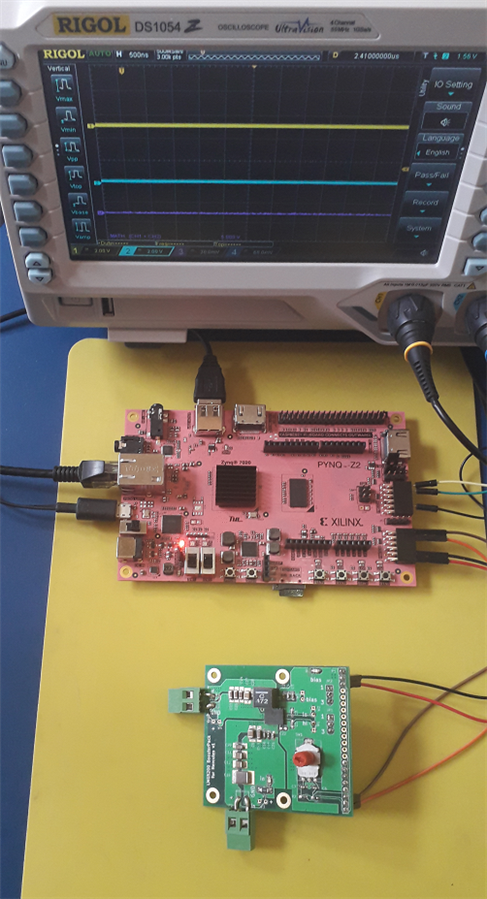
Real world example: Control a GaN half-bridge that needs 8-10 ns dead band between upper and lower FET

imageimage


Video: the design in action:


You don't have permission to edit metadata of this video.
Edit media
x
image
Upload Preview
image


I documented my learning path, starting the day after I got the board as a present from balearicdynamics on May 30, when we visited the Drongen maker space:


Pynq - Zync - Vivado series
Add Pynq-Z2 board to Vivado
Learning Xilinx Zynq: port a Spartan 6 PWM example to Pynq
Learning Xilinx Zynq: use AXI with a VHDL example in Pynq
VHDL PWM generator with dead time: the design
Learning Xilinx Zynq: use AXI and MMIO with a VHDL example in Pynq
Learning Xilinx Zynq: port Rotary Decoder from Spartan 6 to Vivado and PYNQ
Learning Xilinx Zynq: FPGA based PWM generator with scroll wheel control
Learning Xilinx Zynq: use RAM design for Altera Cyclone on Vivado and PYNQ
Learning Xilinx Zynq: a Quadrature Oscillator - 2 implementations
Learning Xilinx Zynq: a Quadrature Oscillator - variable frequency
Learning Xilinx Zynq: Hardware Accelerated Software
Automate Repeatable Steps in Vivado
Learning Xilinx Zynq: Try to make my own Accelerated OpenCV Function - 1: Vitis HLS
Learning Xilinx Zynq: Try to make my own Accelerated OpenCV Function - 2: Vivado Block Design
Learning Xilinx Zynq: Logic Gates in Vivado
Learning Xilinx Zynq: Interrupt ARM from FPGA fabric
Learning Xilinx Zynq: reuse and combine components to build a multiplexer
PYNQ version 2.7 (Austin) is released
PYNQ and Zynq: the Vitis HLS Accelerator with DMA training - Part 1: Turn C++ code into an FPGA IP
PYNQ and Zynq: the Vitis HLS Accelerator with DMA training - Part 2: Add the Accelerated IP to a Vivado design
PYNQ and Zynq: the Vitis HLS Accelerator with DMA training - Part 3: Use the Hardware Accelerated Code in Software
PYNQ and Zynq: the Vitis HLS Accelerator with DMA training - Deep Dive: the data streams between Accelerator IP and ARM processors
Use the ZYNQ XADC with DMA part 1: bare metal
Use the ZYNQ XADC with DMA part 2: get and show samples in PYNQ
VHDL: Convert a Fixed Module into a Generic Module for Reuse


Attachments:
jupyter_notebook.zip
quad_pwm.zip
  • Sign in to reply

Top Comments

  • Jan Cumps
    Jan Cumps over 4 years ago +3
    I've been looking at other people's AXI (memory map) implementation, and I see I have an error in all my AXI designs: I connected the processor's interconnect_axi reset to all my resets, but it is only…
  • Jan Cumps
    Jan Cumps over 4 years ago +1
    I've added a second video, with the FPGA PWM actually driving a home-made GaN half bridge. www.youtube.com/watch
  • Jan Cumps
    Jan Cumps over 2 years ago in reply to Jan Cumps

    I got the simple example working again - that's a start Slight smile

    image

    image

    • Cancel
    • Vote Up 0 Vote Down
    • Sign in to reply
    • More
    • Cancel
  • Jan Cumps
    Jan Cumps over 2 years ago

    It's been so long ago that I completely forgot how Pynq and Jupiter work. Reading my own post  Learning Xilinx Zynq: port a Spartan 6 PWM example to Pynq 

    • Cancel
    • Vote Up 0 Vote Down
    • Sign in to reply
    • More
    • Cancel
  • Jan Cumps
    Jan Cumps over 2 years ago in reply to yepe

    It's been a while since I've seen my own code. I'm trying if I can make the project work again...


    I think that the easiest way to achieve this, as beginner, is to eat the elephant in pieces. Ignore my code, because it's not the basis for what you need.

    • make a design that can generate the clock. Confirm by probing.
    • make a design that can generate one of the easy signals, based on that clock. PWM maybe? If you can make that clock at 10 kHz, you know that you'll be able to generate the slower ones too
    • add PWMN to the design. That should be easy, because it's NOT PWM
    • try a separate design with the PRF logic. If you have that working, add to the original one (or keep separate, feeding it from the same clock?)
    • same for the remaining ones.

    The advantage of little steps is that you'll get early success, and that boosts the morale.
    Advantage of separate blocks for a beginner is that the code stays separate and graspable. 

    The main job for each signal will will be to:

    • find out after how many ticks of the clock the signal should change
    • count the clock ticks and compare it to the figure(s) figured out above
    • set the output(s) to the desired state.

    • Cancel
    • Vote Up 0 Vote Down
    • Sign in to reply
    • More
    • Cancel
  • yepe
    yepe over 2 years ago

    Hi Jan Cumps, I hope you don't mind if I ask a question regarding the PYNQ half-bridge PWM driver. I am working on a student project for school and I need to drive a half-bridge for an ultrasound pulser. I was working through your great tutorial and I had the complementary pwm output on my board PYNQ Z1. However, I have to make certain changes to the operation to make it compatible with my needs which I attempted to do, but I could not determine the best approach. First off, I need to simplify that I only need 50% duty cycle and no other duty cycles needed. I have made a timing diagram for the various waveforms:
    image

    CLK should be a continuous 20 MHz signal, PRF should be a 10 kHz 50% duty cycle signal that synchronizes the rest of the waveforms. PWM&PWMN are the complementary PWM signals with dead-time of programmable N cycles with a timed delay from a falling edge of PRF. PULSE should be equal to the length of the PWM pulse train, and GATE is equal to pulse but with a programmable delay. The PWM pulse-train should be 5 MHz. The first thing I tried to do is to change your example to see if I could get a 5 MHz complementary PWM but I could not see how the frequency is determined so I was playing around with the board clocks and only could get it up to 650 kHz.

    I am a biginner at vhdl so I am a bit out of my element. I have developed all the electronics and analogue demodulation circuits but I still lack the control system to tie it together. If I were to implement these signals in the PYNQ, where do you propose to start?

    • Cancel
    • Vote Up 0 Vote Down
    • Sign in to reply
    • More
    • Cancel
  • Jan Cumps
    Jan Cumps over 4 years ago

    I've added a second video, with the FPGA PWM actually driving a home-made GaN half bridge.


    You don't have permission to edit metadata of this video.
    Edit media
    x
    image
    Upload Preview
    image

    • Cancel
    • Vote Up +1 Vote Down
    • Sign in to reply
    • More
    • Cancel
>
element14 Community

element14 is the first online community specifically for engineers. Connect with your peers and get expert answers to your questions.

  • Members
  • Learn
  • Technologies
  • Challenges & Projects
  • Products
  • Store
  • About Us
  • Feedback & Support
  • FAQs
  • Terms of Use
  • Privacy Policy
  • Legal and Copyright Notices
  • Sitemap
  • Cookies

An Avnet Company © 2025 Premier Farnell Limited. All Rights Reserved.

Premier Farnell Ltd, registered in England and Wales (no 00876412), registered office: Farnell House, Forge Lane, Leeds LS12 2NE.

ICP 备案号 10220084.

Follow element14

  • X
  • Facebook
  • linkedin
  • YouTube